What is Indian Pav Bhaji and How to Serve It

As a chef who grew up enjoying Mumbai’s street food and later recreated it in my restaurant kitchen, Pav Bhaji holds a special place in my heart. It’s colorful, bold, and deeply satisfying. Whether I’m cooking for a bustling dinner crowd or just my own family, Pav Bhaji never fails to bring everyone to the table. In this article, I’ll walk you through everything I’ve learned about this dish—from how to make it perfectly at home to how to serve it like a true street food vendor.
- Origin and Flavor Profile of Pav Bhaji
- Ingredients Needed for Traditional Pav Bhaji
- How to Make Pav Bhaji at Home from Scratch
- Cooking Time Breakdown and Meal Planning
- Variations of Pav Bhaji Across India
- Cooking Pav Bhaji in Different Appliances
- How to Serve Pav Bhaji Like a Street Vendor
- Nutritional Value and Health Adjustments
- Traditional Pav Bhaji Spices and Homemade Blend
- Texture and Consistency: Getting the Bhaji Just Right
- Cooking Time and Serving Table
- Pairing Ideas Beyond Bread
- How to Reheat Pav Bhaji Without Losing Flavor
- Adapting Pav Bhaji for Special Diets
- Slow Cooker, Microwave, and Oven Variations
- Cultural Roots and Personal Memories with Pav Bhaji
- FAQ
Origin and Flavor Profile of Pav Bhaji
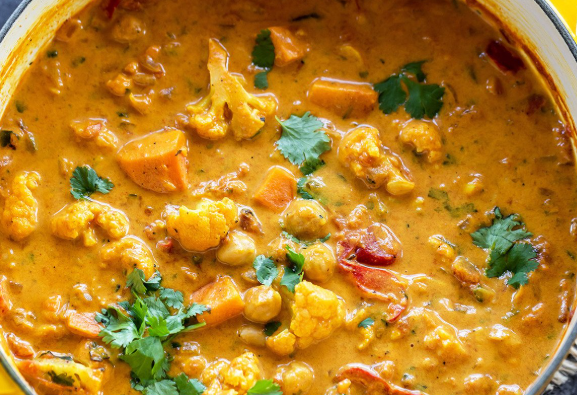
Pav Bhaji is more than just mashed vegetables in spices—it’s a symbol of Mumbai’s street food culture. Originally created to feed textile mill workers in the 1850s, it combined nutrition and speed in one fiery skillet. The word “pav” refers to soft bread rolls, while “bhaji” means a curried vegetable mash. From my own travels through India and years working in professional kitchens, I’ve learned that the flavor lies in the contrast: buttery bread toasted crisp, paired with tangy, spicy, and slightly sweet mashed vegetables loaded with tomatoes, onions, and bold spices.
The heat usually comes from red chili powder and the unmistakable aroma from Pav Bhaji masala—a spice blend that gives it depth. When done right, it’s not just comfort food; it’s a crowd-pleaser you’ll crave repeatedly.
Ingredients Needed for Traditional Pav Bhaji
Over the years, I’ve tested dozens of combinations, but there’s a core group of vegetables and spices that never changes in my kitchen. You’ll need starchy vegetables like potatoes to give body, carrots and peas for sweetness, cauliflower for texture, and bell peppers and tomatoes for richness. Butter—yes, plenty of it—is essential for that street-style flavor.
For spices, Pav Bhaji masala is non-negotiable. You can make it from scratch, but I often use MDH or Everest brands when time is tight. Kashmiri red chili powder gives the dish color without too much heat. Onions and garlic form the base, and a squeeze of lemon at the end brightens the whole dish.
When I want to add more complexity or balance out the spiciness, I often serve it with something like a light Indian Pulao rice —this contrast works beautifully on the plate.
How to Make Pav Bhaji at Home from Scratch
When making Pav Bhaji at home, I prefer using a large cast-iron or heavy-bottomed pan for heat retention and better browning. I start by sautéing onions in butter until golden, then adding ginger-garlic paste followed by chopped tomatoes. Once the tomatoes break down and the oil begins to separate, I stir in the spices and mashed vegetables.
Potatoes should be pre-boiled and mashed roughly—not too smooth, as a bit of texture is lovely. Cauliflower, carrots, and peas can be steamed beforehand or cooked directly in the pan with a little water. I add more butter at the end for richness, and just before serving, I stir in chopped cilantro and lemon juice.
To toast the pav (bread rolls), I slice them in half and brown them generously in butter on a skillet until golden. They should be crispy outside and pillowy inside.
When preparing a full Indian brunch, I sometimes pair Pav Bhaji with a cooling Mango Lassi to balance the spice. The contrast is pure magic.
Cooking Time Breakdown and Meal Planning
Below is a time planning table I use when making Pav Bhaji at home or during meal prep for events:
| Task | Estimated Time | Notes |
| Boiling and prepping veggies | 15–20 minutes | Can be done ahead of time and stored |
| Preparing bhaji (masala base) | 10 minutes | Includes sautéing onions, tomatoes, and spices |
| Mashing and simmering bhaji | 15–20 minutes | The longer it simmers, the deeper the flavor |
| Toasting pav | 5–10 minutes | Done fresh before serving for best texture |
| Total active time | 35–45 minutes | Hands-on time; multitasking can reduce total prep window |
| Storage & reheating tips | +5 minutes | Bhaji stores well; pav should be toasted fresh |
This dish is incredibly meal-prep friendly. I often make a big batch of bhaji in advance and reheat portions as needed—great for busy weeknights or unexpected guests.
Variations of Pav Bhaji Across India
Pav Bhaji has evolved far beyond its Mumbai roots. In my kitchen, I love experimenting with these regional and modern twists depending on the crowd I’m serving.
In Gujarat, for instance, a version called Jain Pav Bhaji skips onions and garlic completely. I’ve served this to clients who prefer sattvic food, and it’s surprising how flavorful it remains. The key is using raw bananas as a potato substitute and amchur (dried mango powder) for that tangy finish.
In Delhi, people often add paneer cubes or even grated cheese on top. The Cheese Pav Bhaji trend has swept food trucks and casual eateries, and I’ll admit—I’m not above grating fresh Amul cheese over a spicy bhaji for comfort food nights.
In my restaurant, I once developed a fusion recipe by blending Poha masala techniques into the bhaji base—it gave the dish an incredible toasted cumin note and added a breakfast-like twist that worked well on brunch menus.
There’s even Khada Pav Bhaji, where vegetables are kept chunky instead of mashed smooth. It gives a more rustic feel, and customers love identifying the individual vegetables as they eat.
Cooking Pav Bhaji in Different Appliances
While traditionalists swear by stovetop prep, I’ve adapted Pav Bhaji for different methods depending on the kitchen setup or time available. Here’s what I’ve tested in my own kitchen:
Microwave:
This method works if you’re short on time or cooking for one. I microwave diced vegetables with a splash of water and butter, then add a spice mix and mash gently. The flavor won’t be as rich as stovetop, but it’s surprisingly effective for quick cravings.
Oven:
Yes, I’ve baked Pav Bhaji. I combine all ingredients—pre-cooked vegetables, spices, butter, and tomato base—in a Dutch oven and bake it covered at 180°C for about 30 minutes. This results in a more caramelized, almost roasted flavor. It’s excellent for party-style servings.
Slow Cooker:
For crowd prep or catering gigs, the slow cooker is a game-changer. I dump in all ingredients (except lemon and cilantro), let them stew for 3–4 hours on low, and mash lightly before serving. The flavor becomes more developed the longer it sits—ideal for buffet tables.
No matter which appliance I use, I never compromise on toasting the pav. Even if the bhaji comes from a slow cooker, the bread must be pan-toasted in butter for that authentic finish.
How to Serve Pav Bhaji Like a Street Vendor
Serving Pav Bhaji is an experience in itself. On the street, it’s fast-paced and interactive—but you can replicate the same excitement at home or in a restaurant setting.
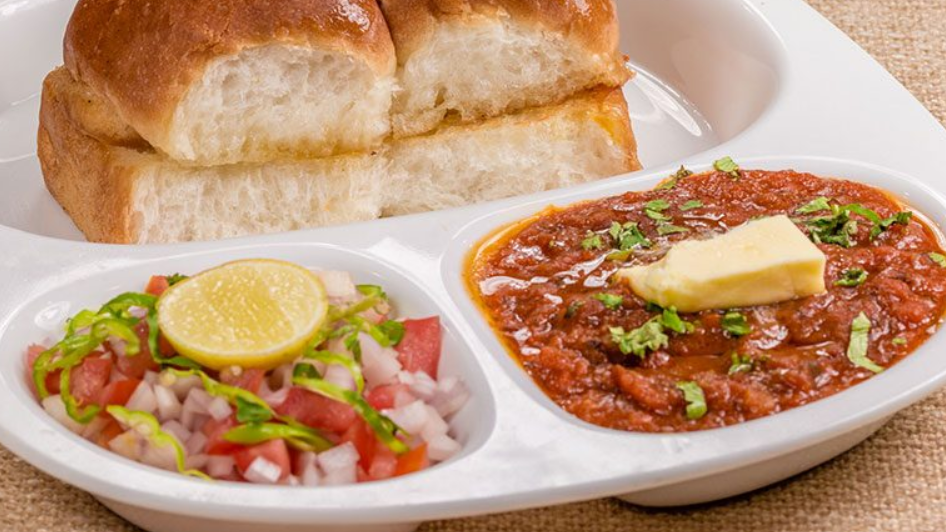
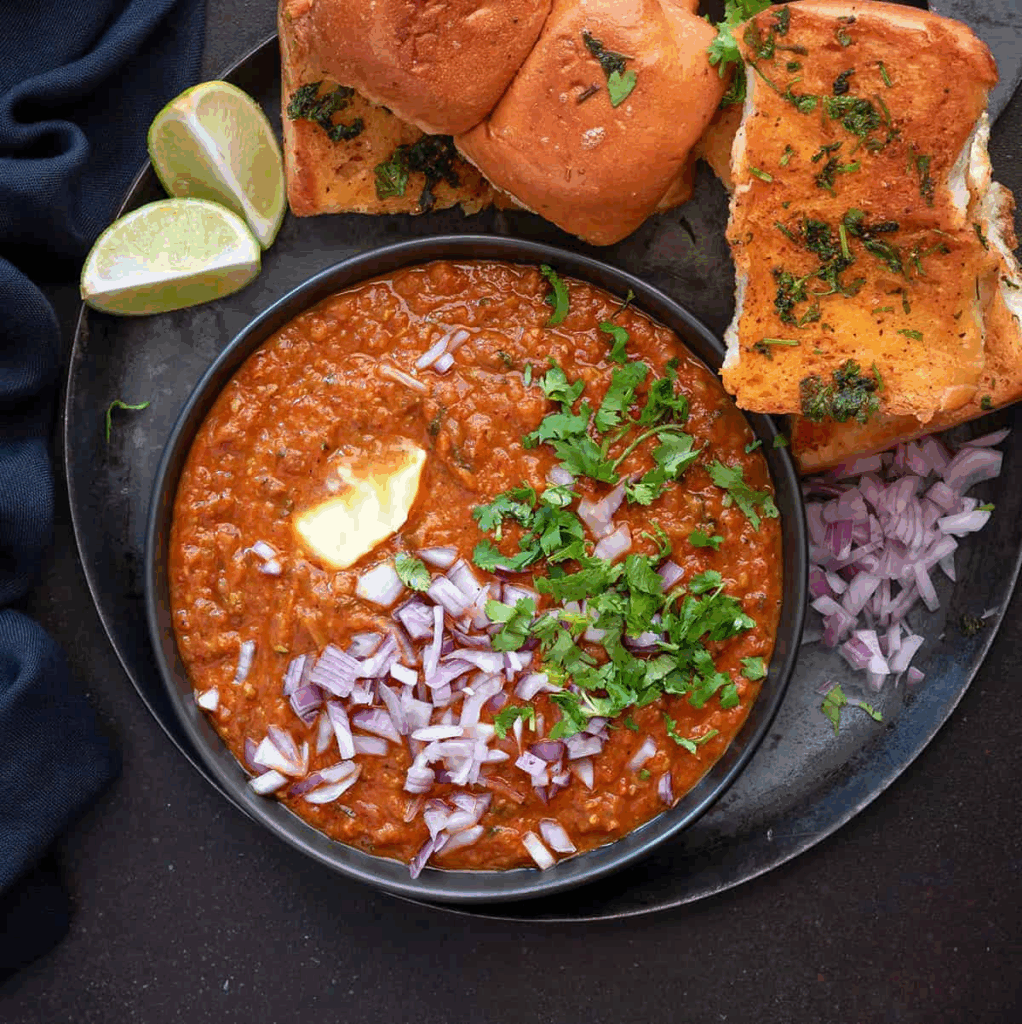
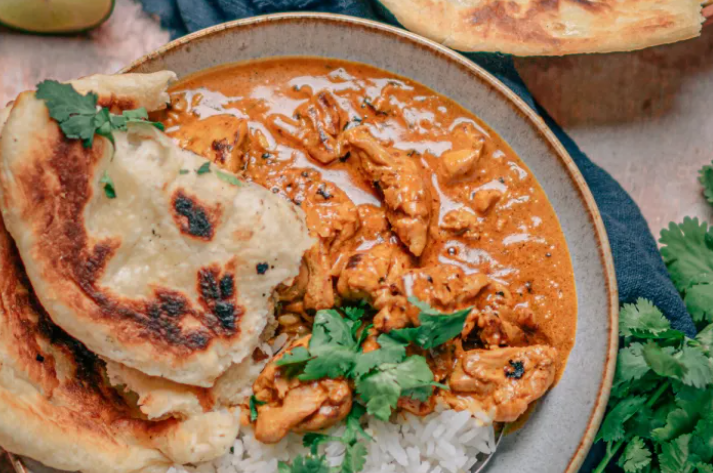
I use wide shallow plates to serve the bhaji, with a generous slab of butter melting on top. The butter not only looks indulgent but gives that final glossy sheen. Pav rolls are always toasted until golden-brown and placed around the edge. A side of finely chopped onions and lemon wedges is essential—I encourage guests to mix them in right before the first bite.
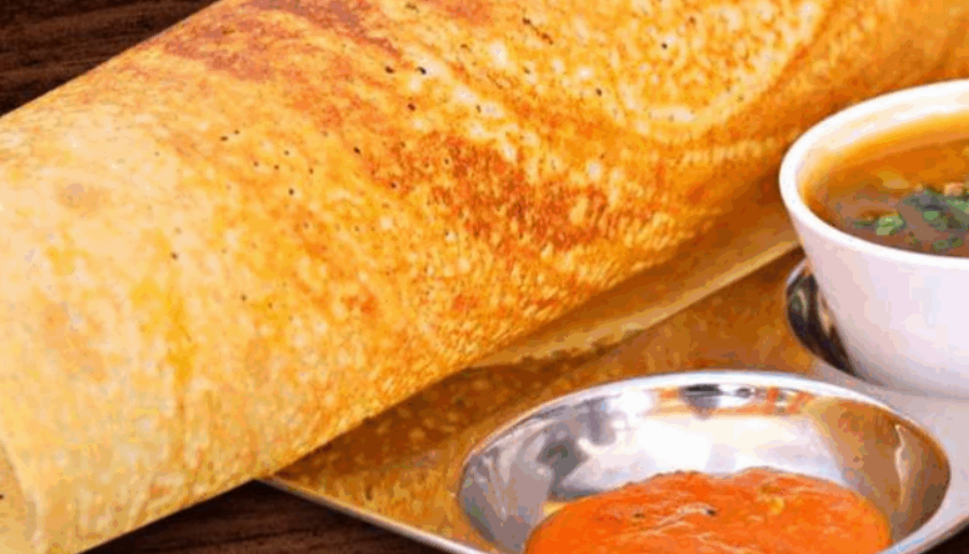
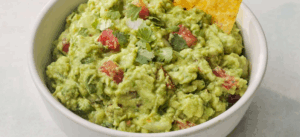
For elevated presentation, I occasionally add a spoonful of fresh coriander chutney on the side or top the bhaji with a swirl of cream for richer flair. When I’m hosting brunch, I often serve Pav Bhaji alongside light South Indian fare like Idli and Sambar to give guests a mix of regional favorites on one table.
Nutritional Value and Health Adjustments
Pav Bhaji is undeniably rich—but there are ways to tweak it without compromising flavor. From my experience cooking for health-conscious clients, I often make a lighter version using olive oil instead of butter and reducing the quantity of potatoes.
Cauliflower can substitute some of the starch, and I’ve even snuck in zucchini or spinach when cooking for picky eaters. The key is balancing the spices so the dish still tastes familiar.
If gluten is a concern, you can swap pav for gluten-free bread rolls or rice. It actually pairs well with lightly spiced Indian Pulao rice when you want to skip bread altogether.
Nutritionally, the bhaji is packed with fiber, vitamins A and C (from carrots and peppers), and when made with less butter, it’s a great way to sneak veggies into anyone’s diet. I’ve even served a vegan version at wellness retreats that went over brilliantly.
Traditional Pav Bhaji Spices and Homemade Blend
Over the years, I’ve stopped relying on store-bought Pav Bhaji masala and began creating my own blend at home. The reason? I wanted fuller control over depth, heat, and freshness of the flavors.
In my version, I always begin with whole spices: coriander seeds, cumin, fennel, black cardamom, and cloves. Toasting them gently before grinding intensifies their aroma. I mix that base with turmeric, Kashmiri chili powder for color, and dry mango powder for tang. Sometimes I’ll add a bit of cinnamon or nutmeg when I want a sweeter depth.
This spice mix keeps for up to three months in an airtight jar, and I often use it in other Indian street food recipes. Making your own blend not only enhances taste but also allows you to tweak it for special diets—less chili for kids, more garlic powder for bold palates.
Texture and Consistency: Getting the Bhaji Just Right
The texture of Pav Bhaji is what separates an amateur attempt from a masterful one. I’ve had people say they couldn’t quite replicate the street flavor—and it often comes down to how it’s mashed and cooked.
I prefer using a potato masher rather than a blender. This allows me to retain tiny bits of vegetables while still achieving a smooth, creamy consistency. In street stalls, they use large flat pans and continuously press down the mixture with heavy spatulas. That gives the bhaji its signature silkiness.
A touch of water added gradually during cooking keeps it from becoming too thick or gloopy. And don’t forget butter—it emulsifies the mash beautifully and brings everything together. I’ve tested recipes with ghee and oil, but nothing beats the texture of a butter-enriched bhaji simmered for at least 25 minutes.
Cooking Time and Serving Table
Below is a detailed cooking and prep timeline based on how I batch and organize my Pav Bhaji process in professional settings.
| Task | Duration | Method/Tool Used |
| Chopping vegetables | 10 minutes | Knife or food processor |
| Boiling/microwaving veggies | 10–12 minutes | Pressure cooker / microwave |
| Preparing masala base | 7 minutes | Deep skillet |
| Combining and mashing | 10 minutes | Masher on stovetop |
| Simmering with spices | 15–20 minutes | Low heat on stovetop |
| Toasting pav rolls | 5 minutes | Buttered skillet |
| Total time (approx.) | ~45–50 minutes | Full stovetop method |
I use this table in my restaurant’s back-kitchen workflow. It helps me pace the preparation, especially when coordinating with other items like Mango Lassi for drink pairings .
Pairing Ideas Beyond Bread
While the classic serving method is with soft pav buns, there are days when I switch it up. At home, I’ve served Pav Bhaji with homemade parathas or even fluffy puris. It’s a great way to give leftovers a new feel.
I’ve also paired bhaji with quinoa or foxtail millet for clients seeking healthier grains. Surprisingly, the texture works well with mildly spiced pulao rice—particularly when infused with cumin and bay leaf. For those interested in fusion menus, I’ve even stuffed leftover bhaji into puff pastry and baked them into savory parcels.
One unique idea I tried during a catering event was mini bhaji-stuffed sliders. Toasted mini pavs, a small spoon of bhaji, and a cheese topping—great as party snacks. And if you’re serving this at brunch, combine it with a tray of Poha and seasonal fruit for a colorful spread.
How to Reheat Pav Bhaji Without Losing Flavor
From my kitchen trials, the best way to reheat Pav Bhaji is on a stovetop over low heat. I always recommend adding a splash of water or a small cube of butter during reheating. This restores moisture and revives the spice blend, making it taste almost freshly made.
Microwaving is convenient, but it can dry out the bhaji. If you go this route, cover the bowl with a damp paper towel and stir halfway through. In my restaurant, we reheat large portions using a steam tray, which gently warms it while preserving texture.
Leftover pav rolls, however, should never be microwaved directly—they tend to get rubbery. I always toast them fresh on a skillet with a little butter. If you’ve stored them in the fridge, bring them to room temperature before reheating for best results.
Adapting Pav Bhaji for Special Diets
I’ve been asked many times: “Can I make Pav Bhaji vegan or gluten-free?” Absolutely. Over the years, I’ve created variations for clients with dietary restrictions without compromising on taste.
For a vegan version, I substitute butter with neutral oil or vegan margarine. Coconut oil gives a pleasant twist, but I prefer sunflower or avocado oil for a neutral base. Skip the pav rolls and go for gluten-free buns or even millet pancakes.
If you’re avoiding nightshades like tomatoes or potatoes, I replace them with pumpkin and sweet potato mash—it changes the profile but stays true to the spirit of the dish. I’ve also made a low-sodium version for heart patients by reducing added salt and skipping packaged masala, using fresh herbs instead.
Slow Cooker, Microwave, and Oven Variations
In a slow cooker, I usually pre-cook the vegetables on the stove, then transfer everything into the cooker with spices and butter. I let it simmer on low for 3–4 hours. The slow infusion brings out remarkable depth and richness, especially if you’re not in a rush.
For a microwave version, I start by cooking all chopped vegetables with a bit of water in a large covered bowl (about 10 minutes). Then I mash and mix in sautéed masala that I prepare separately in a skillet. Finally, I combine everything and microwave again for 3–5 minutes for full flavor integration.
The oven method is unconventional but can work if you’re making a baked bhaji casserole. After cooking the base, pour it into a baking dish, add cheese or breadcrumbs on top, and bake at 180°C (350°F) for about 15 minutes. It’s not traditional, but I once tried it for a catering event—and the crusty top was a hit.
Cultural Roots and Personal Memories with Pav Bhaji
Pav Bhaji is more than just a dish to me—it’s a story I carry from my early kitchen days in Mumbai. I remember the first time I stood in front of a giant tava, watching a street vendor toss butter, vegetables, and spices in rhythmic chaos. That visual and smell stayed with me.
I started experimenting at home with my own mix, trying to replicate that same joy. Over time, I made it mine—swapping ingredients, playing with texture, and even pairing it with dishes like Indian Pulao rice for a contrast in grains.
It’s also the dish I turn to when I want to feel comfort. Whether it’s a rainy evening or a festive brunch, there’s always space on the table for Pav Bhaji. And every spoonful brings back years of flavor, memory, and shared laughter around the stovetop.
FAQ
What kind of vegetables are best for making Pav Bhaji?
From my experience, starchy and soft vegetables like potatoes, cauliflower, peas, carrots, and bell peppers create the perfect base. I’ve tried adding green beans or cabbage, but they tend to alter the flavor too much. Stick to the classics for authentic texture and taste.
Can I make Pav Bhaji without butter?
Yes, and I’ve done it many times for vegan clients. I recommend using sunflower or coconut oil as a substitute. The butter does enhance richness, but with the right spice balance, you won’t miss it much.
Is Pav Bhaji supposed to be spicy?
Traditionally, yes, it has a noticeable heat. But on my stove, I always tailor the spice to my guests. I’ve found kids and those new to Indian food prefer a milder version, which still tastes amazing without too much chili powder.
What kind of bread is used for Pav Bhaji?
Classic pav rolls are soft, white, and slightly sweet. On my own table, I sometimes serve brioche buns or dinner rolls if pav isn’t available locally. The key is to toast them with butter until golden and crispy outside.
Can I prepare Pav Bhaji ahead of time?
Absolutely. I often make the bhaji the night before for events—it only gets better as flavors deepen. I store it in airtight containers in the fridge and gently reheat it with a spoon of butter to revive the aroma.
How long does Pav Bhaji last in the fridge?
On my own routine, I find it stays good for about 3 days when stored properly. Make sure it’s fully cooled before refrigerating, and always reheat only the portion you need.
Can I freeze Pav Bhaji?
Yes, and I’ve done it many times in my professional kitchen. Just let it cool completely, portion it, and freeze. When reheating, thaw in the fridge overnight and reheat with a splash of water and butter on the stove.
Is it okay to use pre-made Pav Bhaji masala?
Yes, it’s convenient, and I use it when time is tight. That said, I always add fresh ingredients like garlic, ginger, and chopped coriander to balance the pre-mix and give it a homemade depth.
How can I make Pav Bhaji more nutritious?
I’ve tried blending in spinach or beetroot puree into the mash—it boosts nutrients and adds lovely color. Lentils can also be included for protein, especially if you’re skipping meat elsewhere in the meal.
Can I serve Pav Bhaji with other Indian dishes?
Definitely. In fact, I often pair it with How to prepare Indian Poha breakfast or even How to make Indian Pulao rice for larger brunch spreads. The mix of textures and spice levels really complements each other.
Is Pav Bhaji a good option for kids?
Yes, and I speak from experience. Just reduce the chili and mash the veggies well. Kids love the buttery bread and colorful mash—plus it’s a sneaky way to get them to eat more vegetables.
What’s the best way to serve it at a party?
I usually set up a DIY station with bowls of bhaji, toasted buns, chopped onions, lemon wedges, and butter cubes. It turns into an interactive experience, and everyone can customize their plate.
Can I cook Pav Bhaji in an Instant Pot?
I’ve tested this a few times. Sauté the masala first using the sauté mode, then add vegetables, water, and pressure cook for 5 minutes. After quick release, mash everything and adjust spices. It works beautifully and saves time.
What’s the difference between Pav Bhaji and Misal Pav?
Great question. Pav Bhaji is a mixed vegetable mash, while Misal Pav has sprouted legumes in a spicy, watery gravy. I love both, but they cater to different moods—bhaji is hearty, misal is fiery and brothy.
Can I make a sweet version of Pav Bhaji?
Not exactly, but I’ve seen guests pair the pav with Easy Indian Mango Lassi recipe as a dessert drink. It balances the spicy, buttery bhaji with something cool and creamy.
Post Comment