What Is Indian Dosa and How to Make It Like a Chef at Home

The first time I made dosa, I was working in a South Indian kitchen where mornings began before sunrise and the batter fermented slowly overnight. Since then, I’ve made dosa for home brunches, tasting menus, and street-style pop-ups. This thin, crisp, golden crepe—made from fermented rice and lentils—is one of India’s most iconic dishes. In this guide, I’ll walk you through the entire process of making dosa from scratch, offer alternate cooking methods, and help you master texture, flavor, and presentation—even without a special dosa pan.
- What Is Dosa and Why It’s Loved Across India
- Ingredients for Traditional Dosa Batter
- Types of Dosa and Their Unique Features
- Mixing, Fermenting, and Perfecting Dosa Batter
- How to Cook Dosa on a Regular Pan Without a Tawa
- Popular Dosa Fillings and Their Flavors
- How I Serve Dosa with Chutneys, Sambar, and Sides
- No-Fermentation Dosa: Is It Possible?
- Baking Dosa in the Oven: Experimental but Possible
- Can You Cook Dosa in the Microwave?
- Making Dosa in a Slow Cooker: Unconventional But Fun
- Complete Dosa Cooking Timeline
- FAQ: What Is Indian Dosa and How to Make It
What Is Dosa and Why It’s Loved Across India
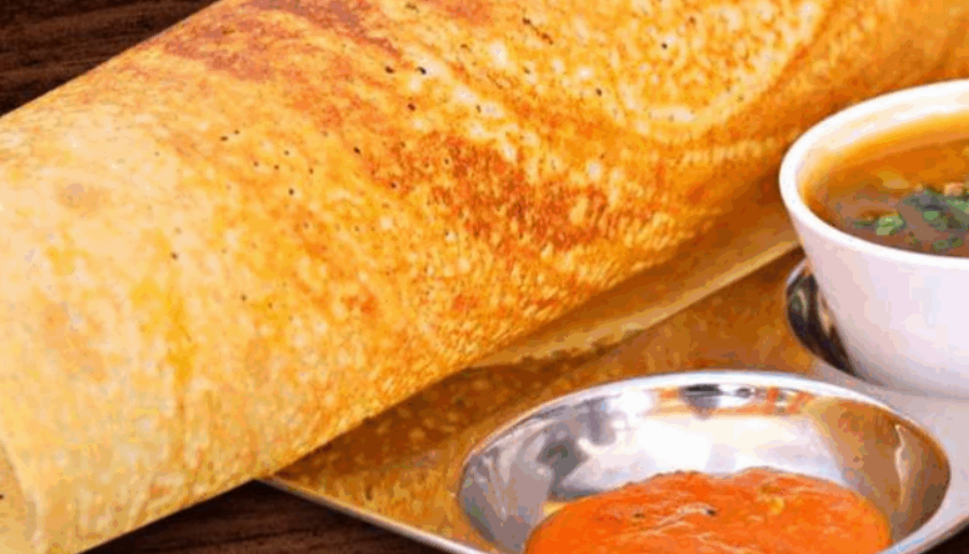
Dosa is a fermented crepe traditionally made from a mix of rice and urad dal (black gram). Native to South India but beloved across the country, it’s a dish that straddles simplicity and complexity. At first glance, it looks like a thin pancake. But when you bite into a good dosa—crispy at the edges, soft in the center, tangy from fermentation—it’s an experience.
What makes dosa so special, in my opinion, is that it can be breakfast, lunch, dinner, or even a street snack. It’s naturally gluten-free, high in protein, and endlessly adaptable. Some versions are paper-thin and crisp, others are soft and folded, and some are stuffed with spicy fillings. No matter the version, the base is always the same: a fermented batter of soaked rice and lentils that’s ground, rested, and spread onto a hot surface.
Even outside India, dosa is gaining popularity for its versatility and health appeal. I’ve served it to clients in vegan cafés, brunch spots, and even at upscale catering events. The key is in the fermentation, the spreading technique, and the right pan temperature. You don’t need a tandoor or a dosa tawa—you just need patience, heat, and good timing.
Ingredients for Traditional Dosa Batter
To make authentic dosa, you only need a few ingredients—but it’s the proportions, soaking times, and fermentation that make all the difference. Here’s what I use in my own kitchen:
- Parboiled rice – This is the base grain. I typically use idli rice or sona masoori. Parboiled rice helps dosa crisp up beautifully.
- Urad dal (black gram, skinless) – The key lentil that gives dosa its protein content and silky texture. I use whole or split urad dal without skin.
- Fenugreek seeds – Just a small amount improves fermentation and adds a gentle bitterness that balances the tang.
- Salt – Added after fermentation to preserve flavor balance.
- Filtered water – Essential for soaking and blending. I avoid chlorinated water, which can interfere with fermentation.
I soak the rice and dal separately for 4–6 hours. Then I grind them separately for best texture. Once blended into a smooth batter (with a slightly gritty finish from the rice), I mix both and let it ferment in a warm place overnight—about 8 to 12 hours, depending on the climate.
Fermentation transforms the batter from flat and bland to aerated and tangy. That flavor, from natural lactic acid bacteria, is what gives dosa its depth. On cold days, I place the batter inside the oven with the light on or near a warm stovetop. From my experience, properly fermented batter smells slightly sour and has visible bubbles.
Types of Dosa and Their Unique Features
| Type of Dosa | Texture | Filling | Common Serving |
| Plain Dosa | Thin, crisp edges | None | Served with chutneys and sambar |
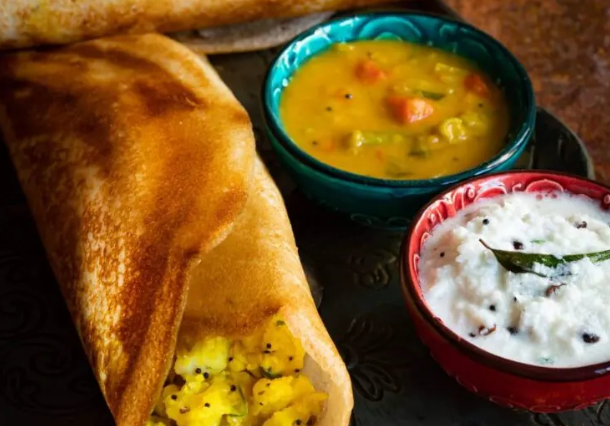
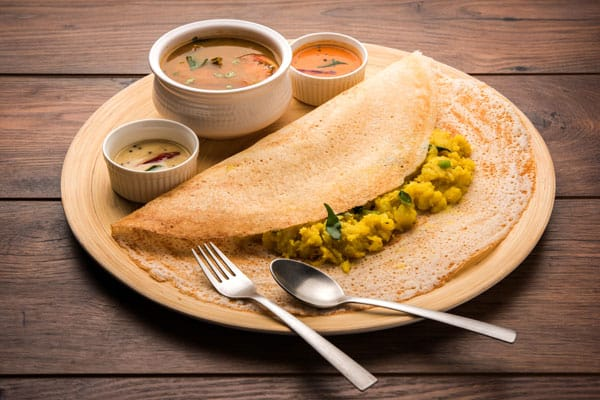
| Masala Dosa | Crisp with soft center | Spiced mashed potatoes | Always served with coconut chutney |
| Paper Dosa | Ultra-thin and massive | Usually none | Often a showpiece in restaurants |
| Rava Dosa | Lacy, brittle texture | None or mild filling | Made with semolina instead of rice |
| Set Dosa | Soft, thick, fluffy | Usually no filling | Served in stacks with curry |
| Cheese or Paneer Dosa | Crisp outside, melty inside | Grated cheese or paneer | Fusion-style, popular in cafés |
| Mysore Dosa | Crisp with spicy spread | Red chutney and potato filling | A regional favorite in Karnataka |
From my time in Bangalore, I’ve learned that no two dosa vendors serve it exactly the same. Some add onion, others add ghee, and some even fold in grated beetroot for color. That’s the beauty of dosa—it adapts to the cook’s hand and the eater’s taste.
Mixing, Fermenting, and Perfecting Dosa Batter
Once the rice and urad dal have soaked for several hours, I blend them separately using just enough water to get a pourable consistency. I aim for a texture that’s smooth but not overly thin—think pancake batter but slightly airier.
After grinding, I combine both batters and beat it well by hand to incorporate air. This helps jump-start the fermentation. The batter is left in a large bowl (never more than ⅔ full, to allow rising) and covered loosely.
Fermentation can take anywhere from 8 to 14 hours. In summer, it’s fast. In winter, I might have to warm the oven slightly or add a pinch of sugar to speed up microbial activity. I never use commercial yeast—natural fermentation gives better flavor and texture. Once fermented, the batter doubles in size, becomes fluffy, and develops a mildly sour aroma.
I stir in salt only after fermentation, just before cooking. That small detail helps prevent overly sour batter or sluggish fermentation. And from my experience, freshly fermented batter makes the crispiest, most aromatic dosas you can imagine.
How to Cook Dosa on a Regular Pan Without a Tawa
Traditionally, dosa is made on a flat cast-iron griddle called a tawa. But I’ve taught countless home cooks how to make perfect dosa using standard non-stick or cast-iron pans. The key lies in heat control, spreading, and patience.
Before anything touches the surface, I heat the pan over medium-high until a drop of water sizzles and evaporates immediately. Then I reduce the heat slightly and lightly wipe the pan with an oiled paper towel. Pouring batter on an overly hot or cold pan leads to sticking or uneven spreading, so this pre-heating ritual is vital.
Using a ladle, I pour the batter into the center and quickly spread it outward in a circular motion using the back of the ladle. I don’t press down too hard—I let the natural flow of the batter form the shape. Once it begins to set, I drizzle a few drops of ghee or oil around the edges.
From my experience, flipping isn’t necessary for thin dosas unless you want them extra crisp or if the filling needs cooking. I simply fold them once golden and serve immediately. With thicker varieties like set dosa, I cover the pan and cook gently on both sides.
Popular Dosa Fillings and Their Flavors
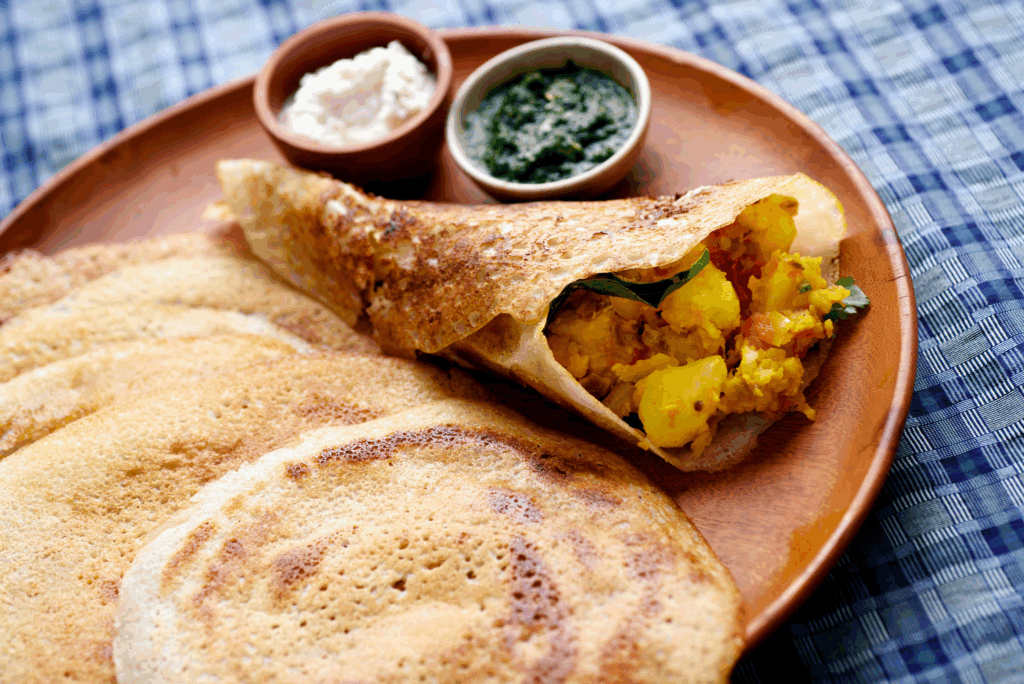
The filling transforms dosa from a crisp snack into a hearty meal. My most requested version is the classic masala dosa, where I fill it with a warm spiced potato mixture. I cook boiled potatoes with mustard seeds, turmeric, green chili, and sautéed onion until everything softens and melds. A handful of chopped coriander at the end makes all the difference.
I’ve also created fillings with crumbled paneer sautéed with tomatoes and cumin, or caramelized onions with melted cheese for a fusion take. At catering events, I offer spinach-corn dosa and mushroom masala versions that go over surprisingly well with non-Indian audiences.
The dosa itself is subtle in flavor, so the filling can really shine. I adjust spices based on the crowd—milder for brunch, hotter for street-style pop-ups. One trick I often use is spreading a thin layer of red chutney on the dosa before adding the filling. It adds heat and helps the filling stick, especially when serving folded dosas.
How I Serve Dosa with Chutneys, Sambar, and Sides
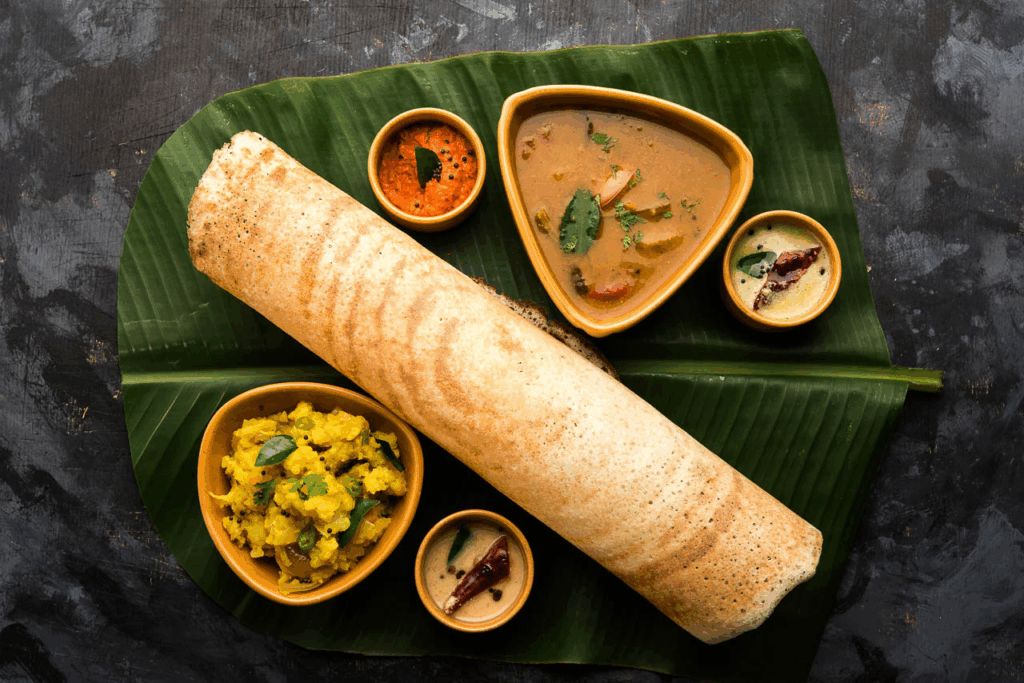
Serving dosa is more than placing it on a plate—it’s a small ceremony. I like to present it fresh off the pan, golden and folded, with a trio of chutneys in small bowls: coconut, tomato, and mint-coriander. Each one adds contrast—creamy, tangy, herbal.
A well-made sambar, the lentil-vegetable stew from South India, turns dosa into a full meal. I ladle it hot and aromatic into a bowl next to the plate. From my experience, people love dipping the crispy edge of dosa into the sambar, letting it soak and soften before taking the bite.
I also often serve lemon pickle or a dry chutney powder with sesame oil on the side. For brunch menus, I offer mini dosas in tasting portions with shot-glass chutneys. Whether plated casually or elegantly, the key is balance—flavor, heat, and texture working together.
And always, always serve dosa hot. Letting it sit kills the crispness. That’s why in restaurants across India, dosa is often brought out separately from the rest of the meal, straight from the griddle to the guest.
No-Fermentation Dosa: Is It Possible?
While traditional dosa relies on fermentation, there are ways to make instant versions when you’re short on time. From my experience, it won’t have the same tang or crisp structure, but it can still be satisfying.
I often prepare rava dosa—a variation made with semolina (rava), rice flour, and all-purpose flour. The batter is thin, almost watery, and requires no fermentation. When poured onto a hot pan, it forms a lacy, crispy texture that’s beautiful to look at and eat. I let the batter rest for 20 minutes to hydrate the grains, then stir well before cooking.
Another option I’ve used is adding a touch of baking soda or ENO (fruit salt) to standard dosa batter to mimic the airiness of fermentation. It works for quick dinners, but I always tell students not to expect the same depth of flavor.
Instant dosa mixes from Indian markets can be useful, but I prefer mixing my own—at least that way, I know what’s inside. These quick versions are great for experimentation or weekday meals when you don’t have 12 hours to wait.
Baking Dosa in the Oven: Experimental but Possible
Though dosa is best cooked on a griddle, I’ve tested baking methods for specific use cases—like buffets or when catering for large groups. The idea is not to bake a classic dosa, but to create large thin dosa “sheets” or even dosa chips.
I spread fermented batter thinly over a silicone baking mat or oiled parchment-lined sheet pan. Then I bake at 400°F (200°C) for about 12–15 minutes, or until the edges begin to crisp and the top loses its raw sheen. It doesn’t brown like on a skillet, but it cooks evenly and holds shape.
For dosa chips, I spread batter thinner, add seasonings (like cumin or chili), and bake longer until crisp, then break into shards. I’ve served these as crunchy appetizers with dips like coconut chutney mousse or spiced hummus.
While it’s not a replacement for stovetop dosa, oven-baked versions are creative, functional, and great when serving a crowd with limited equipment.
Can You Cook Dosa in the Microwave?
Most people assume dosa and microwave don’t mix—but I’ve used microwave-compatible grill plates and crisp plates to get surprisingly usable results. The trick is spreading a small amount of fermented batter on a preheated grill-safe tray designed for microwave use. I use the combo of grill + microwave power, usually 70%, for 3–4 minutes.
The texture isn’t as crispy as stovetop, but it’s firm and slightly golden. I wouldn’t recommend this method for guests, but for solo meals or experimentation, it gets the job done. I usually pair microwave dosas with thick chutneys or fillings, which compensate for the lighter texture.
For reheating dosa, however, the microwave excels. I wrap them in a kitchen towel and heat for 20–30 seconds. It keeps them soft and warm without turning rubbery.
Making Dosa in a Slow Cooker: Unconventional But Fun
This might sound strange, but I’ve successfully made dosa-style crepes in a slow cooker, especially for themed dinners. The process isn’t traditional at all—but it’s effective when you’re working with limited heat sources.
I preheat the slow cooker on high, brush the bottom with oil, and pour in a ladle of dosa batter. I keep the lid off to avoid steaming, and after about 20 minutes, the batter sets and begins to brown on the bottom. It doesn’t crisp, but it becomes firm and foldable.
I use these as soft dosa wraps for fillings like spiced vegetables, grilled paneer, or scrambled tofu. While it lacks the drama and bite of griddle-cooked dosa, the flavor of fermented batter remains intact.
In professional settings, I’ve used this method for dosa “tortillas” at fusion-themed events. It’s creative, unexpected, and surprisingly well-received.
Complete Dosa Cooking Timeline
| Stage | Time Required | Details from My Experience |
| Soaking rice and dal | 4–6 hours | Keep them in separate bowls with plenty of water to allow full hydration. |
| Grinding and mixing | 30–40 minutes total | Use a high-power blender. Texture should be smooth but not watery. |
| Fermentation | 8–14 hours | Best results when kept warm. Overnight in an oven (light on) works great in cold weather. |
| Cooking each dosa | 2–4 minutes per piece | Adjust heat as needed. Don’t rush the spread or lift too early. |
| Serving and garnishing | Immediate | Serve hot with chutneys and fillings ready at the side. |
| Optional storage | Up to 3 days | Keep batter refrigerated. Stir before use; do not freeze fermented batter. |
From my kitchen to yours, this timeline keeps dosa-making smooth, even on a busy day. I often split the process over two days—soak and grind one night, ferment overnight, cook next morning.
FAQ: What Is Indian Dosa and How to Make It
Is dosa gluten-free?
Yes. On my own experience, dosa made from rice and urad dal is completely gluten-free. Just ensure no wheat-based flours are added.
Can I skip fermentation?
Technically yes, but the flavor won’t be the same. I’ve made quick versions with baking soda or semolina, but they’re more like crepes than real dosa.
How do I store leftover batter?
I keep it in a covered container in the fridge for up to 3 days. Stir gently before reuse. If it smells overly sour, it’s best to discard.
Why is my dosa sticking to the pan?
This is a common issue. Based on what I’ve tried, either your pan is too cool, not seasoned enough, or you’ve used too much oil. Try reducing oil and preheating longer.
Can I make dosa with brown rice?
Yes, I’ve done it. It gives a nuttier flavor and a softer center. Soak it longer and grind well to ensure smoothness.
Do I have to soak the rice and dal separately?
I always do. It ensures better texture and consistency when grinding. Mixing before soaking can cause uneven fermentation.
Can I freeze dosa batter?
I don’t recommend it. I’ve tried, and it affects fermentation and texture. Better to freeze cooked dosas if needed.
What oil works best?
I use sesame or ghee for aroma. Coconut oil works too, especially for Kerala-style dosa. Avoid strong oils like mustard unless that’s the flavor you want.
Why does my dosa crack while spreading?
That usually means the batter is too thick or the pan is too hot. I thin the batter slightly and reduce heat for the next try.
Is dosa healthy?
Absolutely. From my experience, it’s a clean, fermented, plant-based dish that’s light but filling—especially when paired with protein-rich fillings.
What’s the difference between dosa and crepe?
Dosa is fermented, tangy, and made from lentils and rice. A crepe is flour-based and often includes eggs and milk. Texture and flavor are very different.
Can I add veggies directly into the batter?
Yes—I sometimes add grated carrot, beet, or finely chopped spinach. It adds color and nutrition, especially for kids.
How long should I ferment in winter?
In cold weather, I’ve had to ferment up to 14–16 hours. Keep the batter warm using oven light or wrap it in a towel near the stove.
What blender should I use?
I use a high-speed wet grinder or a strong blender like Vitamix. Regular blenders struggle with dal, but soaking helps.
Can I reheat dosa the next day?
Yes. On my own routine, I reheat them on a dry skillet for 1–2 minutes or wrap in a towel and microwave for 20 seconds. Still delicious.


Post Comment