How to Make Indian Biryani: A Complete Guide from a Chef’s Kitchen

In this guide, I’m walking you through everything — from choosing the right rice and spices, to understanding dum cooking (slow steaming), to preparing biryani in a slow cooker or even a microwave if needed. Whether you’re making it for the first time or refining your family recipe, I’ll help you master it in a way that makes sense, without shortcuts that compromise flavor.
- What Exactly Is Biryani — And Why It’s Worth the Time
- Essential Ingredients for Authentic Biryani
- Cooking Methods Compared
- The Marination Process: Where the Flavor Begins
- Cooking the Rice: Timing Is Everything
- Layering the Biryani: The Art of Assembly
- Baking and Slow Cooking Methods
- Regional Biryani Variations Across India
- Vegetarian vs. Meat-Based Biryani: Two Stories, One Soul
- Weekly Biryani Time Planner
- How to Serve Biryani: From Casual Plates to Dinner Parties
- What to Do with Leftover Biryani
- FAQ – Your Indian Biryani Questions Answered
What Exactly Is Biryani — And Why It’s Worth the Time
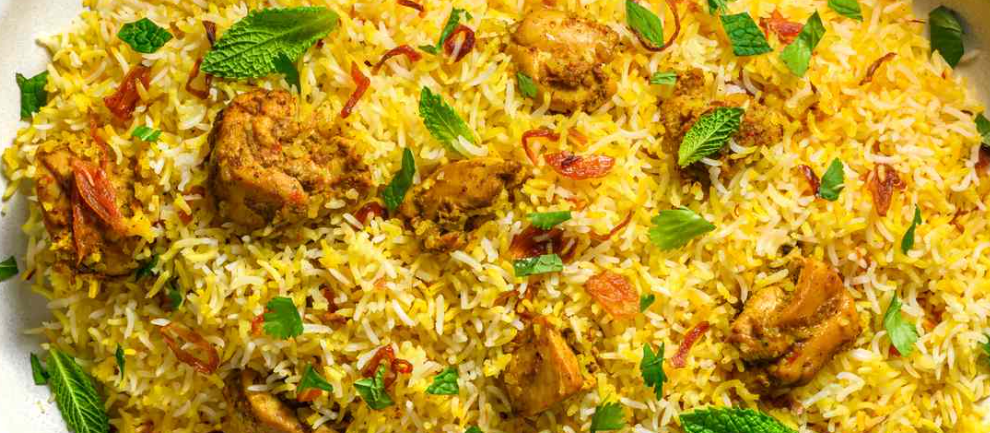
When someone asks me what biryani is, I don’t just say “a rice dish.” It’s much more than that. Biryani is an aromatic, spice-laced, layered meal where fragrant basmati rice is cooked with marinated meat or vegetables, often sealed and slow-cooked to trap all the flavors.
There are dozens of regional styles — from Hyderabadi dum biryani to Kolkata’s subtle sweetness, to Kerala’s coconut-scented version. But what unites all biryanis is balance: between richness and spice, between rice and gravy, between timing and texture.
Making it right takes time, but trust me — every minute is worth it. It’s one of those dishes where your kitchen ends up smelling like a spice bazaar and your dinner guests never forget it.
Essential Ingredients for Authentic Biryani
When I teach biryani to beginners, I emphasize understanding the role of each component — because unlike simple one-pot dishes, biryani relies on layers working together.
The basmati rice must be long-grained and aged — it’s the soul of the dish. I always soak it first for 30 minutes to help it cook evenly.
Protein choices vary: bone-in chicken, lamb shoulder, beef, shrimp, or even paneer or jackfruit for vegetarians. I usually marinate the protein in yogurt, ginger-garlic paste, and a blend of spices — this gives both tenderness and flavor.
Spices are non-negotiable. I use whole spices (cloves, cardamom, bay leaf, cinnamon) in the rice, and ground spices (coriander, chili powder, turmeric, garam masala) in the meat marinade.
Onions, fried golden and crisp, are another crucial layer. I always make extra — half goes into the marinade, half gets scattered between layers.
Finally, a handful of fresh mint and cilantro, plus a drizzle of saffron milk or rose water, finishes it beautifully.
Cooking Methods Compared
| Cooking Method | Prep Time | Cook Time | Total Time | Pros | Best For |
| Stovetop (Dum style) | 45 mins | 45–60 mins | 1.5–2 hrs | Most authentic texture/flavor | Classic biryani lovers |
| Oven (Baking) | 45 mins | 40–50 mins | 1.5 hrs | Even cooking, low maintenance | Beginners or large portions |
| Slow Cooker | 45 mins | 4–5 hrs | 5–6 hrs | Hands-off, very tender meat | Busy cooks, bulk prep |
| Microwave (Layered) | 30 mins | 12–15 mins | 45 mins | Quickest option | Students or small households |
From my own kitchen, I still favor stovetop dum cooking — sealing the pot with dough or foil, then slow-steaming over low heat. But when I cook biryani for a team lunch or big party, the oven method saves me time and guesswork.
The Marination Process: Where the Flavor Begins
I always say: biryani isn’t built on just spices — it’s built on marination. Whether it’s chicken, mutton, or jackfruit, the base is the same: thick yogurt, ginger-garlic paste, red chili powder, turmeric, garam masala, and salt. Sometimes I’ll add a splash of lemon juice or a tablespoon of oil to round it out.
I combine everything in a large non-metallic bowl and coat each piece thoroughly. Then I cover and let it rest in the fridge. The sweet spot is around 4 hours — but overnight gives unbelievable depth.
Here’s something I’ve learned: don’t skip the fried onions in the marinade. Their sweetness mellows the spice and adds umami richness. And always taste a spoonful of the marinade before cooking. If it tastes good raw (minus the raw meat, of course), it’ll taste incredible cooked.
Cooking the Rice: Timing Is Everything
Rice in biryani isn’t just filler — it’s half the soul of the dish. If you overcook it, you get mush. If you undercook it, it stays chewy and raw. Getting that perfect “90% done” grain takes care, and over the years, I’ve fine-tuned this part to near science.
I start with aged basmati rice — always soaked for at least 30 minutes, ideally 45. I bring a large pot of water to a rolling boil, season it with salt (think of it like pasta water), toss in a few whole spices (cardamom, bay leaf, clove), then add the drained rice.
Now here’s what I do differently: I never walk away. I stir gently and test the grains starting at the 5-minute mark. When the rice is soft on the outside but still has a bit of resistance at the center, I drain it immediately. That firmness allows it to finish cooking in the final steam phase without turning to porridge.
Layering the Biryani: The Art of Assembly
This is where biryani becomes biryani. I always tell my students: don’t rush the layering — this is the heart of the technique. The magic comes from alternating textures and temperatures, from the hot rice meeting the marinated meat, from the spices blooming into the grains as they cook together.
I start by oiling the base of my pot, then spreading a layer of marinated meat or vegetables. On top of that goes a layer of partially cooked rice — not all of it, just a third. Then I scatter fried onions, mint, cilantro, maybe a bit of ghee or saffron milk. I repeat this until all the components are used up, finishing with a final sprinkle of herbs and a lid.
To trap the steam, I seal the lid with foil or dough — creating that dum (pressure-cooked) environment. The whole pot goes on low heat, and I let it sit undisturbed. Over time, the flavors meld, the rice finishes, and the bottom layer crisps up beautifully — that’s what we call tahdig or kurchan.
Baking and Slow Cooking Methods
While traditionalists swear by stovetop dum cooking, I’ve worked with plenty of home cooks and busy clients who need more flexibility. The oven and slow cooker both deliver excellent results — if you handle them right.
For oven baking, I preheat to 350°F (175°C) and use a Dutch oven or heavy baking dish with a tight lid. After layering the biryani, I cover it well and bake for about 45 minutes. It’s even, forgiving, and a solid choice if you’re feeding a crowd.
With the slow cooker, the trick is in the prep. I par-cook the rice as usual, layer everything in the cooker, and set it to low for 4–5 hours. I’ve found that adding a bit more moisture (like ¼ cup of stock or water) helps the rice stay tender. You won’t get the same bottom crust, but the flavors deepen in an incredible way.
And yes — I’ve even tried a biryani in the microwave. Layered in a deep microwave-safe container, covered tightly with wrap, and cooked in 5-minute intervals (usually 12–15 mins total), it works surprisingly well. Great for small portions or fast meals.
Regional Biryani Variations Across India
No two biryanis are the same — and that’s what makes it so fascinating. I’ve traveled across India tasting versions of this dish in home kitchens, dhabas, and five-star hotels. Here are some that left a mark on me:
- Hyderabadi Dum Biryani: Arguably the most famous. Raw marinated meat is cooked with rice in a sealed pot. The bold use of saffron and whole spices gives it a royal flair.
- Lucknowi (Awadhi) Biryani: More delicate. The meat is pre-cooked separately and then layered. Uses fragrant stock and subtle rose or kewra water.
- Kolkata Biryani: Has its Mughal roots, but adds a surprising touch — boiled potatoes and a hint of sweetness. I love making this when I want something gentler.
- Malabar Biryani (Kerala): Southern flair, with coconut oil, fried shallots, and sometimes seafood. It’s lighter and great for summer.
- Sindhi or Bombay Biryani: A spicier, more chaotic mix with tangy notes (often from yogurt or dried plums) and a punchier flavor profile.
Trying each variation is like tasting a different chapter of Indian history. I often switch up which version I cook depending on the season, the crowd, or even my mood.
Vegetarian vs. Meat-Based Biryani: Two Stories, One Soul
I’ve cooked biryani for meat-lovers, vegetarians, and everyone in between — and I can tell you, both versions can be spectacular. What matters most is how you build flavor.
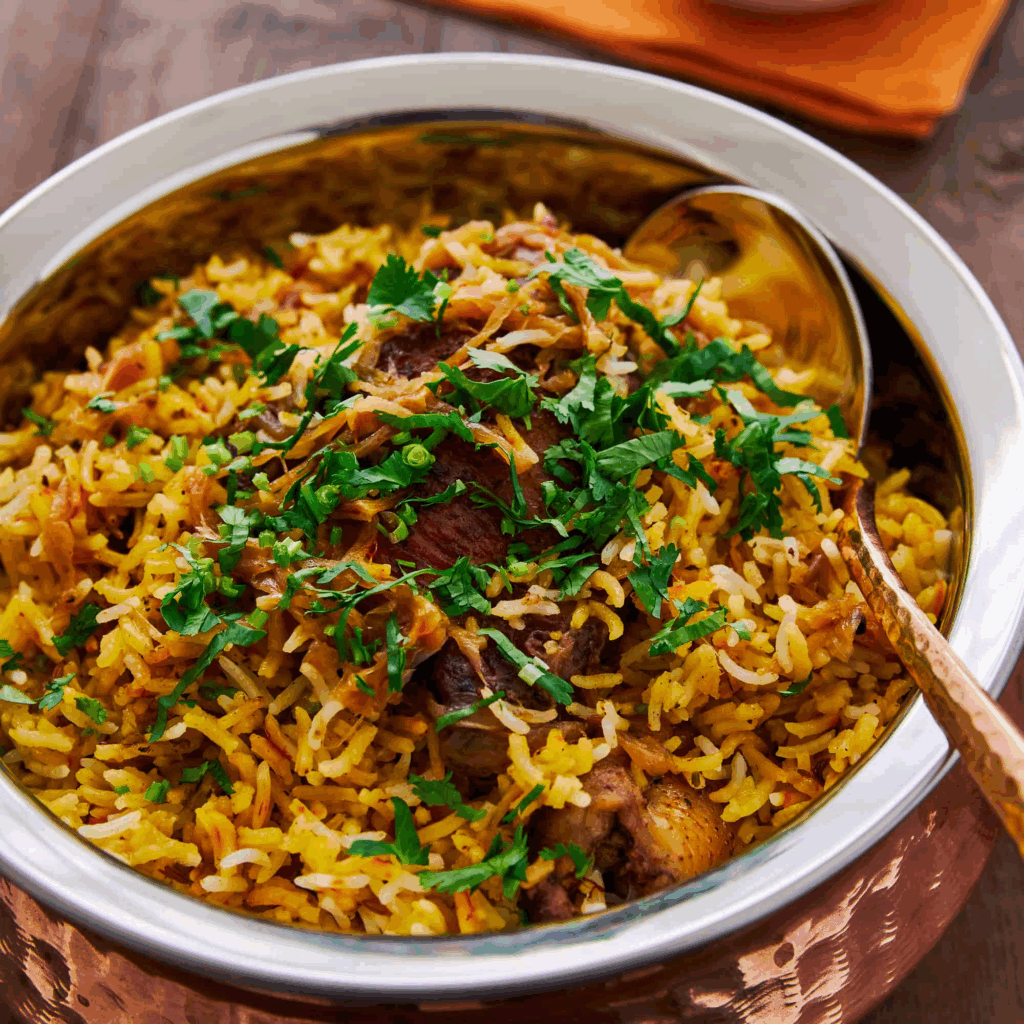
When I make meat-based biryani, I prefer bone-in cuts. Chicken thighs, lamb shanks, or even goat — the bones enrich the marinade and deepen the final taste. These versions often cook longer but reward you with intense, savory depth. I usually pair these with a raita and something cooling like cucumber-onion salad to balance the richness.
With vegetarian biryani, it’s all about texture and spice layering. My go-to combos are paneer and peas, or mushrooms and potatoes. I marinate the vegetables the same way I would with meat — in spiced yogurt with ginger-garlic paste — then roast or pan-sear them before layering. You don’t want them soggy. A splash of lemon juice at the end brings the whole dish alive.
One of my favorite spins is jackfruit biryani. When cooked right, it mimics the texture of pulled meat and absorbs flavors beautifully. Vegan guests are always blown away by it — they don’t miss the meat at all.

Weekly Biryani Time Planner
| Day | Prep Focus | Cooking Style | Serving Idea |
| Monday | Make spice mix, soak rice | Microwave | Small batch with raita |
| Tuesday | Marinate veggies/chicken | Slow cooker | Serve with salad + lemon pickle |
| Wednesday | Full biryani build | Stovetop dum | Classic dinner with naan or paratha |
| Thursday | Leftover remix | Reheat + toppings | Wrap in roti or fill pita pockets |
| Friday | Party prep | Oven-baked biryani | Serve with chutney, salad, and dessert |
| Saturday | Experiment day | Try regional variation | Hyderabadi or Kolkata-style + tea pairing |
| Sunday | Clean-out fridge biryani | Mixed veg version | Serve with fried egg and hot sauce |
In my home kitchen, this schedule helps keep things fresh — without repeating the same flavor profile. You prep a few elements once, then build out meals that feel brand new.
How to Serve Biryani: From Casual Plates to Dinner Parties
I’ve served biryani in all sorts of settings — from backyard BBQs to fine-dining tasting menus. Regardless of the context, one thing stays the same: presentation matters.
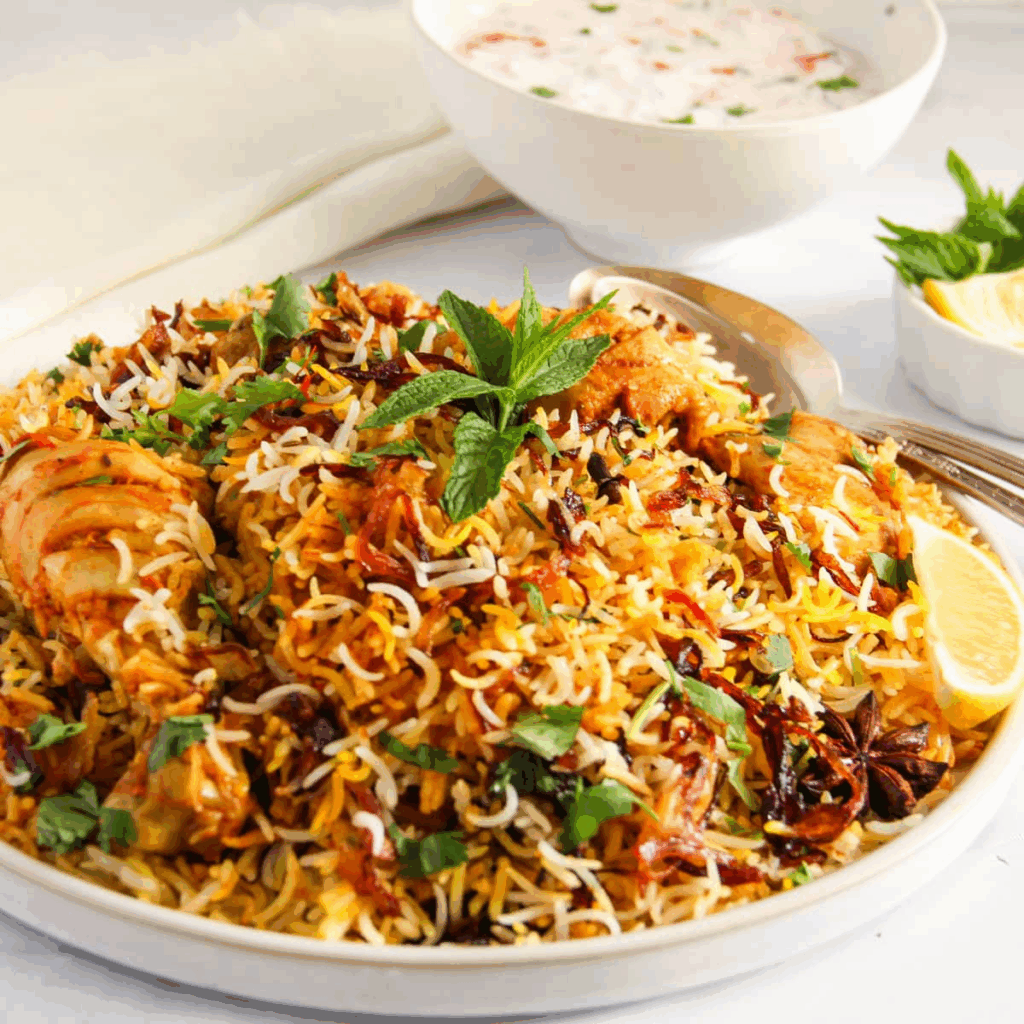
At home, I usually serve biryani in wide, shallow dishes. I fluff the rice gently with a fork before scooping, being careful not to mash the grains or meat. A sprinkle of fried onions, a few mint leaves, and a drizzle of saffron milk on top makes it look (and smell) irresistible.
For parties, I garnish with boiled eggs, roasted cashews, and sometimes raisins sautéed in ghee. I like to keep condiments nearby — cucumber raita, spiced pickles, mango chutney. And don’t forget lemon wedges. A squeeze of citrus right before eating brings out the full aroma.
Sometimes I even serve individual biryani portions in clay pots or ramekins — especially for plated service. The wow factor is undeniable, and people remember it.
What to Do with Leftover Biryani
Let’s be real — leftover biryani is often even better the next day. The flavors settle, the rice absorbs the spices more fully, and everything just comes together. I always tell my students: make extra.
Here’s what I do with mine. One, I reheat it gently with a splash of water in a covered pan — low and slow. Two, I turn it into “biryanidosas” — folded into a crispy dosa or tortilla with a fried egg. It’s street-food gold.
I’ve also made biryani-stuffed bell peppers (baked until tender), rice fritters with yogurt dip, and even biryani arancini — Italian-style rice balls, fried and served with spicy tomato chutney. You’d be amazed how far leftovers can go.
And yes, you can freeze biryani. Just let it cool fully, portion it, and freeze in airtight containers. I’ve done this for meal prep many times, and it saves the day when you’re short on time.
FAQ – Your Indian Biryani Questions Answered
Can I make biryani ahead of time?
Absolutely. In my experience, biryani actually gets better the next day. I often cook it a day in advance, then reheat it gently over steam or in the oven with a splash of water. The key is to avoid drying out the rice.
What’s the best rice for biryani?
I’ve tried countless varieties, and aged basmati wins every time. It’s long-grained, aromatic, and holds its shape beautifully. I avoid generic long-grain rice — it tends to break down or clump when layered.
How long should I marinate the meat?
Ideally, I marinate for 6 to 8 hours, or overnight. That gives the deepest flavor. I’ve done quick marinades in a pinch, maybe an hour, and while it works, it doesn’t deliver that signature depth.
Can I use precooked rice for biryani?
You can, if it’s cooked just right — firm and not mushy. I’ve used leftover rice before, especially for weeknight versions. The trick is to add a little moisture, like stock or saffron milk, when layering to freshen it up.
Is there a fast version for busy days?
Yes, I make a “shortcut” biryani on the stovetop or even in the microwave. I sauté everything, layer with parboiled or leftover rice, cover, and let it steam. It’s not the same as dum biryani, but it’s flavorful and fast.
Why does my biryani turn out mushy or wet?
I’ve been there myself. The usual culprit is overcooked rice or too much liquid in the meat. What I do now: cook the rice until it’s 70–80% done, and reduce the masala until most of the moisture evaporates before layering.
Can I make biryani vegetarian or vegan?
Definitely. I’ve made amazing versions with roasted vegetables, tofu, mushrooms, or jackfruit. I use dairy-free yogurt for marination and coconut milk in place of cream or ghee. It works wonderfully.
What’s the difference between pulao and biryani?
Pulao is simpler — everything cooks together in one pot. Biryani is layered, with separately cooked rice and marinated fillings. I always say: pulao is quick comfort, biryani is ceremony and soul.
Do I need to fully cook the meat before layering?
It depends on the style. In Hyderabadi biryani, I layer raw marinated meat and let it cook under the rice — the juices rise and flavor everything. In Lucknowi-style, I cook the meat first. Both work well if you time the rice properly.
How do I keep the bottom from burning?
I’ve learned to use heavy-bottomed pots and very low heat. I also add a thin layer of ghee or oil at the bottom and sometimes place a flat pan underneath to diffuse heat. That avoids scorching.
Can I use a rice cooker or Instant Pot?
Yes — I’ve tested both. In the Instant Pot, I sauté everything on the Sauté setting, layer as usual, then pressure cook on low for about 6 minutes. It’s not traditional, but works well when time is tight.
What meat works best in biryani?
I always reach for bone-in cuts like chicken thighs or lamb shanks. They release flavor into the marinade and hold up during slow cooking. I’ve also used beef and turkey — less common, but still tasty.
How do I layer without mixing everything up?
I use a wide ladle or tongs to gently place the rice over the meat, keeping it fluffy. The trick is not to stir once it’s layered. Let it steam as-is, and the flavors will naturally rise and settle.
Can I freeze leftover biryani?
Yes — I do it often. Let it cool completely, store in airtight containers, and skip the boiled eggs or fresh herbs (add those later). It reheats well on the stovetop with a splash of water.
What drinks pair best with biryani?
From my experience, cooling drinks are the best match. I serve sweet or salty lassi, lemon-mint water, or even lightly sparkling lime soda. Avoid overly sweet beverages — they clash with the spice.


Post Comment