How to Make Idli and Sambar at Home

As someone who has cooked in both traditional South Indian homes and professional kitchens, I can tell you that few dishes bring comfort like freshly steamed idlis served with a hot bowl of sambar. The aroma of roasted spices, the fluffy texture of fermented rice cakes, and the tangy broth of vegetables and lentils—this combination is a true celebration of flavor. In this guide, I’ll walk you through every detail, from soaking and grinding to steaming and tempering, all based on years of hands-on experience.
- Understanding the Cultural Importance of Idli and Sambar
- Ingredients Needed for Idli Batter and Sambar Base
- Fermenting Idli Batter the Right Way
- Cooking Time Table for Idli and Sambar
- Steaming Idlis on the Stove and in the Microwave
- Making Sambar from Scratch: My Go-To Method
- Oven-Baked Idlis and Slow Cooker Sambar Variants
- Regional and Creative Variations of Idli and Sambar
- Common Mistakes When Making Idli at Home
- Sambar Troubleshooting: What to Do When It Goes Wrong
- Storing and Reheating Idli and Sambar
- Pairing Idli and Sambar with Chutneys and Sides
- Serving Idli and Sambar the Traditional Way
- When to Serve: Breakfast, Dinner, or Anytime
- Nutritional Benefits of Idli and Sambar
- Final Thoughts from the Chef
- FAQ: Idli and Sambar at Home
Understanding the Cultural Importance of Idli and Sambar
Idli and sambar are more than just breakfast staples in South India—they’re cultural icons. Idlis represent simplicity and nutrition, while sambar brings depth, tanginess, and warmth to the plate. I’ve served this dish in 5-star buffets and tiny home kitchens alike, and its appeal is universal.
The idli symbolizes purity in its soft, white form—made from only rice and urad dal (black gram). Sambar, on the other hand, is a celebration of regional vegetables, spices, and tamarind. Together, they form a complete meal with protein, carbs, fiber, and fat.
From Tamil Nadu’s breakfast counters to Kerala’s wedding breakfasts, you’ll find this duo being served with pride. Even internationally, idli-sambar has found its way into health food menus for being gluten-free, fermented, and gut-friendly.
Ingredients Needed for Idli Batter and Sambar Base
I’ve worked with many variations, but here’s the version I use most often in my kitchens for reliable results:
For Idli Batter:
- Parboiled rice – 2 cups
- Whole urad dal – 1 cup
- Fenugreek seeds – ½ teaspoon
- Water – as needed
- Salt – to taste
For Sambar:
- Toor dal (split pigeon peas) – ¾ cup
- Tamarind – 1 lemon-sized ball (or 2 tsp concentrate)
- Sambar powder – 1.5 tablespoons
- Turmeric – ½ teaspoon
- Mustard seeds – 1 teaspoon
- Curry leaves – a sprig
- Asafoetida – a pinch
- Onion – 1 sliced
- Tomato – 1 chopped
- Carrot, drumstick, radish – optional but traditional
- Oil – 2 tablespoons
- Salt – to taste
- Fresh coriander – for garnish
I always recommend soaking rice and dal separately for a better grind and fermentation. Fenugreek not only enhances flavor but also boosts fermentation.
Fermenting Idli Batter the Right Way
Fermentation is where the magic happens. On my first attempts years ago, I struggled with batter that wouldn’t rise—until I mastered the balance of temperature, time, and ratios.
After grinding the soaked rice and urad dal separately (urad should be fluffy), I mix them and add salt after fermentation (if I live in a hot climate) or before (in colder places—it helps the rise).
I let it rest in a large bowl, covered but not sealed, for 8 to 12 hours. Warmth is key. In cold kitchens, I’ve left the batter in my oven with just the light on—it rises beautifully. A properly fermented batter will double in volume and smell slightly sour, but pleasant.
Don’t stir the batter vigorously after fermentation—just fold gently before ladling it into idli molds.
Cooking Time Table for Idli and Sambar
Here’s a table I’ve created from my own workflow in restaurants and home kitchens:
| Task | Prep Time | Cook Time | Notes |
| Soaking rice & dal | 6 hours | — | Soak separately |
| Grinding & mixing batter | 30 mins | — | Use wet grinder or high-power blender |
| Fermentation | 8–12 hrs | — | Time varies with temperature |
| Steaming idlis | — | 10–12 min | Keep lid tight |
| Cooking toor dal | — | 20 min | Pressure cooker helps |
| Making sambar base | — | 15 min | Includes tempering, veggies, tamarind |
| Final simmer with dal | — | 10 min | Combine everything & finish |
Steaming Idlis on the Stove and in the Microwave
Traditional stove-top steaming is my favorite method, and I use it in every professional kitchen I’ve worked in. I grease my idli plates lightly with oil, pour the fermented batter into each mold, and place them in a preheated steamer.
Using a pressure cooker without the weight valve also works perfectly. Steam over medium heat for 10–12 minutes. I check doneness by inserting a toothpick—it should come out clean and dry.
For a quick microwave version, I use silicone idli molds or microwave-safe ramekins. Add a little water in a bowl below the tray, then cook for 3–5 minutes depending on the microwave wattage. The texture is slightly denser but works when you’re short on time.
Let them cool a minute before unmolding to avoid tearing. I’ve found that resting idlis for 1–2 minutes actually improves their springiness.
Making Sambar from Scratch: My Go-To Method
Sambar is where creativity meets discipline. I always start by pressure-cooking the toor dal with turmeric until completely soft. You can also boil it for 30–40 minutes if you don’t have a cooker, but it takes more patience.
While the dal cooks, I prepare the tamarind water and chop vegetables. I sauté mustard seeds, curry leaves, and a pinch of asafoetida in hot oil to start the tempering. Then in go the onions, tomatoes, and vegetables of the day—carrots, drumsticks, radish, or even pumpkin.
Once softened, I pour in tamarind extract and sambar powder, then let it simmer until everything melds together. Finally, I mash the cooked dal and add it to the pot. Simmer for another 10 minutes and finish with fresh coriander.
The fragrance that fills the kitchen at this point is always nostalgic. If you want thicker sambar, mash a few pieces of cooked vegetable into the broth.
Oven-Baked Idlis and Slow Cooker Sambar Variants
I often get asked if idli and sambar can be adapted for modern appliances. The answer is yes—and some versions are surprisingly effective.
To bake idlis, I use small ramekins or muffin trays. I preheat the oven to 350°F (175°C), add water to a deep baking dish for steam, and place the ramekins inside. I bake them for about 15–18 minutes until firm and risen. The crust is slightly different, but they hold their shape well and taste great.
For sambar in a slow cooker, I add pre-soaked toor dal, chopped veggies, turmeric, and water and let it cook on low for 6 hours or high for 3 hours. I do the tempering separately and stir it in at the end. Tamarind and sambar powder go in after the lentils have softened.
These variations are a lifesaver on busy days or for bulk cooking. I often prep this for big events and reheat gently before serving.
Regional and Creative Variations of Idli and Sambar
| Variation Name | What’s Different | My Notes |
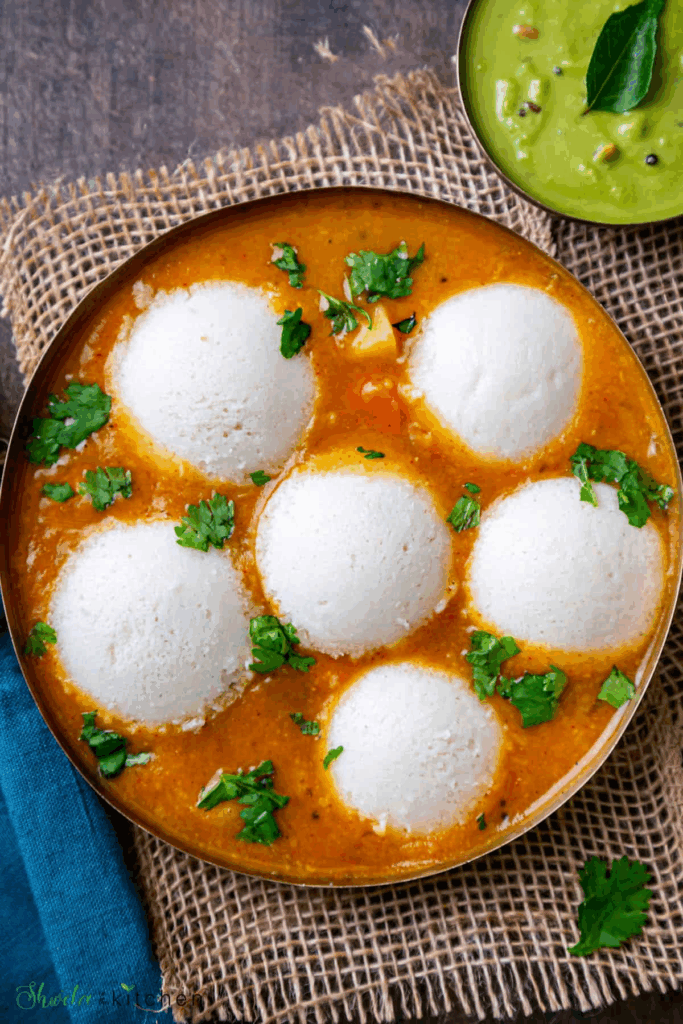
| Rava Idli | Uses semolina instead of rice | Quick version, no fermentation needed |
| Mini Idlis | Bite-sized and fun for kids or starters | I serve them in sambar for “idli sambar bath” |
| Kanchipuram Idli | Spiced with pepper, ginger, and cumin | Great for special temple-style meals |
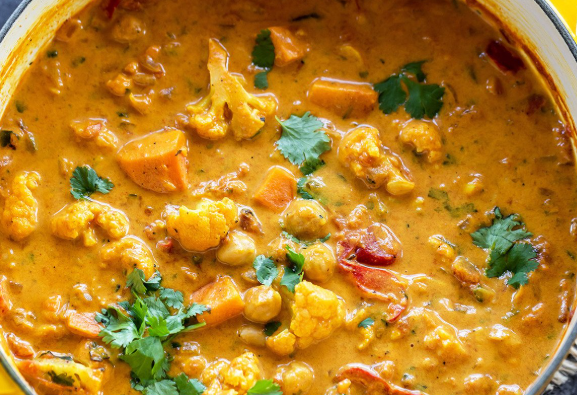
| Vegetable Sambar | Includes more carrots, beans, or pumpkin | I balance the sweetness with extra tamarind |
| Drumstick Sambar | Uses moringa pods, popular in Tamil Nadu | Cook drumsticks separately to avoid stringy bits |
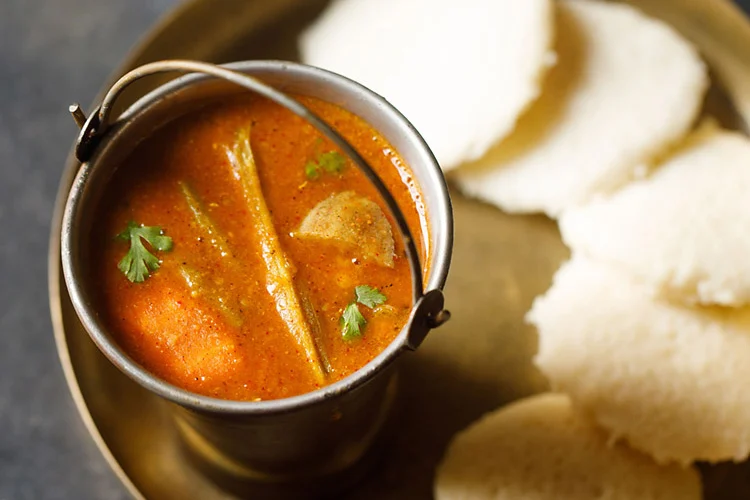
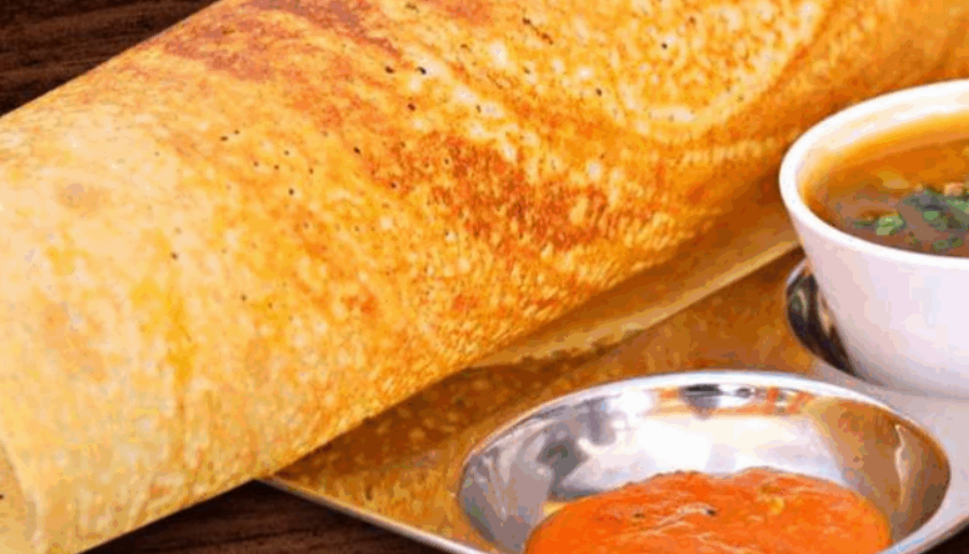
| Tiffin Sambar | Thinner, milder version used in hotels | I love this for breakfast spreads |
| Andhra Sambar | Hotter with extra chilies and garlic | I often tone it down for wider appeal |
| Udupi Sambar | Sweeter, no onion or garlic | Traditional temple style—very subtle and light |
Common Mistakes When Making Idli at Home
Over the years, I’ve seen many home cooks—and even a few young chefs—make the same avoidable mistakes when preparing idlis. Learning how to troubleshoot these has become second nature to me, and I always make a point of teaching them early.
The most common issue is dense or flat idlis. This usually happens when the fermentation didn’t go well—either the kitchen was too cold, the batter was overmixed after rising, or the dal wasn’t whipped enough during grinding.
Another frequent mistake is using too much water when grinding, which creates a thin batter. It won’t hold air or set properly in the molds. Use just enough to get a smooth grind, especially for urad dal.
Oversteaming can also make idlis rubbery. I always remind my staff to steam with just enough water in the steamer and never to overfill the molds. And don’t forget to let the steamed idlis rest for a minute or two before removing—they firm up beautifully with just a bit of patience.
Sambar Troubleshooting: What to Do When It Goes Wrong
Even a great cook can end up with watery or overly sour sambar. I’ve done it myself back in the early days. Here’s what I’ve learned from those kitchen battles:
Too watery? Simmer longer without a lid or mash some of the dal and veggies to naturally thicken it. Avoid adding flour or starch—it ruins the texture.
Too sour? You might’ve used too much tamarind or added it too early. Try balancing it with a small spoon of jaggery or sugar. I sometimes add a pinch of baking soda if the acidity is overwhelming, but this is rare.
Too bland? Make sure the sambar powder is well roasted or use a fresh batch. Old spices lose potency. A tempering with extra mustard seeds, curry leaves, and dried chilies added at the end can also lift the whole dish.
Lastly, don’t skip asafoetida (hing). Even a tiny pinch can transform the aroma and digestion quality of your sambar.
Storing and Reheating Idli and Sambar
Idli and sambar are excellent for batch cooking if you store them right. I often prepare double portions at home so I can enjoy them during the week.
For Idlis:
Once cooled, I keep them in an airtight box lined with parchment or a banana leaf. They go into the fridge for up to 3 days. For reheating, I use a steamer or microwave with a wet paper towel to restore softness. Avoid dry reheating—it makes them rubbery.
For Sambar:
It actually tastes better the next day after all the spices blend. I store it in glass containers and refrigerate for 3–4 days. It also freezes well. To reheat, I gently simmer it, adjusting salt and adding a splash of water if it thickened too much.
In my restaurant work, we often freeze portioned sambar in airtight vacuum bags for quick service during festivals—it saves time and retains flavor beautifully.
Pairing Idli and Sambar with Chutneys and Sides
Idli-sambar is a power couple on its own, but add the right chutneys and you have a full-on flavor party. I always serve at least two chutneys with idli—it brings variety and color to the plate.
Coconut Chutney is the king. I blend grated coconut with green chili, roasted chana dal, ginger, and a splash of water. Then I finish it with a tempering of mustard seeds and curry leaves.
Tomato Chutney adds tang and color. I sauté onion, garlic, tomato, red chilies, and blend it smooth. Perfect for those who like a bit of heat.
Mint Chutney, peanut chutney, or even onion-tamarind chutney are popular alternatives. I rotate them depending on the season and occasion.
On special mornings or festive buffets, I also serve medu vada or upma on the side. And a strong filter coffee to finish—nothing beats that combo.
Serving Idli and Sambar the Traditional Way
Presentation matters, especially when you’re serving comfort food with cultural roots. I always take a moment to serve idli and sambar the way I learned growing up in South India—and later refined in professional kitchens.
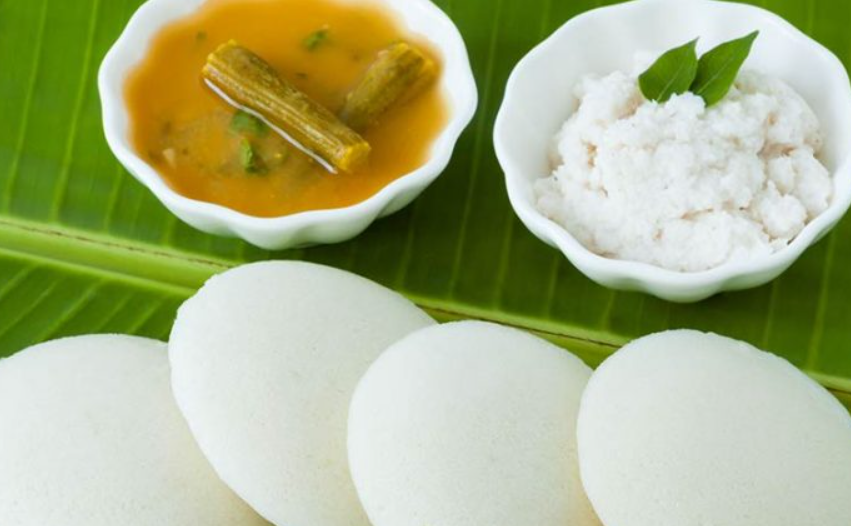
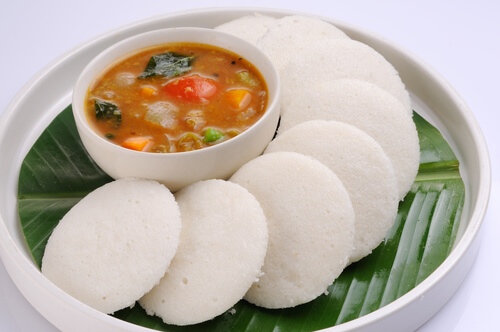
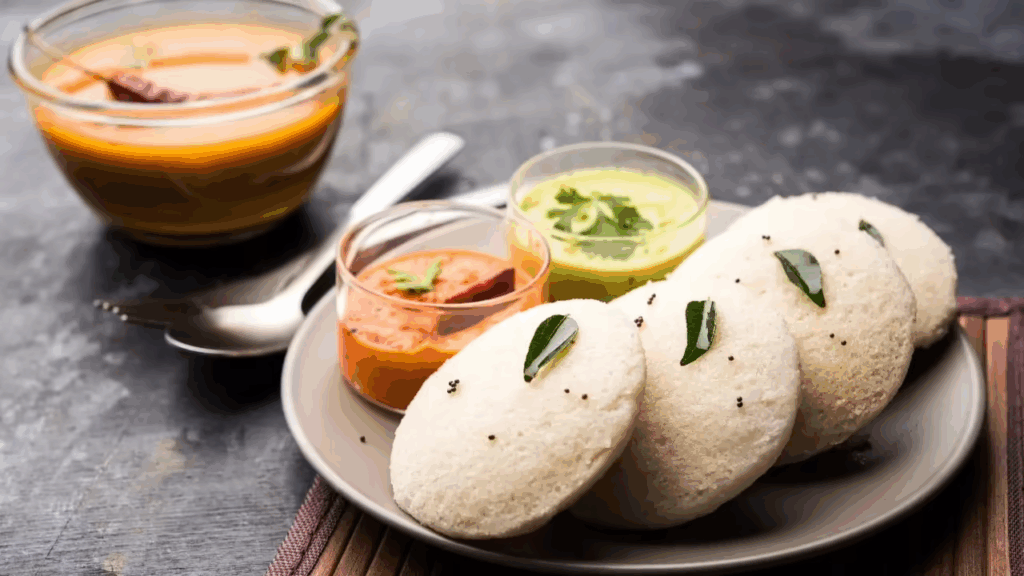
Traditionally, idlis are served on a banana leaf, accompanied by a ladle of hot sambar poured directly over them. I usually serve two to four idlis per plate, depending on the setting, and keep the chutneys on the side for dipping.
If I’m catering or plating for a restaurant, I go for a clean white plate to make the colors pop. Garnish the sambar with chopped coriander and a few mustard seeds from the tempering. If I’m serving for guests unfamiliar with the cuisine, I label each condiment—it’s a small touch that invites exploration.
Don’t forget: a drizzle of ghee on top of the idlis before serving can take the whole dish to a new level of richness.
When to Serve: Breakfast, Dinner, or Anytime
Idli and sambar may be famous as a South Indian breakfast, but honestly, I serve it around the clock. It’s light yet filling, and incredibly easy to digest, especially when fermented well.
In my restaurant experience, we offered it as an early morning special and as a late-night comfort bowl. It’s perfect for:
- Brunch menus paired with chai or coffee
- Kids’ meals, because it’s soft and non-spicy
- Recovery meals for people feeling under the weather
- Vegetarian buffets and fasting days (especially if made without onion/garlic)
It’s also a great base for fusion dishes—like idli upma or stuffed masala idlis. Leftover idlis never go to waste in my kitchen.
Nutritional Benefits of Idli and Sambar
One of the reasons I love this combo is that it’s a complete meal—and incredibly nutritious. You’ve got fermented carbohydrates from the idli and plant-based protein and fiber from the sambar.
Fermentation improves gut health, increases vitamin B content, and makes nutrients more absorbable. Idlis are low in fat, naturally gluten-free, and easy to digest—great for people with dietary restrictions.
Sambar, depending on the vegetables you add, gives a full dose of antioxidants, iron, and essential minerals. Tamarind provides potassium and a touch of Vitamin C. I often recommend this meal to clients looking for hearty, healthy, and vegetarian options that don’t compromise on taste.
Final Thoughts from the Chef
I’ve been making idli and sambar since my early culinary days, and even after hundreds of batches, it still feels special. The aroma of steaming idlis, the gurgle of simmering sambar, and the punch of that first bite—it always brings me home.
Don’t be discouraged by a failed fermentation or a watery sambar. I’ve messed it up in new kitchens, at high altitudes, and even once during a cooking demo. But that’s how you learn. The secret is practice, understanding your environment, and adjusting as needed.
And once you get the hang of it, you’ll find that idli and sambar are more than just a dish—they’re an experience you’ll keep coming back to.
FAQ: Idli and Sambar at Home
What do I do if my idli batter doesn’t rise?
On my experience, cold kitchens are usually the problem. Try keeping the batter in a warm place—like inside an oven with just the light on. Also, make sure you ground the urad dal until it’s very fluffy. That air is what helps it rise.
Can I use a blender instead of a wet grinder?
Yes, I’ve done this many times when traveling or working abroad. Just be sure to pulse slowly and don’t let the motor overheat. A powerful blender with minimal water can still make decent batter.
How long can I store the idli batter?
I’ve stored it up to 5 days in the fridge. After the second day, it starts to ferment further and tastes a bit sour, but that’s not a bad thing. Just stir gently before use.
Is sambar always vegetarian?
Traditionally yes, but I’ve seen people add dried shrimp or even chicken stock in fusion versions. For a true South Indian taste, keep it vegetarian with lots of veggies and fresh tamarind.
Can I make idlis without fermenting the batter?
I’ve tried using baking soda for instant idlis (especially with rava/semolina), and it works for emergencies. But the taste and texture are nowhere close to the real thing.
What can I serve with idli besides sambar?
On my menu, I usually include coconut chutney, tomato chutney, and sometimes peanut chutney. Even ghee and sugar or podi (spice powder) with oil make a simple, nostalgic combo.
Can I freeze idlis?
Yes, I’ve done this when prepping for large events. Let them cool completely, freeze in layers separated by parchment, and steam or microwave before serving. They hold texture surprisingly well.
Why are my idlis sticky?
That’s often from undercooked batter or too much water in the mix. Also, don’t steam with too much water in the base—it creates excess steam and softens them too much.
How do I make sambar less spicy?
I usually reduce the number of chilies and use a milder sambar powder. A spoon of grated coconut or a dash of jaggery also balances the heat nicely.
Can I use moong dal instead of toor dal?
Yes, I’ve done that when out of toor dal. It gives a lighter texture and slightly different flavor—still delicious and easy to digest.
What’s the best way to reheat leftover sambar?
I recommend simmering it gently on the stove. Add a splash of water and adjust salt. Microwaving works too, but stovetop reheating revives the flavor better.
Can I make sambar in advance?
Absolutely—I often do it the day before. It actually tastes better the next day once all the flavors settle and deepen. Just store it well and reheat before serving.
What’s the difference between hotel sambar and homemade?
Hotel sambar is often thinner and slightly sweet, with fewer whole vegetables. I usually make mine thicker and spicier at home, especially when it’s a family meal.
Are steel idli molds better than silicone ones?
From my experience, steel molds give a more even steam and firmer texture. Silicone is easier to clean but can sometimes result in soggy idlis if not handled properly.
What drink pairs best with idli and sambar?
I always recommend traditional South Indian filter coffee. But you can also enjoy it with ginger chai or even buttermilk if you’re having it later in the day.
Post Comment