How to Cook Turkey Legs
How to Cook Turkey Legs: A Complete Guide for Beginners

As a chef, I’m often surprised by how underappreciated turkey legs are. Most home cooks go straight for the breast meat when preparing turkey, especially during the holidays. But if you’ve ever cooked turkey legs properly, you’ll know they offer far more flavor, moisture, and satisfaction. With their rich, dark meat and natural juiciness, turkey legs can rival duck or lamb shank when treated with care.
- Why Turkey Legs Deserve More Attention
- Understanding the Anatomy of a Turkey Leg
- Choosing the Best Turkey Legs
- How to Prepare Turkey Legs Before Cooking
- Essential Ingredients for Cooking Turkey Legs
- Step-by-Step Turkey Leg Recipe for Beginners
- Temperature and Doneness Guide (Table)
- How to Cook Turkey Legs in the Oven
- Skillet-Cooked Turkey Legs: My Pan-Roasting Technique
- Using a Pressure Cooker for Tender Turkey Legs
- How to Cook Turkey Legs in the Microwave (Yes, You Can)
- Common Mistakes When Cooking Turkey Legs
- Best Sauces and Gravies for Turkey Legs
- My Favorite Seasonings and Spice Blends
- Variations and Recipe Ideas for Turkey Legs
- Serving, Storing, and Reheating Turkey Legs
- FAQ: Turkey Legs — 15 Questions Answered by a Chef

Why Turkey Legs Deserve More Attention
Turkey legs are affordable, versatile, and forgiving—ideal for slow roasting, braising, or pressure cooking. They can feed a family on a budget or serve as a show-stopping centerpiece. Unlike the delicate breast, which dries out quickly, turkey legs stay juicy even when cooked low and slow. This makes them perfect for beginners learning temperature control, seasoning, and protein handling.
In this guide, I’ll show you every step of the process, from choosing the right legs to seasoning them like a pro and cooking them across multiple methods—including oven, skillet, pressure cooker, and even microwave. Whether you’re cooking for the holidays or meal-prepping for the week, turkey legs are worth every bit of attention.
Understanding the Anatomy of a Turkey Leg
Before you cook turkey legs, it helps to understand what exactly you’re working with. A turkey leg consists of two parts: the drumstick (lower leg) and the thigh (upper leg). When sold together, they’re often referred to as a “whole turkey leg.” Each part has different characteristics, which matter when it comes to cooking.
The drumstick contains longer muscle fibers and more connective tissue. It’s tougher than the thigh but also more flavorful—perfect for slow braising or pressure cooking. When cooked correctly, the meat pulls right off the bone and absorbs sauces beautifully. I like to treat drumsticks the same way I’d cook osso buco or pork shank.
The thigh, on the other hand, is slightly more tender and cooks faster. It has more fat marbling, which translates to rich flavor and a juicy bite. I often roast thighs at a slightly higher temperature or pan-sear them when I want a crisp finish. The muscle structure here is looser, which makes it easier to season deeply.
Understanding these differences will help you make better choices: how long to cook each part, what temperature to use, and which techniques will enhance rather than fight against the meat’s natural structure.
Choosing the Best Turkey Legs
When selecting turkey legs, I always look for skin-on, bone-in pieces—these retain moisture better during cooking and allow you to build flavor in the skin and connective tissue. You’ll find turkey legs sold either fresh or frozen, and both are workable, but there are a few important details to know.
Fresh turkey legs are ideal when you can find them. They have a brighter color, more intact skin, and are ready to season and cook right away. I recommend sourcing from a local butcher or farmer’s market whenever possible. The quality of the meat is noticeably better, and you’ll often get larger, more uniform cuts.
Frozen turkey legs are more widely available and still perfectly fine. Just be sure to thaw them completely in the fridge—not at room temperature. I typically allow 24 hours in the fridge per 2 pounds of meat. Rushed thawing results in uneven cooking and watery texture. Once thawed, pat them dry thoroughly before seasoning.
As for weight, I prefer turkey legs that are around 1½ to 2½ pounds each. They’re large enough to handle slow cooking, but not so massive that they become tough or stringy. Smaller legs cook faster but can dry out more easily—something to keep in mind depending on your method.
If you start with good legs, the rest of the dish becomes far easier. In my kitchen, ingredient selection is half the battle won.
How to Prepare Turkey Legs Before Cooking
Proper preparation is what separates a good turkey leg from a great one. In my experience, taking just 15 extra minutes before cooking can drastically improve both flavor and texture.
I always begin by rinsing the turkey legs under cold water and patting them completely dry with paper towels. Moisture on the surface prevents proper browning and makes the skin rubbery instead of crisp. Once dry, I trim any excess fat or skin flaps—but I never remove the skin entirely, as it protects the meat and holds flavor.
Next, I recommend scoring the skin lightly with a sharp knife. This helps fat render out during cooking and allows seasoning to penetrate deeper. For large drumsticks, I also prick the thickest part with a knife tip to help brines and marinades reach the interior.
Brining is optional, but I highly recommend it. Even a quick 4-hour wet brine (water, salt, sugar, aromatics) can dramatically improve moisture retention. If I don’t have time to brine, I use a dry rub at least an hour before cooking and let the meat rest in the fridge, uncovered. This helps the skin dry out slightly and promotes better browning in the oven or pan.
Finally, always bring turkey legs to room temperature before cooking—about 30–45 minutes on the counter. Cold meat in a hot pan or oven cooks unevenly and tightens the muscle fibers, leading to toughness. Trust me: a bit of prep equals a much better final dish.
Essential Ingredients for Cooking Turkey Legs
When I cook turkey legs, I focus on building flavor from the inside out. Below are my go-to ingredients for a versatile base recipe that can be adapted for any method—roasting, braising, or pan-searing.
- 2 large turkey legs (about 2 lbs each)
- 2 tablespoons olive oil or melted butter
- 1½ teaspoons kosher salt
- 1 teaspoon black pepper
- 1 teaspoon smoked paprika
- ½ teaspoon garlic powder
- ½ teaspoon onion powder
- Optional: 1 tablespoon Dijon mustard or soy sauce (for marinades)
- Fresh herbs like rosemary, thyme, or sage (whole sprigs or chopped)
- 1 cup chicken or turkey broth (for braising or oven roasting with foil)
These are the essentials. From this base, I often branch out into different flavor profiles—Cajun, citrus-herb, or barbecue—but this simple combination is my reliable starting point.
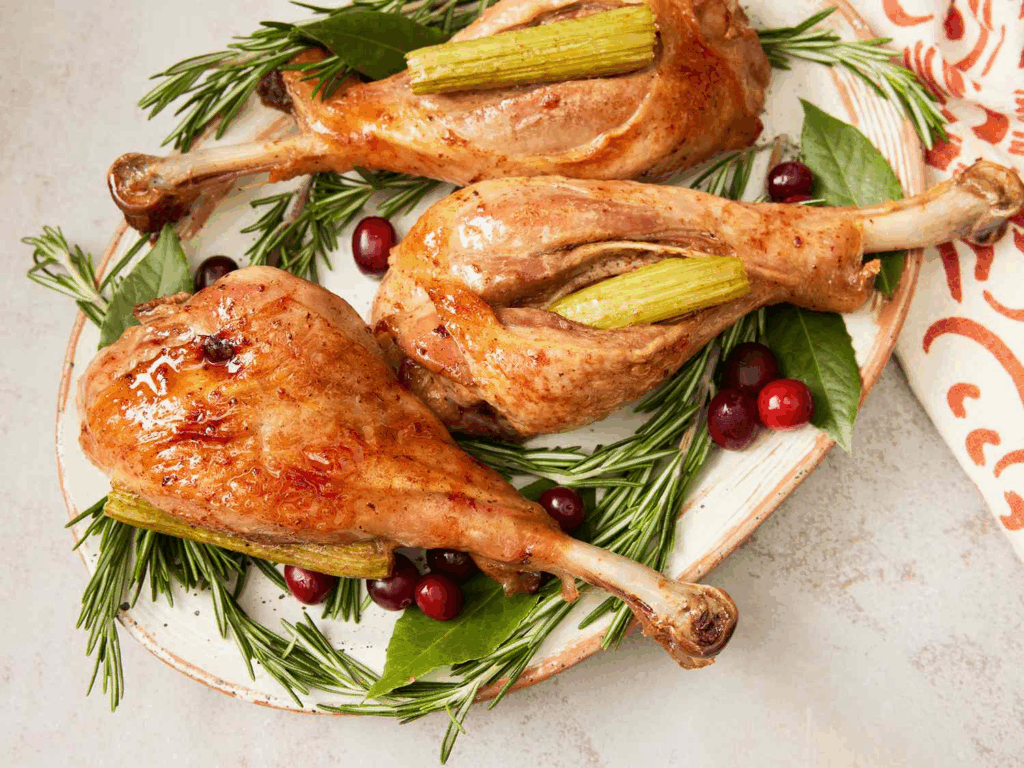
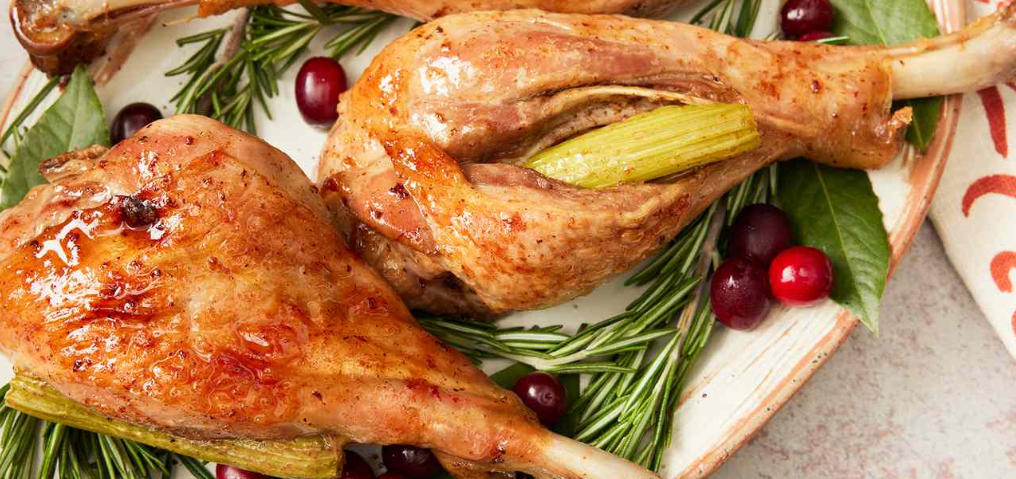
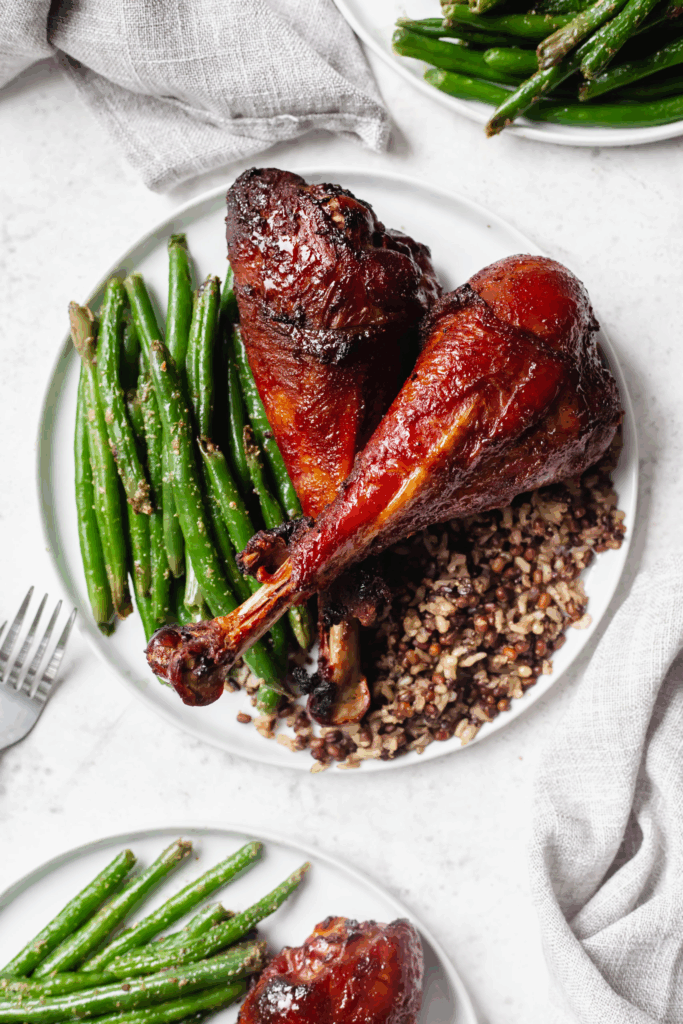
Step-by-Step Turkey Leg Recipe for Beginners
This recipe is one I use when teaching new cooks how to handle dark meat. It’s simple, flexible, and delivers consistent results across different kitchens and oven setups.
Season generously
After drying the legs, I rub them with olive oil and massage the seasoning blend into every crevice. I make sure to get seasoning under the skin when possible.
Rest the meat
I let the seasoned legs rest for 30 minutes at room temperature. This gives the seasoning time to work into the meat and ensures even cooking.
Preheat the oven to 375°F (190°C)
While the legs rest, I preheat the oven and prepare my roasting setup—a foil-lined tray with a rack, or a Dutch oven if I’m adding liquid.
Roast covered, then uncovered
I roast the legs covered with foil or in a lid-sealed Dutch oven for the first 45 minutes. Then I remove the foil or lid and roast for an additional 30–40 minutes, basting once halfway through. This two-phase cooking creates tender meat with a crispy outer finish.
Rest and serve
I let the turkey legs rest for 10–15 minutes after cooking. This allows juices to redistribute and keeps the meat moist when carving.
Temperature and Doneness Guide (Table)
Getting the internal temperature right is critical. Undercooked turkey is unsafe; overcooked turkey is dry and stringy. Below is my temperature and timing reference for different cooking methods:
| Method | Oven Temp / Power | Internal Temp Goal | Time Range | Notes |
| Oven (roasting) | 375°F / 190°C | 175–180°F / 80–82°C | 75–90 minutes | Cover early, uncover late for crisp skin |
| Skillet (pan-roast) | Medium heat | 175°F / 80°C | 25–30 min + rest | Sear then cover with lid and steam through |
| Pressure cooker | High pressure | 180°F / 82°C | 35–45 minutes | Natural release preferred |
| Microwave | High (1000W) | 175°F / 80°C | 15–18 minutes (flipped) | Use broth and steam lid, rotate halfway |
Use a meat thermometer in the thickest part of the thigh or drumstick without touching the bone. I pull turkey legs at 175°F, then rest them 10 minutes to reach ideal tenderness.
How to Cook Turkey Legs in the Oven
The oven remains my favorite method for turkey legs. It’s reliable, hands-off, and produces deep flavor and crispy skin. I’ve cooked turkey legs in ovens from restaurant convection units to cheap home models—the technique works everywhere.
First, I preheat to 375°F (190°C). I place the legs on a wire rack in a roasting pan, or directly into a Dutch oven if I’m adding broth. For crisp skin and deep browning, I roast uncovered after an initial covered phase.
I always start covered for moisture—foil or lid—for about 45 minutes. This creates steam and tenderizes the meat. Then I uncover the pan and roast an additional 30–40 minutes, basting with the pan juices every 15 minutes. The result: deep golden skin and fall-off-the-bone texture.
When I’m going for ultra-juicy results, I roast the legs low and slow at 325°F (165°C) for 2.5 hours, then broil for 5–7 minutes to finish. This is my holiday approach. When I want a faster, weeknight dinner, I stick with the 375°F method above.
No matter which way you go, oven-roasted turkey legs deliver every time—as long as you control the temperature, baste when needed, and rest the meat after cooking.
Skillet-Cooked Turkey Legs: My Pan-Roasting Technique
Cooking turkey legs in a skillet is fast and delivers bold flavor, especially when you want crisp, seared skin. I use this method when I’m cooking only one or two legs and don’t want to heat the whole oven. The trick is managing heat and moisture.
First, I season and rest the legs as usual. Then I heat a heavy-bottomed skillet (cast iron is best) over medium heat and add a splash of oil. I place the turkey legs skin-side down and sear for about 5–7 minutes until deeply browned. Then I flip and do the same on the other side.
Once both sides are seared, I reduce the heat to low, add a splash of broth or water, and cover the skillet with a lid. I let the legs steam gently for 20–25 minutes, flipping once and checking for doneness. If the liquid evaporates, I add a little more to prevent burning.
I finish by removing the lid, turning the heat back to medium-high, and basting with the pan juices until the skin tightens and caramelizes. The result is flavorful, tender meat with crisp skin and rich pan sauce—all in under 40 minutes.
Using a Pressure Cooker for Tender Turkey Legs
A pressure cooker is my go-to when I want fall-off-the-bone turkey legs in under an hour. It’s incredibly effective for tougher cuts like drumsticks, and the sealed environment locks in flavor and moisture.
I start by searing the turkey legs in the pressure cooker pot on sauté mode (or a separate pan) to develop color. Once browned, I remove the legs, deglaze the pot with a splash of broth or wine, and scrape up the brown bits—this becomes the base of my sauce.
I then return the turkey legs to the pot with 1 cup of liquid (broth, water, wine, or a combination), season again, and seal the lid. I cook at high pressure for 35–45 minutes, depending on the size of the legs. I always let the pressure release naturally—quick release can toughen the meat fibers.
The result is ultra-tender, flavorful meat that’s easy to shred or serve whole. The leftover cooking liquid makes an amazing base for gravy or rice pilaf. I use this method year-round when I want reliable, moist turkey without turning on the oven.
How to Cook Turkey Legs in the Microwave (Yes, You Can)
It might sound unusual, but I’ve cooked turkey legs in a microwave with solid results—especially when short on time. It works best with smaller legs or precooked ones, and it requires steam and patience.
I use a microwave-safe covered dish, like a glass casserole with a lid or a silicone steam tray. I place the seasoned turkey leg in the dish with about ½ cup of broth, cover it, and microwave on high power (1000W) for 8–9 minutes per pound, flipping halfway.
To prevent drying, I let the turkey rest for 5 minutes covered after cooking. I check the internal temp with a thermometer—if it’s below 175°F (80°C), I continue in short 2-minute bursts. This method steams rather than roasts, so the texture is moist but lacks crisp skin.
To improve flavor, I finish the leg under a broiler or in a hot skillet for a few minutes to build a crust. Microwave cooking isn’t perfect, but in a pinch, it gets the job done—and it’s useful for quick meal prep or reheating cooked turkey legs.
Common Mistakes When Cooking Turkey Legs
I’ve seen—and made—every mistake in the book with turkey legs. The most common is overcooking, especially when trying to brown the skin. People forget that dark meat keeps cooking after it’s removed from heat. I recommend pulling turkey legs when they hit 175°F, not 190°F.
Another mistake is not seasoning enough. Turkey legs have thick skin and muscle structure, so flavor doesn’t penetrate unless you’re generous. I often add both a dry rub and herbs under the skin to make sure the taste comes through.
Skipping rest time is another big one. If you cut into a leg right out of the oven or skillet, juices will run out and leave the meat dry. I always rest them for at least 10 minutes under foil.
Also, don’t forget to adjust for size. Some turkey legs are massive and take much longer to cook. If one leg is larger than the other, it needs its own attention. I use a thermometer—not guesswork—to guide me.
Lastly, people often skip moisture when roasting or microwaving. A dry oven or microwave chamber will suck the moisture right out of the meat. Even a half cup of broth in the pan goes a long way.
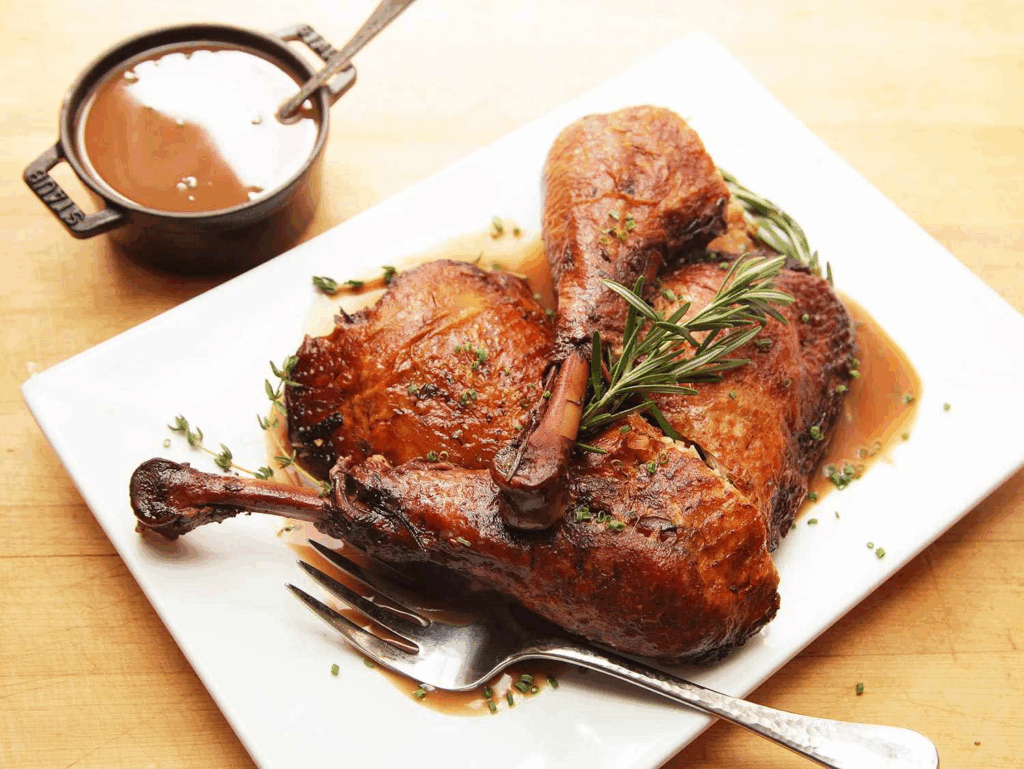
Best Sauces and Gravies for Turkey Legs
Great turkey legs deserve great sauces. I always match the sauce to the cooking method. For roasted legs, I use a pan gravy made with drippings, flour, and broth. After removing the legs, I whisk flour into the hot fat, deglaze with broth, and simmer until thickened. A splash of cream or wine elevates it even more.
For pressure-cooked turkey, I love a herbed butter sauce. I reduce the cooking liquid, add chopped rosemary and thyme, then whisk in cold butter until glossy. This brings richness and depth, especially if the turkey will be served over mashed potatoes or rice.
With skillet-cooked legs, I often deglaze the pan with balsamic vinegar or white wine, then stir in Dijon mustard and a spoonful of honey. This creates a sweet-savory glaze that clings to the skin.
When I want bold flavor, I make a spicy glaze with hot sauce, maple syrup, and garlic, brushed on during the final minutes of cooking. It caramelizes beautifully under the broiler and brings heat without overpowering the turkey’s natural taste.
In every case, the sauce should enhance—not mask—the flavor of the leg. With the right match, turkey legs can feel as elevated as any prime cut of meat.
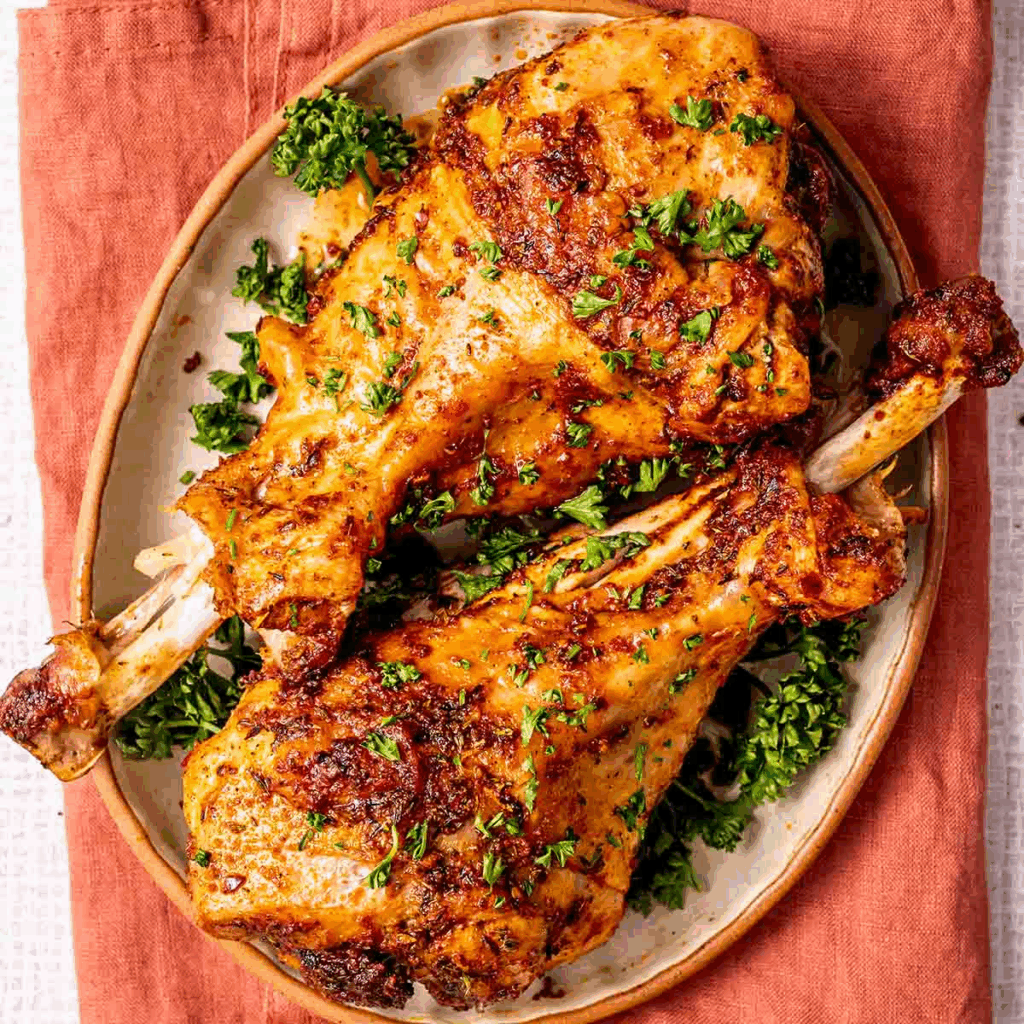
My Favorite Seasonings and Spice Blends
Seasoning turkey legs isn’t just about salt and pepper—although those are essential. Because the meat is dense and flavorful on its own, it responds beautifully to spice blends that build slowly as it cooks.
For a classic roast, I love a Mediterranean rub: sea salt, garlic powder, dried oregano, thyme, and a touch of lemon zest. This blend enhances the natural richness of the meat without overpowering it. I often add fresh rosemary sprigs under the skin or in the pan.
When I want something bolder, I reach for a Cajun mix—paprika, cayenne, garlic, onion, black pepper, and a bit of brown sugar. This is perfect for grilling or skillet-roasting. I’ve also used it with success in the pressure cooker when paired with broth and a splash of vinegar.
Another favorite is my smoky BBQ rub, especially when I’m finishing turkey legs on the grill. I combine smoked paprika, cumin, brown sugar, black pepper, and mustard powder. This rub caramelizes beautifully and works with both dry heat and liquid-based methods.
For global twists, I use ras el hanout for Moroccan-style turkey or five-spice powder for an Asian-inspired version. Both add complex depth and pair well with sauces made from yogurt or soy-based reductions.
Whatever blend I choose, I always season heavily—the skin is thick, and the meat can take it. And for deeper penetration, I rub the seasoning in a few hours ahead or overnight when time allows.
Variations and Recipe Ideas for Turkey Legs
Turkey legs are incredibly versatile, and once you master the basic methods, you can branch out into dozens of variations. Here are some of my favorites that I’ve used both at home and in restaurant kitchens.
For a fall dinner, I often go with apple cider-braised turkey legs, cooked low and slow in a Dutch oven with apples, onions, and rosemary. The sweet and savory balance is perfect for a cozy plate of mashed potatoes or roasted squash.
For something bold, I make buffalo-style turkey legs. I roast them until nearly done, then baste with a mix of hot sauce and melted butter, and finish under the broiler. They’re a hit at parties—especially served with blue cheese dip and celery.
If I want something rich and decadent, I prepare confit turkey legs. I slow-cook the legs submerged in duck fat or olive oil with garlic and herbs at low heat for several hours. The meat becomes unbelievably tender and flavorful, and the skin crisps perfectly in a hot pan.
For lighter meals, I shred roasted turkey leg meat and use it in tacos, flatbreads, or grain bowls. The flavor is deeper than chicken, and the texture is perfect for soaking up sauces or vinaigrettes.
The possibilities are endless. Once you get comfortable with the basics, turkey legs become a reliable canvas for any flavor profile you want to explore.
Serving, Storing, and Reheating Turkey Legs
Serving turkey legs is straightforward, but there are a few tricks I use to keep the texture perfect from oven to plate. First, I always let the legs rest for 10–15 minutes, lightly tented with foil. This keeps juices inside and makes slicing or serving cleaner.
When serving whole legs, I like to offer a small bowl of sauce or gravy on the side. If I’m shredding the meat, I mix it gently with the pan juices or a bit of olive oil to keep it moist.
For storing, I cool the legs completely and wrap them tightly in foil or place in an airtight container. In the fridge, they last up to 4 days. For longer storage, I freeze them whole or shredded for up to 2 months. I label everything by date and include a note on whether it’s cooked with sauce or dry.
Reheating turkey legs can be tricky. My preferred method is low oven heat (300°F/150°C) for 20–25 minutes, covered with foil. I add a splash of broth or water to the tray to keep the meat from drying out. In a rush, I’ll use the microwave, covered with a damp paper towel on medium power, flipping halfway. It works well, though the skin softens.
If the skin needs reviving, I finish the reheated leg in a hot skillet for 2–3 minutes, which brings back texture and fresh aroma.
FAQ: Turkey Legs — 15 Questions Answered by a Chef
What’s the best way to cook turkey legs so they stay juicy?
From my experience, slow roasting with some moisture—either covered in a Dutch oven or wrapped in foil—is the most forgiving and flavorful method. I also recommend a brief rest period after cooking. I’ve ruined great meat by slicing too early and losing the juices. Let it rest, and you’ll taste the difference.
Do I have to brine turkey legs before cooking?
You don’t have to, but I highly recommend it if you have the time. I’ve brined turkey legs for as little as 2 hours and noticed a real improvement in moisture. A simple salt-and-sugar solution works, or even dry-brining overnight in the fridge with kosher salt and herbs does wonders.
What internal temperature should I cook turkey legs to?
I always aim for 175–180°F (80–82°C) in the thickest part without touching the bone. I’ve tested dozens of times, and pulling them out at 175°F, then resting, gives the best results—juicy, tender, and safe.
Why does my turkey leg come out dry or stringy?
Overcooking is usually the culprit, especially at high heat or uncovered. I recommend using a meat thermometer every time. Also, don’t skip the resting period after cooking. That alone will save you from dry meat more often than not.
Can I cook turkey legs in the microwave?
Yes, though I only use this method for speed or reheating. I’ve steamed smaller legs in a covered dish with broth, and they came out tender—but not crisp or deeply flavorful. It works in a pinch, but nothing beats oven roasting or pressure cooking.
How do I get crispy skin on turkey legs?
I use a two-phase method: roast covered first to cook the meat, then finish uncovered at high heat or under the broiler. If I’m pan-cooking, I sear the skin hard at the end. The key is drying the skin thoroughly before cooking—moisture ruins the crisp.
What’s your favorite seasoning blend for turkey legs?
I always come back to smoked paprika, garlic powder, thyme, and kosher salt. That blend works across oven, skillet, and grill. When I want something bold, I switch to Cajun or ras el hanout. I recommend trying your favorite chicken rub first—just go heavier.
Are turkey legs better fresh or frozen?
Fresh is always best, especially for skin texture and even cooking. But frozen works just fine if fully thawed. I always thaw mine in the fridge for 24–36 hours, then pat dry and let them sit at room temp for 30 minutes before seasoning.
Can I cook turkey legs ahead of time and reheat them later?
Absolutely, and I do this a lot during holidays or meal prep. I roast or braise them a day in advance, then reheat covered in a low oven with a splash of broth. They reheat beautifully and often taste better the next day.
What can I serve with turkey legs?
I love pairing them with mashed potatoes, roasted vegetables, or rice pilaf. For sauces, I rotate between gravy, herb butter, or a sweet-spicy glaze. If I shred the meat, I use it in tacos, wraps, or even pasta. It’s very flexible.
How do I keep turkey legs from sticking in the skillet?
Preheat your pan, use enough fat (like oil or butter), and let the skin release naturally. Don’t force it. I’ve torn plenty of skins by flipping too early. Wait until the skin lifts cleanly, then flip—it usually takes 5–7 minutes on medium heat.
Can I cook turkey legs in the air fryer?
Yes, and I’ve had great results with smaller legs. I cook them at 350°F (175°C) for 25–30 minutes, flipping once, and use foil to keep the meat moist if needed. The skin crisps beautifully, especially with a thin layer of oil rubbed on beforehand.
What liquid should I use when braising turkey legs?
I like to mix chicken or turkey broth with wine, cider, or even orange juice depending on the flavor profile. A splash of vinegar helps balance richness. I avoid too much liquid—just enough to come halfway up the meat is ideal.
Why do my turkey legs sometimes have a gamey flavor?
That usually comes from older or poorly stored meat. I minimize this by brining and seasoning aggressively. Fresh herbs, citrus, garlic, and vinegar-based marinades help a lot. Also, never skip the browning stage—it neutralizes that flavor fast.
What’s your personal favorite turkey leg recipe?
Roasted legs with smoked paprika, garlic, and thyme, basted in pan juices, then served with Dijon mustard sauce. I’ve made it dozens of times, and it never fails. It’s rustic, rich, and satisfying—everything a turkey leg should be.


Post Comment