How to Cook Thin Pork Chops
How to Cook Thin Pork Chops: Guide to Juicy, Flavorful Results Every Time

Cooking thin pork chops may seem easy at first glance—they cook fast, they’re affordable, and they’re everywhere. But I’ve seen more chops ruined in home kitchens because people underestimate how delicate they are. With less than an inch of thickness, there’s zero margin for error when it comes to temperature, timing, and moisture.
- Why Thin Pork Chops Are Tricky but Worth It
- Understanding Thin Pork Chops: What You’re Working With
- Prepping Thin Chops for Success
- Essential Ingredients and Tools for Cooking Thin Pork Chops
- Skillet Method: Searing Thin Pork Chops Without Drying Them
- Oven Method: How to Bake Thin Pork Chops for Moisture Control
- Broiling or Grilling: Intense Heat with Watchful Timing
- Temperature and Time Table for Thin Pork Chops
- Cooking Thin Pork Chops in the Pressure Cooker
- Microwave Technique: Emergency Cooking with Texture Awareness
- Common Mistakes with Thin Pork Chops
- Best Sauces for Thin Pork Chops
- Seasoning Tips for Thin Pork Chops
- Recipe Variations: Breaded, Glazed, and Pan-Finished
- Serving Thin Pork Chops with Intention
- Storage and Reheating: How to Keep Them Tasty Later
- FAQ

Why Thin Pork Chops Are Tricky but Worth It
That’s exactly why I love working with them. Thin chops demand precision and reward you with quick, satisfying results when done right. In busy kitchens, they’re the go-to protein when time is tight and flavor still matters.
Common issues with thin cuts
The biggest problem? Overcooking. These chops can go from juicy to dry in under a minute. And since many are pre-trimmed and lean, they lack the built-in fat that protects them. Without proper prep, searing, and resting, you’ll end up chewing instead of savoring.
Why I cook them often anyway
They’re fast. They’re versatile. And when I want to make dinner in 15 minutes or less, thin chops are my protein of choice. With a good crust, balanced seasoning, and the right internal temperature, they can be just as rewarding as thick cuts—and even better for sandwiches, salads, and meal prep.
Understanding Thin Pork Chops: What You’re Working With
Not all thin pork chops are the same. Depending on the cut, thickness, and whether they include bone, the cooking approach changes. The key is knowing what you’re handling before you season or heat your pan.
Bone-in vs boneless thin chops
I use both, but for different reasons. Boneless chops are quicker and easier to trim, but they dry out faster. Bone-in thin chops retain more moisture and flavor during cooking. The bone acts as insulation, and they often have a better texture after searing or baking.
If you’re shopping, choose bone-in for flavor, boneless for speed and uniform cooking. Both will work well—just adjust the cooking time accordingly.
Ideal thickness and butcher selection
The perfect thin chop, in my opinion, is about ½ inch thick. Anything thinner is difficult to sear without overcooking; thicker ones may behave more like regular chops. I avoid cuts under ¼ inch unless I’m planning to fry them Milanese-style.
When possible, I ask the butcher to cut fresh chops to ½ inch and include a thin fat cap for added moisture. That little detail makes a big difference on the plate.
Prepping Thin Chops for Success
Great pork chops begin before the heat ever touches them. Preparation is about more than seasoning—it’s about setting the meat up to retain flavor, moisture, and tenderness.
Trimming and drying
Even thin chops can have uneven fat or silver skin. I trim only what will prevent even searing—no more. Then I dry the surface thoroughly with paper towels. A dry surface equals a better crust. If the meat is too wet, it will steam, not sear.
Before cooking, I let the chops sit at room temperature for 10–15 minutes to reduce the shock of going from fridge to heat. This simple step improves texture and consistency across the entire cut.
Should you brine or marinate?
If I have time, I’ll dry brine the chops with salt at least 30 minutes before cooking. Just a sprinkle on both sides draws moisture to the surface, which then reabsorbs, seasoning the interior.
For even more flavor, I sometimes use quick marinades with acid and aromatics—lemon juice, garlic, olive oil, or soy. But with thin chops, 15–30 minutes is the limit. Any longer and you risk mushy, over-softened texture.

Essential Ingredients and Tools for Cooking Thin Pork Chops
- Thin pork chops (boneless or bone-in, ½ inch thick)
- Kosher salt
- Cracked black pepper
- Garlic powder
- Smoked paprika or chili powder (optional)
- Olive oil or neutral oil (avocado, grapeseed)
- Unsalted butter (for basting)
- Cast iron or stainless-steel skillet
- Tongs or fish spatula
- Digital meat thermometer
- Paper towels
- Aluminum foil (for resting)
Skillet Method: Searing Thin Pork Chops Without Drying Them
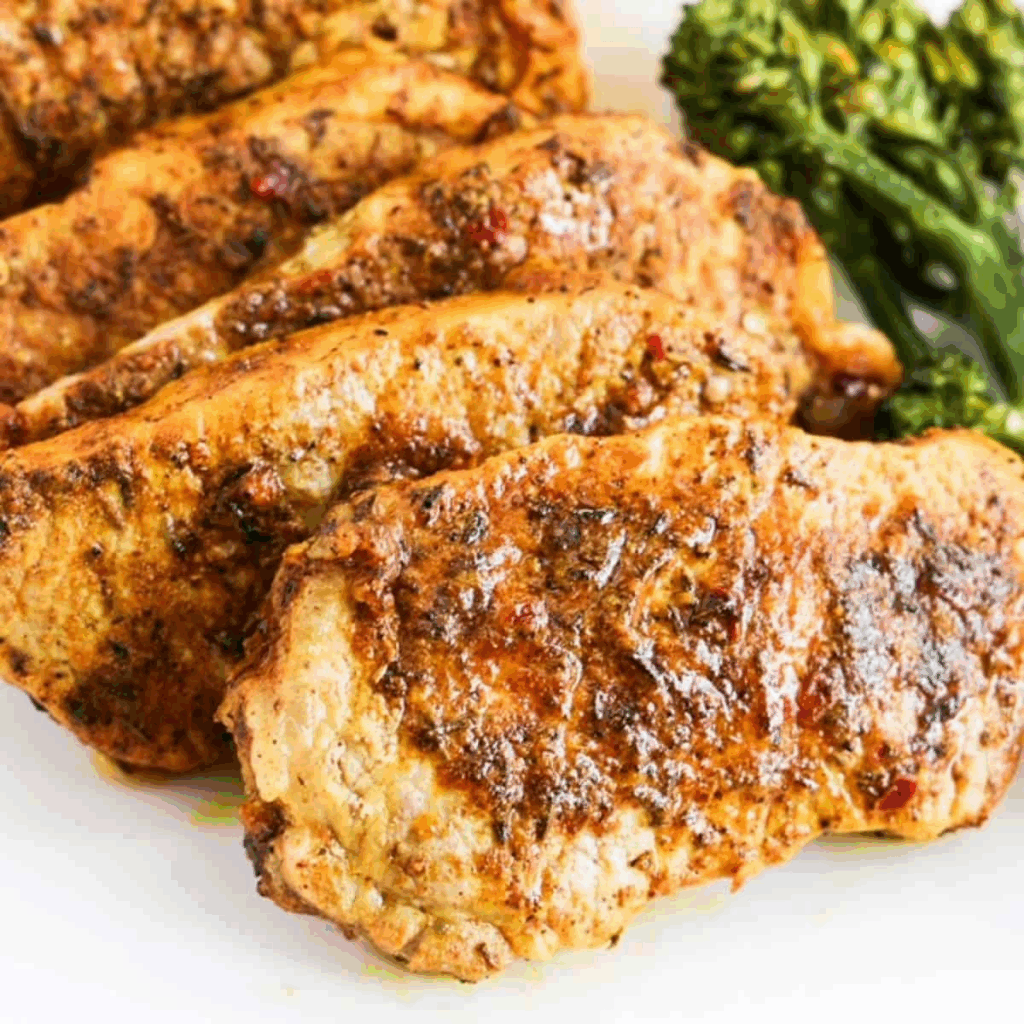
Cooking thin pork chops in a skillet is my default method. It gives me full control over heat, crust formation, and internal doneness. I start by preheating a cast iron or stainless-steel pan over medium-high heat until the surface just begins to smoke. I add a thin layer of oil and gently place the seasoned chops down, laying them away from me to avoid splatter.
Heat management and fat choice
Because thin pork chops cook so quickly, high heat must be tempered. I use a high-smoke-point oil—grapeseed or avocado—so it doesn’t burn before the crust sets. Once the first side is golden brown, I flip and immediately lower the heat slightly. If I’m feeling indulgent, I add a pat of butter, garlic, and herbs at the end and baste for 30 seconds.
When to flip and when to pull
I flip the chop when the edges are browned and the meat easily releases from the pan—usually 2 to 3 minutes per side. I monitor the internal temperature carefully, aiming to pull the meat at exactly 140°F (60°C). Then I let it rest, tented with foil, for 3 to 5 minutes. During that time, it climbs to a juicy, safe 145°F (63°C) without overcooking.

Oven Method: How to Bake Thin Pork Chops for Moisture Control
Baking thin pork chops can be risky, but when I want hands-off cooking, it works—especially for larger batches. I preheat the oven to 400°F (205°C) and place the chops on a lightly oiled baking tray lined with foil or parchment.
Covered vs uncovered
If I want to preserve moisture, I cover the tray loosely with foil for the first 8 minutes, then uncover and broil for a short time to develop a crust. For seasoned breaded chops, I bake uncovered the whole time for maximum browning. The key is not letting them stay in too long—12 to 14 minutes total is usually enough for ½-inch chops.
Best temp for doneness without toughness
I bake until the internal temperature hits 140°F (60°C), then rest the meat out of the oven until it reaches 145°F (63°C). Any higher and you’ll lose the juiciness that makes thin chops worth cooking in the first place.
Broiling or Grilling: Intense Heat with Watchful Timing
Broiling and grilling are great for getting color and char fast—but with thin chops, timing is everything. I preheat the broiler or grill fully and place the chops about 4 to 6 inches from the flame or coals. The meat needs intense heat, but only for a short burst.
How to avoid burning
I lightly oil the chops and season them just before cooking to avoid burning dry spices. For a gas broiler or indoor grill, I use a wire rack over a tray to allow airflow underneath. Cooking time is typically 2 to 3 minutes per side. I never walk away—thin pork under a broiler can overcook in seconds.
How I manage crust without overcooking
If I want that grilled flavor without dryness, I sometimes sear on the grill or under the broiler, then finish the chops on indirect heat or move them to a lower rack. I always check with a thermometer and let the pork rest for a few minutes before slicing or serving.

Temperature and Time Table for Thin Pork Chops
I’ve cooked thousands of thin pork chops and found that accuracy matters more than guesswork. This chart is what I use in both home and professional kitchens:
| Thickness | Method | Temp (°F/°C) | Cook Time | Internal Temp | Resting Time |
| ½ inch | Skillet | Med-high heat | 2–3 min/side | 140°F / 60°C | 3–5 min |
| ½ inch | Oven | 400°F / 205°C | 12–14 min | 140°F / 60°C | 5 min |
| ½ inch | Broiler | 500°F+ / 260°C+ | 2–3 min/side | 140°F / 60°C | 3–5 min |
| ½ inch | Pressure Cook | High (manual) | 1 min + rest | 145°F / 63°C | Quick release |
| ½ inch | Microwave | 50–60% power | 3–4 min total | 135–140°F | 2 min |
Cooking Thin Pork Chops in the Pressure Cooker
Using a pressure cooker for thin pork chops is unusual, but in certain scenarios—especially with bone-in cuts and flavor-rich liquids—it works surprisingly well. I don’t recommend it for searing or dry rub-focused recipes, but for saucy dishes or bulk cooking, it’s reliable.
Why it works better for bone-in
Bone-in thin chops hold together better under pressure. I layer them in the pot with a small amount of flavorful liquid—broth, wine, apple cider—and aromatics like garlic, onion, or mustard. The bone acts like a structural guide, preventing the meat from collapsing.
Boneless chops can become overly soft, so I only use them here when I plan to shred or dice them after cooking.
Short cooking with flavor infusion
I pressure cook thin chops on high for 1 minute, then let the pressure release naturally for 3 to 5 minutes. That’s all it takes to infuse flavor and fully cook the pork to a safe, tender finish. I remove them gently and let them rest for a few minutes before serving or saucing.

Microwave Technique: Emergency Cooking with Texture Awareness
Cooking thin pork chops in the microwave isn’t my first choice—but I’ve done it when I had nothing else, and it can work. The key is low power, moisture retention, and never overcooking.
Avoiding rubberiness
Microwave heat is uneven. I always place the chops in a shallow dish with a splash of broth or even a dab of butter. I cover the dish with a microwave-safe lid or wrap it loosely with plastic to trap steam.
Then I cook on 50–60% power for about 3 minutes, flip the chop, and cook for 1 to 2 minutes more. I check for doneness with a thermometer. Anything over 145°F starts to toughen rapidly.
My recommendations for power level and cover
Never use full power—it shocks the meat and dries the edges. A lower setting allows gradual heating, and covering with moisture helps the texture stay tender. Once cooked, I rest the chop for 2 minutes and drizzle it with oil, lemon, or sauce to rehydrate and boost flavor.
Common Mistakes with Thin Pork Chops
Thin pork chops are often misunderstood. They’re not just smaller versions of thick cuts—they’re a completely different cooking challenge. The biggest mistake I see is treating them like thick chops, assuming more time equals better flavor. It doesn’t. Thin chops cook fast, and every second matters.
The most common error is overcooking. People often wait for a deep crust or clear internal cues, but by the time you see them, the pork is already dry. I always recommend using a thermometer and pulling the chop when it reaches 140°F (60°C), then letting it rest until it reaches 145°F (63°C). That short resting period is not optional—it’s the difference between tough and tender.
Another common mistake is poor pan control. Overheated pans burn seasonings and cause uneven browning. I make sure the pan is hot—but not smoking—before the meat goes in. And I don’t overcrowd the pan; steam kills crust.
Then there’s blandness. Thin chops have little fat, so you need seasoning to compensate. Salt, pepper, and something aromatic like garlic powder or rosemary are essential. Don’t assume the pork’s natural flavor will carry it—it won’t.
Best Sauces for Thin Pork Chops
Sauces are my favorite way to elevate a simple thin chop. Because the meat cooks so fast, the flavor window is small. A good sauce not only enhances the meat but also brings balance and depth to the plate.
One of my go-to sauces is Dijon cream. I deglaze the skillet with a splash of white wine or broth, whisk in some Dijon mustard and cream, and reduce it until it clings to the back of a spoon. This rich, tangy sauce is perfect for seared or pan-fried chops.
When I want something brighter, I reach for apple cider glaze—cider, apple cider vinegar, honey, and thyme reduced until syrupy. It brings acidity and sweetness that complements the lean meat.
If I’m in the mood for bold flavor, garlic-chili butter or a pan jus with balsamic reduction makes the chop feel restaurant-worthy. These sauces don’t overpower—they carry the meat. I always sauce after cooking, not during. That keeps the meat’s texture crisp and the flavor clean.
Seasoning Tips for Thin Pork Chops
Seasoning thin pork chops is about timing and contrast. These cuts are lean, fast-cooking, and mild in flavor—so they need help. I build flavor from the surface inward, starting with salt.
I always season with kosher salt at least 10–15 minutes before cooking, allowing time for the salt to start penetrating. This creates better flavor without moisture loss. On top of that, I add black pepper, garlic powder, and a touch of smoked paprika or chili powder, depending on the flavor profile I want.
For chops going into the oven or pan, dry rubs with spice work great. For those going into foil or pressure cooking, I prefer using wet rubs or marinades. I keep them short—no more than 30 minutes—because acid can break down the meat’s structure too quickly.
One tip I share with new cooks: don’t overseason. Thin chops have less volume, so strong rubs can overpower them. Focus on balance, not boldness.
Recipe Variations: Breaded, Glazed, and Pan-Finished
Thin pork chops are blank canvases. I love how easy it is to adapt them for different cuisines, weeknight meals, or leftover-friendly dishes. The key is fast cooking followed by smart finishing.
One of my favorite styles is Parmesan-breaded chops. I dip the chop in flour, then egg, then a mix of panko and grated cheese. I pan-fry over medium heat in shallow oil until both sides are golden. It gives incredible texture and is perfect with a lemony salad.
For glazed chops, I sear the meat, then brush on a glaze made of maple syrup, mustard, and cider vinegar, letting it reduce in the skillet. The sugars caramelize and create a sticky, flavorful finish that clings without burning.
For something lighter, I serve chops with a fresh gremolata—parsley, lemon zest, garlic, and olive oil—and let the brightness cut through the richness of the meat. I also use leftovers for fried rice, breakfast sandwiches, or grain bowls.
Serving Thin Pork Chops with Intention
A perfectly cooked chop deserves more than a casual toss on the plate. I like to plate thin pork chops with thought—contrasting textures, colors, and temperatures. Even a simple meal looks and tastes better when arranged with care.
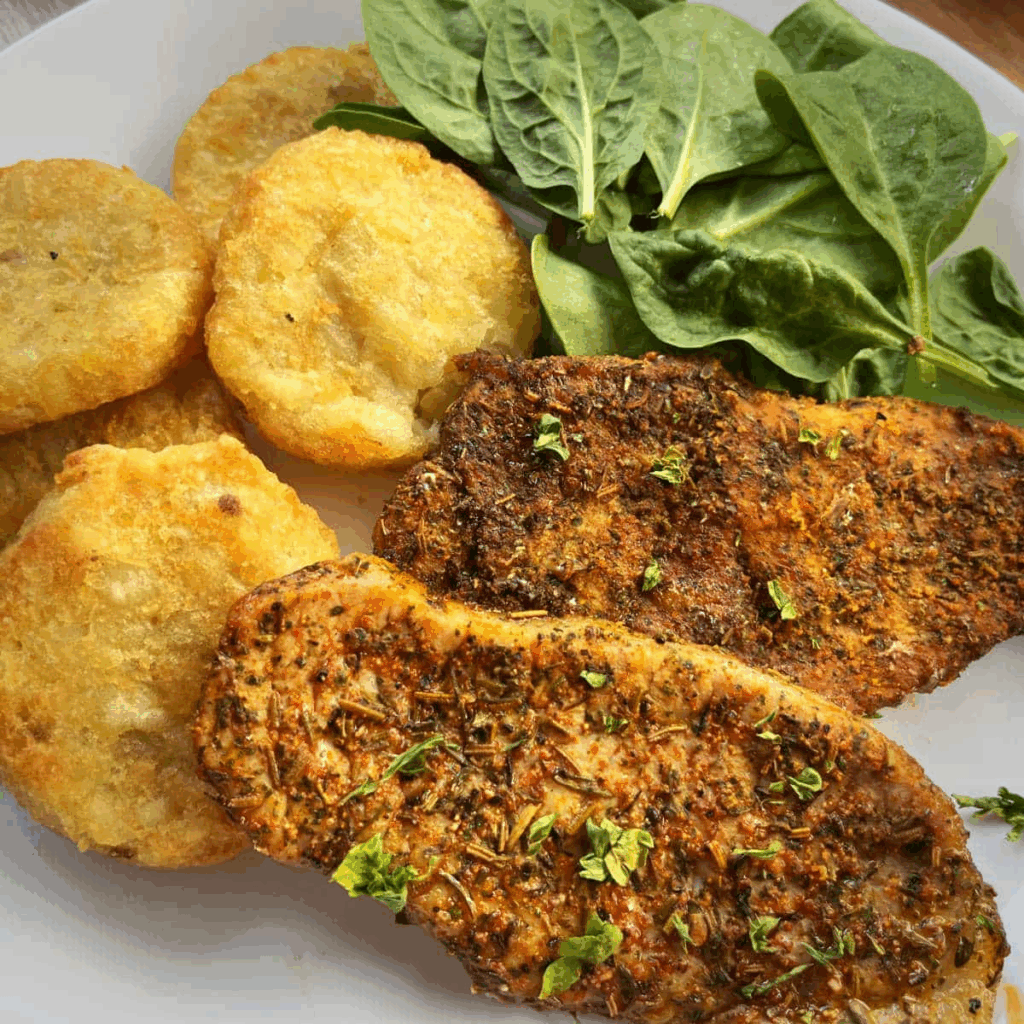
When I serve chops with a starch like mashed potatoes, couscous, or risotto, I prop the meat slightly on the side of the mound. This keeps the bottom from getting soggy and makes the plate look layered.
For contrast, I like to include a bright salad or sautéed greens. Something acidic—pickled onion, vinaigrette, or fresh citrus zest—adds a high note to the savory chop. I often spoon the sauce around or under the chop rather than on top so it doesn’t drown the crust.
Garnishing matters. A sprig of thyme, a dusting of pepper, or a swirl of oil tells the diner that the plate was composed, not thrown together. That intention translates directly to flavor perception.
Storage and Reheating: How to Keep Them Tasty Later
Thin pork chops don’t reheat well if mishandled. Their small size means they lose moisture fast, so I treat them gently when storing and even more carefully when warming them up.
In the refrigerator, I store cooked chops in a shallow container lined with parchment. This prevents sticking and sogginess. I don’t stack them unless I separate each one with a sheet of paper or foil. They’re best eaten within 2 to 3 days.
For freezing, I wrap each chop in parchment and then seal them in freezer bags, removing as much air as possible. They hold up for about 1 month. Thaw slowly in the fridge before reheating to avoid texture loss.
When reheating, I skip the oven. I use a skillet over low heat with a splash of broth or butter, covered to trap steam. The microwave is a backup option—I use 50% power and short intervals, always covered, and stop once warm. I finish with fresh herbs, lemon, or sauce to bring life back to the dish.
FAQ
What’s the best cooking method for thin pork chops?
I recommend pan-searing in a hot skillet if you’re aiming for flavor and speed. It allows you to develop a crust while keeping the interior juicy. For batch cooking or convenience, oven baking works too, but I find the skillet gives you the most control over timing and texture.
How do I keep thin pork chops from drying out?
I always pull them from heat at 140°F and let them rest to 145°F. The rest period is essential. I also make sure not to overcook the second side—thin chops only need 2–3 minutes per side in most cases. Moisture retention starts with proper timing.
Should I marinate thin pork chops?
Yes, but only briefly. I recommend 15 to 30 minutes maximum. Acidic marinades can break down the meat too much. A quick mix of oil, lemon juice, garlic, and herbs works well. Always dry the surface before cooking to help sear properly.
Is it better to cook bone-in or boneless thin chops?
Bone-in chops tend to stay juicier and cook more evenly. I reach for them when I want better flavor and don’t mind trimming around the bone. Boneless are convenient and faster to cook, but you have to be extra careful not to dry them out.
Can I cook thin pork chops in the oven without drying them?
Yes, but only if you manage time and temperature precisely. I bake them at 400°F for 12–14 minutes max and always tent with foil for a few minutes afterward. If you overcook even slightly, they turn rubbery fast.
What internal temperature should I aim for?
I always pull them from heat at 140°F (60°C) and let them rest until they hit 145°F (63°C). That’s the USDA-recommended safe temp for pork, and it’s also when the meat is at peak juiciness.
How do I get a good sear without overcooking the inside?
I dry the chops thoroughly, season well, and preheat the pan until just barely smoking. Then I sear over medium-high heat and reduce the flame once I flip the chop. Butter basting at the end adds flavor and prevents dryness.
Can I bread thin pork chops?
Absolutely. I recommend a light dredge in flour, egg, and seasoned breadcrumbs or panko. Fry over medium heat until golden—usually 3 minutes per side. It adds crunch without masking the meat if done right.
What kind of sauces pair best with thin pork chops?
Lighter sauces like Dijon cream, cider glaze, garlic butter, or herb vinaigrettes work best. I avoid anything too heavy or sweet unless I’m balancing it with acid. I usually sauce after cooking, not before, to protect the crust.
How should I reheat leftover thin pork chops?
I recommend gently reheating in a covered skillet with a splash of broth or butter. In the microwave, use 50% power in 30-second bursts, covered. Add sauce, herbs, or citrus to refresh the flavor. Never reheat to piping hot—it dries the meat instantly.
Why do my chops curl or cook unevenly?
That’s usually because of residual tension in the muscle or uneven heat. I sometimes make a small slit in the fat edge to prevent curling. Also, always let the chops come to room temperature for 10–15 minutes before cooking.
Can I grill thin pork chops?
Yes, but they cook fast—often under 5 minutes total. I oil the grates well and flip only once. I also keep them away from direct flame to avoid charring the edges before the interior is done. Thinner cuts need close attention on the grill.
What’s the best way to season them simply?
You can’t go wrong with kosher salt, cracked black pepper, garlic powder, and smoked paprika. It’s simple, fast, and makes any sauce or side pair well. I always season 10 minutes before cooking to give the salt time to draw into the meat.
How can I make thin pork chops more flavorful without overcomplicating things?
A quick marinade, a hot sear, a proper rest, and a drizzle of something fresh—like lemon juice or pan jus—does the trick. I also rely on the pan itself: fond (browned bits) becomes instant sauce when deglazed with wine or stock.
What’s your favorite way to serve thin pork chops?
I love pairing them with something creamy and something acidic. Mashed potatoes and mustard vinaigrette, or couscous and apple slaw. I plate with contrast in mind and always finish with fresh herbs or citrus zest—it brings everything together.


Post Comment