How to Cook Quick Oats
How to Cook Quick Oats: Guide to Fast, Flavorful Oatmeal Every Time

Quick oats may sound like a basic breakfast, but there’s real technique in transforming them from bland to brilliant. In my kitchens, I treat oats with the same respect as risotto or grains—cooking time is short, but flavor development is key. In this guide, I’ll show you how to cook quick oats with precision, using every method from microwave to stovetop and beyond.
- What Are Quick Oats and How Do They Differ from Other Oat Types
- Choosing the Right Quick Oats for Your Kitchen
- Do You Need to Rinse or Soak Quick Oats?
- Ingredients and Tools You’ll Need
- How to Cook Quick Oats on the Stovetop
- Cooking Quick Oats in the Microwave
- Making Quick Oats in a Pressure Cooker or Instant Pot
- Skillet Method: Dry Toasting and Liquid Pour Over
- Baking Quick Oats in the Oven for Breakfast Casseroles
- Time and Temperature Chart for All Cooking Methods
- Flavor Enhancers: Spices, Sweeteners, and Salts
- Creative Mix-Ins for Texture and Nutrition
- Common Mistakes When Cooking Quick Oats
- Serving Ideas: From Classic Bowls to Oatmeal Jars
- How to Store and Reheat Cooked Quick Oats
- Recipe Variations Using Quick Oats
- FAQ: 15 Real Questions About Cooking Quick Oats — Answered by a Chef
What Are Quick Oats and How Do They Differ from Other Oat Types
Quick oats are whole oats that have been steamed longer and rolled thinner than traditional rolled oats. This extra processing dramatically shortens the cooking time, making them ideal for fast meals or bulk prep in commercial settings. But that convenience comes with trade-offs—namely, a more delicate texture and less structure in the final bowl.
Processing, texture, and cook time
Unlike steel-cut oats, which are simply chopped groats, or rolled oats, which are thicker flakes, quick oats have a much finer surface area. This allows them to absorb water rapidly and soften within 1–3 minutes on the stove or under microwave heat. The result is a smooth, creamy texture—ideal for people who prefer porridge-style oats or want to blend in fruit, seeds, or protein powder.
Because of their thinness, quick oats don’t hold their shape as well under aggressive cooking. They can turn mushy if you overheat or overhydrate them. That’s why understanding water ratios, cooking time, and method is so important.
Why chefs choose quick oats for speed
In busy kitchens, timing matters. When I’m prepping breakfasts for 10+ guests or loading meal prep containers for catering, quick oats let me create high-quality, consistent bowls in under five minutes. They’re also perfect for infusions—quick oats absorb flavor from cinnamon, maple syrup, or fruit much faster than steel-cut oats.
While I still use other oat types for specific textures (steel-cut for chewy, rolled for hearty), quick oats are my go-to when time and creaminess are top priorities.
Choosing the Right Quick Oats for Your Kitchen
Not all quick oats are created equal. Some are made for convenience with added sugars or flavors, while others stay close to the pure grain. Knowing which one to use depends on your culinary goal: classic porridge, overnight jars, or baked oat recipes.
Instant vs quick oats
Quick oats are often confused with instant oats, but they’re not the same. Instant oats are pre-cooked and dehydrated, often with added preservatives, sugars, and flavorings. They’re best for camping or travel, but I rarely use them in a chef’s kitchen due to their tendency to dissolve into paste when heated.
Quick oats, by contrast, still require cooking—even if briefly—and give you better control over texture and taste. They hold their own with spices, mix-ins, and savory pairings.
Organic, gluten-free, and flavored options
I’ve worked with a wide range of quick oats—from conventional supermarket brands to organic, gluten-free, and specialty blends. Organic quick oats tend to have a slightly nuttier flavor and firmer texture, while gluten-free varieties are essential when preparing for clients with celiac or gluten sensitivities (just be sure they’re certified).
Flavored oats (maple, apple cinnamon, etc.) save time for meal prep, but I prefer starting from a neutral base and adding my own controlled sweeteners and spices. This allows for versatility—savory oats with egg and cheese wouldn’t taste great with a sugar-laden base.
Do You Need to Rinse or Soak Quick Oats?
This is a common question from home cooks trying to mimic rice or quinoa techniques. The short answer: you don’t need to rinse or soak quick oats, but in some cases, soaking or blooming can enhance flavor and texture.
When pre-soaking helps (or hurts) texture
If I’m preparing overnight oats or cold oatmeal jars, I soak quick oats in milk, yogurt, or juice. This gives them a soft but chewy texture, almost pudding-like. But if I’m cooking them hot, I skip soaking. The thin flakes absorb water fast during the cook—and pre-soaking can lead to gummy or paste-like texture.
Soaking can be helpful when adding chia seeds, dried fruit, or protein powder, allowing everything to hydrate evenly without clumping.
Dry cooking vs liquid-first methods
Some chefs dry-toast quick oats briefly in a skillet before adding liquid. This builds a subtle nutty aroma and gives them a little more structure. However, I don’t do this unless I’m adding oats to something like a savory risotto-style dish or an oat-based grain bowl. In traditional porridge prep, I always start by combining oats directly with hot water, milk, or a combination of both.
Ingredients and Tools You’ll Need
Ingredients:
- ½ cup quick oats (per serving)
- 1 to 1¼ cups water, milk, or plant milk
- Pinch of salt
- Optional: cinnamon, maple syrup, fresh or dried fruit, nut butter, seeds, vanilla extract
Tools:
- Small saucepan or skillet with lid
- Wooden spoon or heatproof spatula
- Measuring cups
- Microwave-safe bowl (if using microwave)
- Pressure cooker (optional)
- Oven-safe baking dish (for oat bakes)
How to Cook Quick Oats on the Stovetop
Stovetop is my preferred method for cooking quick oats when I want complete control over texture. It’s fast, reliable, and easy to scale whether I’m cooking one bowl or six.
Simmering technique for ideal consistency
I start by bringing 1 cup of liquid per ½ cup of quick oats to a light simmer in a small saucepan. You can use water, milk, or a 50/50 blend depending on whether you’re going for richness or a lighter result. Once simmering, I add the oats and stir constantly for the first 30 seconds to prevent clumping.
I reduce the heat to low and let the mixture gently simmer, stirring every 15–20 seconds for 1.5 to 2.5 minutes, until the oats are soft but not broken down. The goal is creamy texture, not glue. Once thickened, I remove from heat and let it sit covered for another minute to finish hydrating and firm slightly.
Stirring, foaming, and timing
Quick oats foam quickly when cooked with milk, especially at high temperatures. I keep a close eye in the first 60 seconds and lower the heat immediately if the foam starts rising. Stirring regularly helps break bubbles and avoids scorching at the bottom of the pan. I taste a small spoonful before removing from heat—it should be silky but not overly runny.
For extra protein or mix-ins (like peanut butter or mashed banana), I stir them in after the oats are cooked to avoid throwing off hydration or overheating the fats.
Cooking Quick Oats in the Microwave
Microwaving quick oats is a go-to in professional meal prep and busy households because of the time savings. But it’s also where texture can easily go wrong if you don’t account for expansion and spill-over.
Power levels and container size
I use a microwave-safe bowl that’s at least twice the volume of the ingredients to prevent spill-over. For one serving, I mix ½ cup oats with 1 cup water or milk and a pinch of salt. I microwave uncovered at 70–80% power for 90 seconds, then stir, and microwave again for 30–45 seconds more until thickened.
Using lower power settings prevents boiling over and allows gradual hydration. When cooking more than one portion, I extend time in 30-second bursts and always stir between rounds.
How to prevent overflow and gummy texture
To avoid overflow, I place the bowl off-center and leave a wooden spoon or chopstick across the top (a trick that helps break surface tension). I never cover the bowl—steam buildup leads to foaming and spills.
For better consistency, I stir halfway through, even pausing the microwave manually. Once done, I let the oats rest for one minute to allow the starches to settle. Adding nut butter, cinnamon, or syrup during rest, rather than during cooking, keeps flavors intact and texture smooth.
Making Quick Oats in a Pressure Cooker or Instant Pot
Using a pressure cooker for quick oats might sound like overkill, but for batch prep or when I want to infuse deep flavor—this method delivers beautifully smooth, thick oatmeal with zero monitoring.
Batch-cooking oats under pressure
In the Instant Pot, I combine 1 cup quick oats with 2½ cups water or milk, plus a pinch of salt. I lock the lid, set it to high pressure for 1 minute, and let it naturally release pressure for 5–7 minutes. This gives the oats time to hydrate fully without splitting or becoming gluey.
I don’t stir before pressure cooking—instead, I mix well after releasing the pressure. This keeps the oats from sticking to the bottom and helps distribute any mix-ins or flavoring agents like cinnamon or dried fruit.
Natural release vs quick release
Quick releasing pressure on oat recipes tends to splatter and sometimes sucks up starch into the valve. I always recommend natural release, especially for dairy-based recipes. The longer resting time also improves consistency, as quick oats continue to thicken after pressure is removed.
After opening, I stir thoroughly and let sit uncovered for another minute. This method is my top pick for catering breakfasts—I make big batches ahead, portion, and refrigerate.
Skillet Method: Dry Toasting and Liquid Pour Over
This is a chef’s trick I use when I want to build a toasty, nutty depth into oats—especially in savory applications or layered breakfast bowls. It’s not a method for volume, but it elevates flavor beautifully.
When to use butter or oil
I preheat a nonstick or stainless skillet over medium-low heat and add ½ teaspoon butter or neutral oil per serving. Once melted, I add the dry quick oats and stir for 1–2 minutes until they smell nutty and deepen slightly in color.
This creates a toasted foundation and helps the oats hold their shape slightly better. I then pour hot liquid (water or broth) over the oats directly in the skillet, stirring as it simmers for 1–2 minutes until thick.
Flavor boost through toasting
Toasted oats pair well with warm spices, citrus zest, or savory elements like miso or Parmesan. I use this method when building complex breakfast bowls—think oats with poached egg, spinach, and sesame oil—or when prepping for a high-protein menu.
The dry heat caramelizes the surface starches, which gives the oats a firmer bite even when cooked with liquid. I recommend this for cooks who dislike soft or “mushy” oatmeal textures.
Baking Quick Oats in the Oven for Breakfast Casseroles
Quick oats aren’t just for stovetop porridge—they’re excellent in baked dishes when you want structure, sliceability, and the comfort of a warm casserole. In commercial kitchens, I use this method for meal prep trays, brunch buffets, and takeout options that need to hold texture over time.
Combining with eggs, milk, and mix-ins
I start with a base of 2 cups quick oats, 2 eggs, 2½ cups milk or plant milk, and flavorings like vanilla, cinnamon, and a touch of salt. This ratio gives me a spoonable but sliceable baked oatmeal. From here, I add chopped fruit (like apples or bananas), nuts, or even grated zucchini or carrot for nutrition and moisture.
Everything goes into a greased 9×9 baking dish, stirred gently, and topped with thin banana slices, berries, or crushed nuts before baking. I don’t pre-cook the oats—quick oats hydrate just fine in the oven thanks to the liquid and egg matrix.
Texture and temperature control
I bake at 350°F (175°C) for 35–40 minutes, until the center is just set and the top is golden. The internal texture should feel like a firm bread pudding—moist but sliceable. I let it cool for 10 minutes before cutting, which allows the oats to settle.
For a crispier top, I finish under the broiler for 2 minutes. This works well for brown sugar, maple glaze, or crumbled granola toppings. Baked oatmeal also reheats well, which makes it ideal for weekly prep.
Time and Temperature Chart for All Cooking Methods
Here’s a detailed table I use when training staff or planning prep timelines. Each method balances texture, convenience, and yield.
| Method | Liquid Ratio | Cook Time | Temperature | Notes |
| Stovetop | 1 cup liquid: ½ cup oats | 2–3 minutes simmer | Medium-low heat | Stir constantly to avoid sticking |
| Microwave | 1 cup liquid: ½ cup oats | 2–2.5 minutes total | 70–80% power | Use large bowl; stir midway |
| Pressure Cooker | 2½ cups liquid: 1 cup oats | 1 min + 5 min rest | High pressure | Natural release preferred |
| Skillet Toast | 1 cup hot liquid: ½ cup oats | 1–2 minutes simmer | Medium heat | Toast oats in butter first |
| Oven Baked | 2½ cups liquid + 2 eggs: 2 cups oats | 35–40 minutes | 350°F (175°C) | For casserole-style baked oatmeal |
I adjust these slightly based on added ingredients (like fruit, seeds, or dairy), but the structure stays consistent. Always rest after cooking—oats continue to thicken off heat.
Flavor Enhancers: Spices, Sweeteners, and Salts
One of the easiest ways to elevate oats is through balanced seasoning. Without salt or flavoring, oats are bland by nature. As a chef, I treat the base like a canvas and layer flavor depending on whether the dish is sweet, savory, or something in between.
When to add cinnamon, maple, nutmeg, or cardamom
I add spices like cinnamon, nutmeg, ginger, or cardamom during cooking to bloom them in the heat. Quick oats absorb aromatic oils fast, so a pinch of spice early on goes a long way. For sweetness, I prefer maple syrup or honey stirred in right before serving—not while cooking—to maintain clarity and brightness.
If I’m preparing a cold oat bowl or overnight oats, I blend sweeteners and spices into the soaking liquid. This distributes flavor evenly without clumping or bitterness.
Balancing sweet and savory profiles
For savory oats, I skip the sugar entirely and add garlic powder, turmeric, black pepper, or curry spice blends depending on the direction. A pinch of sea salt enhances even sweet bowls, so I never skip it. For gourmet profiles, I finish with lemon zest, tahini, or balsamic glaze.
Sweet and savory shouldn’t compete—they should contrast. For example, oats with sweet roasted squash and thyme play well with a drizzle of maple and a crumble of feta or ricotta.
Creative Mix-Ins for Texture and Nutrition
One of the reasons I love quick oats is how well they absorb flavor and support additions. Whether it’s for texture, protein, or aesthetics, mix-ins can take oatmeal from simple to extraordinary.
Nuts, seeds, berries, and protein add-ins
I add sliced almonds, chia seeds, hemp hearts, or walnuts either after cooking (for crunch) or during soaking (for softness). For protein, I stir in a spoon of nut butter, protein powder, or Greek yogurt right before serving—never during cooking, as high heat can change the texture of these ingredients.
Fresh or frozen berries, shredded coconut, cacao nibs, and even diced apple or pear work well. I stir them in just as the oats finish cooking or during the final rest. This preserves color, shape, and nutritional value.
Adding without overcooking
To avoid mushiness, I don’t cook delicate items like banana slices or soft berries with the oats. Instead, I top the bowl after cooking for freshness. For baked oats, I mix fruits into the batter before baking, reserving some for topping so they stay visible and vibrant.
Seeds like flax or chia absorb moisture, so I account for that by increasing the liquid slightly (an extra tablespoon per serving). This keeps the oats loose and prevents over-thickening during cooling.
Common Mistakes When Cooking Quick Oats
Quick oats are forgiving, but small missteps can turn a bowl from creamy to gluey in seconds. I’ve seen these mistakes from line cooks, home cooks, and even health-conscious meal preppers.
Overcooking, under-hydrating, flavor imbalance
Overcooking is the most common issue. Quick oats cook in just 2–3 minutes; anything beyond that turns the texture into paste. I always pull them off the heat just before they’re fully thickened—they’ll finish during resting.
Under-hydrating is another frequent problem. People try to “cut calories” by reducing water or milk, but this leads to rubbery oats. I stick to at least a 2:1 liquid-to-oats ratio and go slightly higher if I’m adding chia or protein.
Then there’s flavor imbalance. Adding too much sweetener or spice without salt leaves the oats cloying and flat. I always include a pinch of salt, even in fruit-heavy or dessert-style bowls—it sharpens flavor and balances sugar naturally.
Preventing clumps and sticking
To prevent clumping, I stir quick oats immediately upon adding to hot liquid. Stirring distributes starch evenly, avoids dry pockets, and keeps the texture smooth. For stovetop and pressure cooker methods, I also avoid stirring aggressively once the oats start thickening—over-stirring breaks them down.
To prevent sticking, especially with milk-based oats, I use low to medium-low heat and stir regularly. If I walk away, I return to scorched bottoms and wasted portions. In a professional kitchen, I assign someone to “watch the oats” for this exact reason.
Serving Ideas: From Classic Bowls to Oatmeal Jars
Serving oats isn’t just about plating—it’s about making the dish inviting, nourishing, and well-composed. Whether hot or cold, a well-presented oat bowl adds value and comfort.
Hot, cold, layered, and portable styles
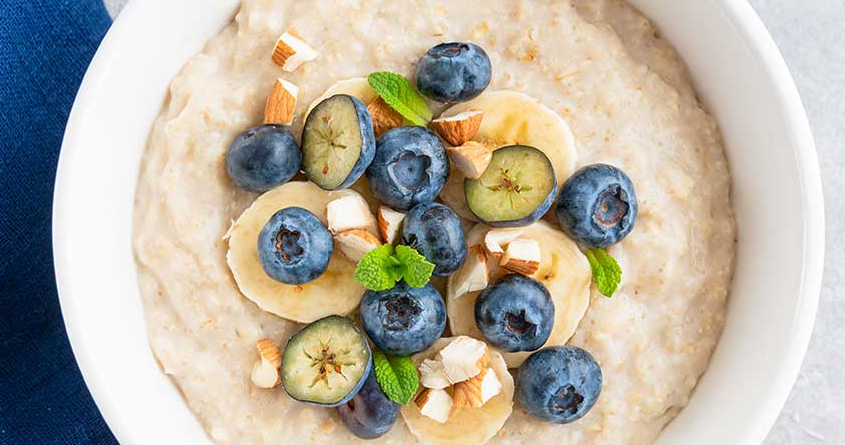
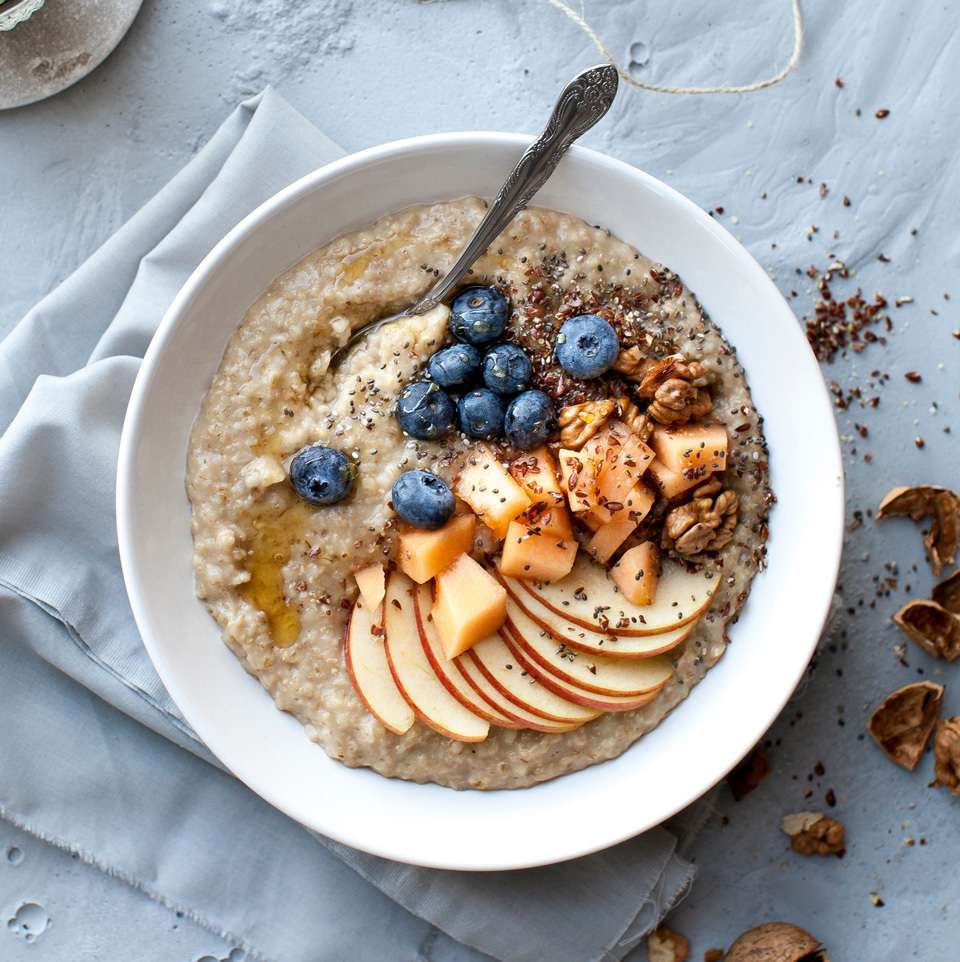
Classic hot bowls are all about contrast—creamy base, crunchy toppings, fresh fruit, and a swirl of nut butter or syrup. I serve them in wide, shallow bowls for visual layering and faster cooling. For guests, I add an edible garnish like a cinnamon stick or toasted coconut.
Cold oatmeal jars are great for meal prep and grab-and-go. I layer soaked quick oats with Greek yogurt, fruit, and seeds in mason jars, storing them overnight. They hold texture for up to 3 days and feel like dessert with the right mix-ins.
Layered parfait-style oats work beautifully for buffets or brunch boards. I use clear glasses or stemmed bowls and alternate oats, jam or compote, granola, and cream. These are perfect for catering or special events when presentation matters.
Plating oats for guests or family
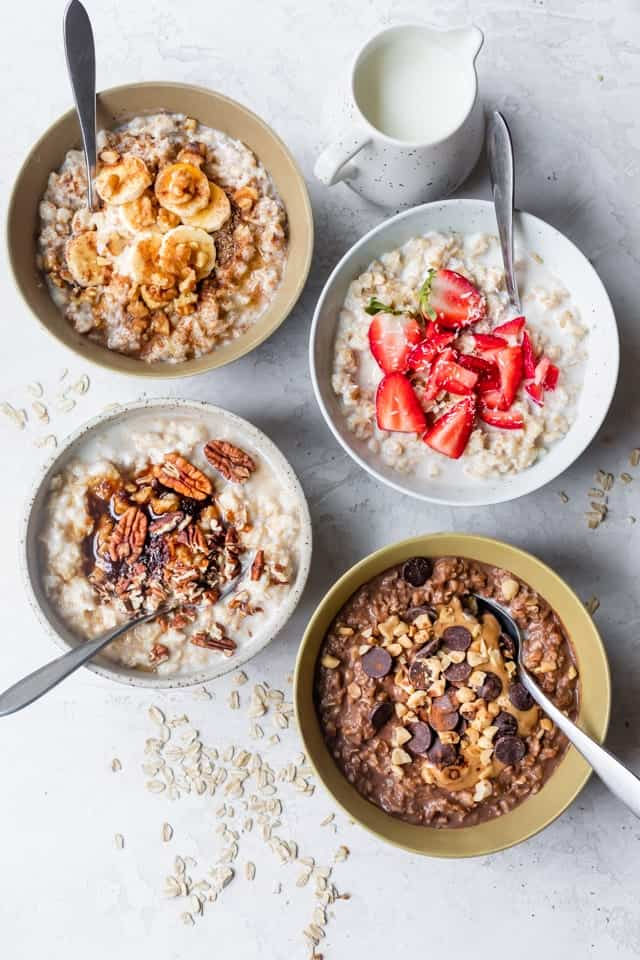
For home breakfasts, I turn oats into customizable bars—everyone gets a plain base, and toppings are laid out like a taco station: nuts, seeds, dried fruit, chocolate chips, syrups, spices, yogurt. It turns oatmeal into a family experience, not just a solo bowl.
In professional settings, I plate oats with a spoon of thick compote, a drizzle of something aromatic (like tahini or lemon zest syrup), and a structured garnish like roasted pear or a square of granola crisp.
How to Store and Reheat Cooked Quick Oats
Leftover oatmeal stores beautifully—if handled right. I treat it like rice or polenta: it needs gentle heat and added moisture to bounce back.
Refrigeration and freezing
I let cooked oats cool to room temperature, then portion into airtight containers. I always press a piece of parchment or plastic wrap over the surface before sealing to prevent skin formation. In the fridge, oats stay fresh for up to 4 days.
For freezing, I scoop oats into muffin tins or silicone molds, freeze solid, then transfer to bags. These reheat well and give me portion control for batch cooking. Frozen oats keep up to 2 months without loss of texture.
Best reheating methods for each texture
On the stove, I reheat with a splash of milk or water, stirring gently over medium-low heat until loosened. For quick use, I microwave at 60–70% power, stirring halfway through. If the oats are too thick, I stir in more liquid gradually.
Baked oatmeal reheats best in the oven at 325°F (160°C), covered with foil. It takes 10–15 minutes and comes out fluffy and moist. I finish with a spoon of yogurt or maple syrup for contrast and richness.
Recipe Variations Using Quick Oats
Once you master the base technique, quick oats become a blank canvas. I rotate between sweet, savory, baked, and chilled variations depending on season, dietary goals, or what’s on hand.
Savory oats, banana bread oatmeal, baked bars
Savory oats are my favorite underused trick. I cook them with broth, garlic, and herbs, then top with sautéed spinach, poached egg, and chili oil. They’re like a creamy polenta but faster and lighter.
For banana bread oatmeal, I mash a ripe banana into the oats while cooking, then add cinnamon, nutmeg, chopped walnuts, and a splash of vanilla. I top with sliced banana and brown sugar brûlée finish.
Baked oat bars are a grab-and-go staple. I mix quick oats with mashed bananas, peanut butter, a bit of honey, and bake in a flat tray until set. Once cooled, they slice into portable breakfast bars.
Adjusting liquid ratios for baking vs spoonable oats
For spoonable oats, I use a 2:1 liquid-to-oat ratio (or higher). For baked oats or bars, I reduce liquid and add binders like eggs or mashed fruit. The key is knowing that quick oats hydrate fast—so I always give them time to rest before final judging the texture.
I adjust depending on whether I’m going for pourable, chewy, or sliceable oats. That flexibility makes quick oats one of my most-used ingredients in both sweet and savory kitchens.
FAQ: 15 Real Questions About Cooking Quick Oats — Answered by a Chef
Can I make quick oats with just hot water?
Yes, you can. I’ve done this during travel and catering when stovetops aren’t available. Just pour boiling water over quick oats in a bowl, cover, and let sit for 2–3 minutes. Stir and it’s ready—though the flavor won’t be as developed as with stovetop or baked versions.
What’s the best liquid-to-oats ratio?
I recommend a 2:1 ratio for creamy oats—1 cup of liquid to ½ cup of quick oats. I sometimes go up to 1¼ cups of liquid if I’m adding chia seeds, protein powder, or letting the oats sit longer.
How do I make oats without them becoming mushy?
I recommend pulling oats off the heat just before they look “done,” then letting them sit for 1–2 minutes. I also avoid over-stirring, which breaks down their structure. For a firmer texture, dry-toast the oats first in a skillet.
Are quick oats less healthy than rolled or steel-cut oats?
Nutritionally, they’re very similar—same calories, fiber, and protein. The difference is in glycemic index and texture. I choose quick oats when speed matters, and add fiber or fat (like nuts) to balance blood sugar.
Can I make overnight oats with quick oats?
Absolutely. I use them regularly for cold oat jars. They hydrate well in milk, yogurt, or juice within 4–6 hours. I prefer them over rolled oats when I want a smoother, pudding-like texture.
What’s the best way to flavor quick oats?
I recommend adding a pinch of salt, plus a sweetener like maple syrup or honey right before serving. Spices like cinnamon or cardamom should go in during cooking. For savory oats, I use broth, garlic, and herbs.
Can I add protein powder to quick oats?
Yes, and I often do. I stir it in after cooking while the oats are still hot. This prevents clumping and preserves the protein’s structure. If you add it too early, it can turn the oats grainy or dry.
Are quick oats good for baking?
Yes, they’re perfect for baked oatmeal, bars, and even meatloaf binders. Because they hydrate fast, I usually reduce liquid in baking recipes or mix them with eggs or mashed fruit to hold texture.
What’s the best way to reheat leftover oats?
I reheat them on the stove or in the microwave with a splash of milk or water. Stir gently while warming to bring back the creaminess. Avoid high heat—it can scorch or dry out the oats.
Can I freeze cooked quick oats?
Definitely. I portion them into muffin tins or silicone molds, freeze solid, then transfer to freezer bags. When ready to eat, I reheat with added milk or water and stir until smooth again.
Why do my oats boil over in the microwave?
It’s usually due to too small of a bowl or using full power. I use a large microwave-safe bowl, cook at 70–80% power, and stir halfway. I also let them rest a minute before eating to avoid burns.
How do I make savory oats taste good?
Start by cooking them in broth instead of water. Add sautéed vegetables, garlic, herbs, or even cheese. I love topping them with a poached egg, sesame oil, and chili flakes—it feels like brunch and comfort food combined.
Are quick oats gluten-free?
Only if certified. Oats themselves are gluten-free, but they’re often processed in facilities with wheat. I always check for the gluten-free certification when serving clients with celiac disease.
Can I use quick oats in smoothies?
Yes, and I recommend them. They blend better than rolled oats and add fiber, body, and creaminess to shakes. I often soak them in milk for 10 minutes before blending for smoother results.
What toppings work best for texture contrast?
I use chopped nuts, seeds, toasted coconut, or granola. These add crunch that balances the softness of the oats. A swirl of peanut butter or a spoon of thick yogurt also gives richness and layering.

Post Comment