How to Cook Chicken Tenders

How to Cook Chicken Tenders: Complete Guide to Juicy, Crispy Perfection Every Time

Chicken tenders are often overlooked as simple or overly casual, but I see them as one of the most versatile and high-potential cuts in the kitchen. When handled correctly, they’re tender, fast-cooking, and take on marinades and coatings beautifully. I’ve used them for everything from bar snacks to upscale plated entrées. Their small size makes them perfect for quick weekday meals, but that doesn’t mean they should be treated carelessly.
- Why Chicken Tenders Deserve Culinary Attention
- What Are Chicken Tenders and How They Differ From Other Cuts
- Choosing Quality Chicken Tenders
- How to Prepare Chicken Tenders for Cooking
- Essential Ingredients for Cooking Chicken Tenders
- Pan-Frying Chicken Tenders for Golden Crisp Texture
- Oven-Baking for Healthy Yet Crisp Results
- Air Frying Chicken Tenders: Speed and Crunch
- Temperature and Doneness Table for Chicken Tenders
- Using a Pressure Cooker for Juicy Chicken Tenders
- Microwaving Chicken Tenders: Fast but Risky
- Common Mistakes with Chicken Tenders
- Best Sauces for Chicken Tenders
- Seasoning and Marinade Ideas
- Creative Recipes with Chicken Tenders
- How to Plate and Serve Chicken Tenders Like a Chef
- FAQ: 15 Questions About Cooking Chicken Tenders — Answered by a Chef

Why Chicken Tenders Deserve Culinary Attention
What I love most is that chicken tenders allow for creative flexibility. You can pan-fry them for crunch, air fry them for health, or poach them gently for salads. They take on flavors incredibly well, which makes them ideal for global-inspired marinades, glazes, or breadings. This guide walks through the complete process of preparing, cooking, and serving tenders in multiple ways, with all the small details that make the difference between bland and brilliant.
What Are Chicken Tenders and How They Differ From Other Cuts
Chicken tenders—also called tenderloins—are the small, elongated muscles located just beneath the chicken breast. They’re not slices of breast meat; they’re a separate, naturally tender cut that doesn’t get much movement. This means they cook fast and remain soft, even when exposed to dry heat, as long as you don’t overdo it.
Tenders have a looser grain than breast meat, which gives them a silkier bite when cooked properly. They’re lean like the breast but can dry out faster due to their size. That’s why I’m extra cautious with heat and timing when cooking them, especially with methods like oven baking or air frying.
The key structural difference is the central tendon that runs through each piece. It’s edible but chewy, so I often remove it—especially when I’m breading tenders or using them in finer preparations. It takes a few seconds with a knife or paper towel pull, and the resulting texture is much more refined.
Choosing Quality Chicken Tenders
When selecting tenders, I always start by checking moisture and color. Quality chicken tenders should be pale pink, slightly translucent, and free from excess liquid in the packaging. Avoid tenders that look dull, overly wet, or have visible blood spots—those are signs of poor handling or extended refrigeration.
I typically prefer fresh over frozen, especially for breaded recipes. Frozen tenders can work well, but they must be thawed thoroughly and patted dry to avoid steaming instead of browning. If frozen is the only option, I choose individually quick frozen (IQF) options without added solutions or marinades, which tend to affect flavor and texture.
Organic or pasture-raised chicken usually has a firmer structure and more distinct flavor, though not necessarily better tenderness. If I’m serving tenders plain or with light seasoning, I’ll invest in better poultry. But for dishes where they’re breaded or sauced, standard supermarket tenders can perform just fine with the right handling.
How to Prepare Chicken Tenders for Cooking
The most important prep step for tenders is drying. Even a few drops of moisture on the surface can interfere with browning and lead to a rubbery texture. I use paper towels to dry each piece thoroughly. If they were previously frozen, I let them sit uncovered in the fridge for 30 minutes to air-dry further.
Next, I often remove the tendon, especially for breaded or sautéed dishes. To do this, I grip the white nub of tendon with a paper towel and gently pull while sliding a paring knife under the meat. It sounds tedious, but once you get the hang of it, it only takes a few seconds per tender—and the texture improvement is worth it.
I season tenders before breading or cooking, and if time allows, I’ll give them a quick brine or marinade. Even a 15-minute soak in buttermilk, salt, and garlic powder helps them stay juicy and flavorful. For naked or sautéed preparations, I go with dry seasoning—kosher salt, cracked pepper, smoked paprika, or chili flakes depending on the final dish.
Essential Ingredients for Cooking Chicken Tenders
- 1–1.5 lb chicken tenders (fresh or fully thawed)
- Kosher salt
- Freshly ground black pepper
- Neutral oil (canola, avocado, or grapeseed) for frying or coating
- Optional: buttermilk or yogurt (for brining)
- Optional spices: garlic powder, paprika, chili flakes, cayenne
- Optional for breading: flour, eggs, panko, or crushed cornflakes
This basic set covers everything you need for nearly every method—whether you’re going breaded and crisp, or clean and pan-seared.
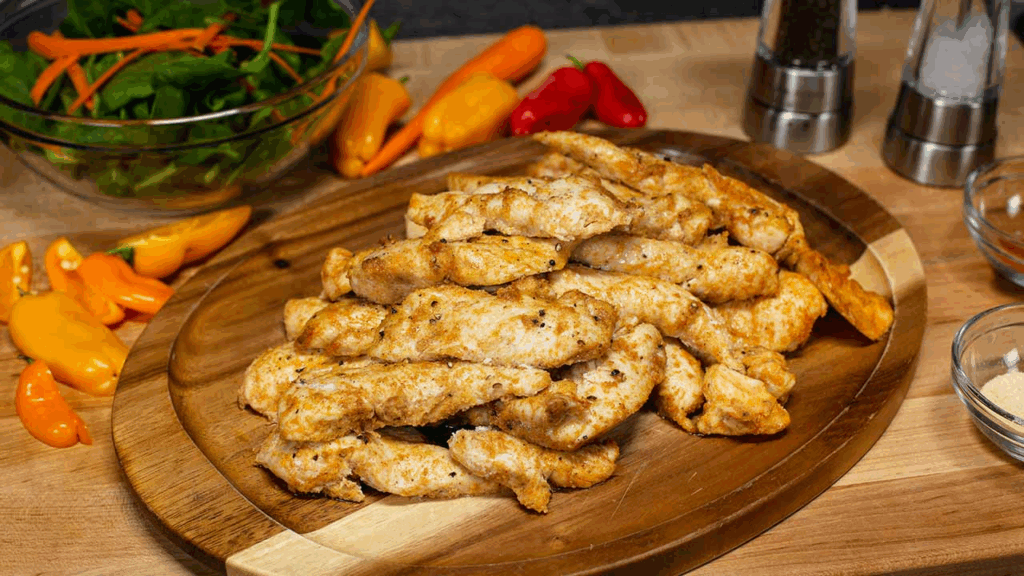
Pan-Frying Chicken Tenders for Golden Crisp Texture
Pan-frying is the method I reach for when I want that classic golden crunch and tender juiciness. I start with a heavy-bottomed skillet, preferably cast iron or stainless steel, and preheat it with about ¼ inch of neutral oil over medium-high heat. The oil should shimmer but not smoke—around 350–360°F.
If I’m breading the tenders, I use a three-part coating system: flour, egg wash, then panko or seasoned breadcrumbs. I press each tender firmly into the crumbs to ensure full adhesion. I gently lower the tenders into the oil, leaving space between them, and cook for 3–4 minutes per side, depending on size. I flip only once, using tongs.
When the coating is deep golden brown and the internal temp reaches 165°F (74°C), I transfer them to a rack or paper towel to rest. The carryover heat finishes the cooking, and the texture stays crisp if you don’t crowd them post-cook.
Pan-frying gives the best crust-to-juice balance. If I’m serving tenders in a basket with fries or for dipping, this is the method I choose every time.
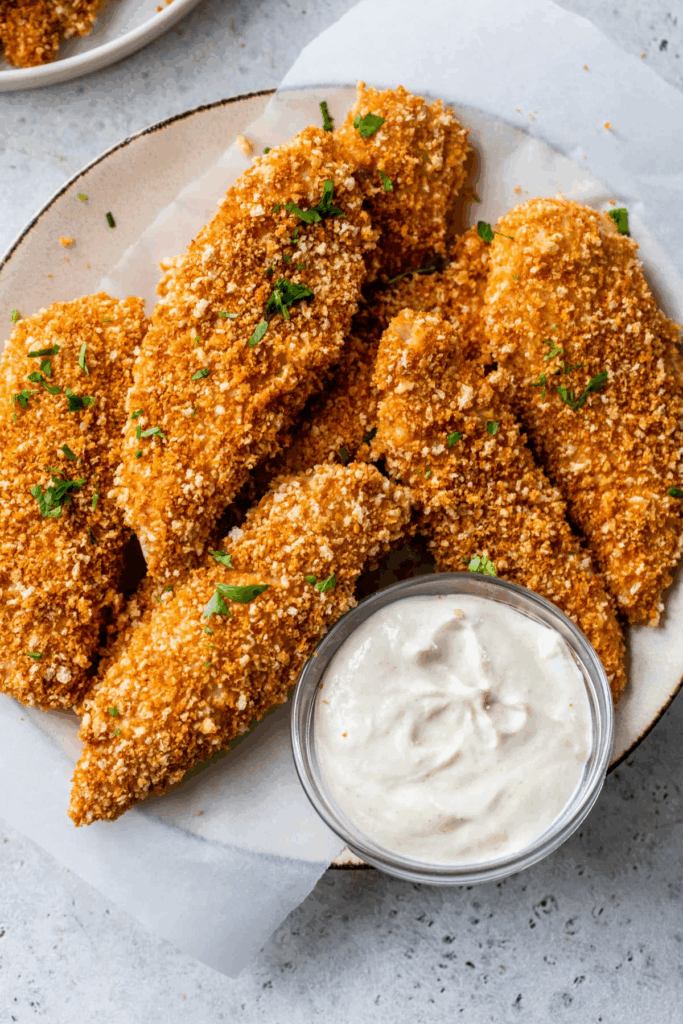
Oven-Baking for Healthy Yet Crisp Results
Baking chicken tenders can still deliver great texture—if you approach it correctly. The biggest mistake is laying them directly on a pan. I always use a wire rack over a foil-lined sheet tray, which allows heat to circulate and moisture to escape.
I preheat the oven to 425°F (218°C) and brush or spray the tenders with a small amount of oil on all sides. If breaded, I lightly mist the coating to enhance crisping. For plain-seasoned tenders, I use olive oil or avocado oil to coat before seasoning with salt, pepper, and optional spices.
Cooking time is usually 15–18 minutes, flipping once halfway through. I monitor with a meat thermometer and remove at exactly 165°F, letting them rest for a couple of minutes.
The key to oven success is space and airflow. Don’t overcrowd the rack. If I’m making a large batch, I rotate pans midway through cooking to keep browning even. For extra crunch, I sometimes broil for the last minute—but only under close watch.
Air Frying Chicken Tenders: Speed and Crunch
Air frying has become my favorite method for weeknight tenders—fast, consistent, and surprisingly crisp with almost no oil. I preheat the air fryer to 400°F (204°C) and arrange tenders in a single, well-spaced layer. Whether breaded or plain, I never stack them.
For fresh tenders, I cook for 9–11 minutes, flipping at the 5-minute mark. For breaded versions, I lightly mist the outside with oil before air frying to boost browning. I watch carefully during the last 2 minutes—overcooking happens fast in an air fryer.
If I’m cooking frozen breaded tenders, I increase the total time to 12–14 minutes, and lower the temp slightly to 380°F (193°C) to avoid burning the exterior.
One important tip: rest the tenders for 2–3 minutes after cooking, even from the air fryer. It helps the juices settle and the coating stay crisp. I use this method when I need consistent results with little cleanup—and the texture is shockingly close to deep fried.
Temperature and Doneness Table for Chicken Tenders
Whether I’m baking, frying, or air frying, I cook by temperature—not guesswork. Here’s the guide I use across all methods:
| Cooking Method | Internal Temp Target | Pull Temp | Surface Temp | Texture Result |
| Pan-fried | 165°F / 74°C | 162°F / 72°C | ~350°F / 177°C oil | Crispy crust, juicy center |
| Oven-baked | 165°F / 74°C | 163°F / 73°C | 425°F / 218°C oven | Even texture, light browning |
| Air-fried | 165°F / 74°C | 160–162°F / 71–72°C | 400°F / 204°C basket | Crisp surface, fast cook |
| Pressure-cooked | 165°F / 74°C | Auto-reaches target | Steam-pressure sealed | Tender, juicy interior, needs browning |
I always use an instant-read thermometer inserted sideways through the thickest part. This avoids overcooking, keeps texture consistent, and ensures safe doneness, especially in breaded or glazed preparations.
Using a Pressure Cooker for Juicy Chicken Tenders
Pressure cooking works surprisingly well for chicken tenders when I want soft, juicy results without needing crisp skin. I use it for shredding, sauced dishes, or when I want to finish on a grill or skillet after cooking.
I start by adding ½ cup of broth or seasoned liquid (chicken stock, citrus juice, or spiced water) to the bottom of the pressure cooker. I place the tenders on a trivet or directly in the liquid, season lightly, and seal the lid.
Cooking time is short—2 to 3 minutes on high pressure, with a 5-minute natural release. After release, I check temp (usually already at 165°F), then transfer to a skillet with butter or sauce to build color and flavor.
This method is perfect when prepping chicken for tacos, rice bowls, or salads, where moistness matters more than surface crunch. I often sous-vide or pressure-cook tenders for large groups and crisp or glaze them right before plating.
Microwaving Chicken Tenders: Fast but Risky
I’ll be honest—microwaving chicken tenders isn’t ideal, but I’ve done it in a pinch. It works for reheating or for pre-cooked frozen tenders, but not for cooking fresh ones from raw. When using a microwave, you sacrifice texture, and if you’re not careful, you can easily overcook the meat.
If I’m reheating tenders, I wrap them in a damp paper towel to retain moisture and microwave at 50–60% power for 1 to 2 minutes, flipping once. This gentle heat warms the interior without drying out the edges.
For frozen breaded tenders, I use a microwave-safe plate and cook on high for about 3 minutes, letting them sit 30 seconds before checking doneness. They often come out pale or soggy, so I usually transfer them to a skillet or toaster oven to crisp.
I never microwave raw tenders—it’s too hard to control the cook, and the texture is rubbery at best. If this is your only option, I recommend slicing tenders thinly before cooking and using low power with intervals, checking constantly.
Common Mistakes with Chicken Tenders
The biggest mistake I’ve seen (and made) is overcooking. Because tenders are so lean and small, just 1–2 extra minutes can dry them out. I always recommend pulling them just before 165°F, then resting for a minute or two to finish.
Another problem is uneven seasoning. Tenders have irregular shapes and can hide under-seasoned spots. I toss them in seasoning by hand, pressing in spices or salt to get even coverage, especially for unbreaded versions.
With breaded tenders, the most common failure is losing the coating. That happens when the surface is too wet, or when the pan isn’t hot enough to seal the crust. I always pat dry, and I let the breaded tenders sit for 10 minutes before frying so the crust adheres.
Also, skipping the tendon removal can lead to stringy bites that ruin the experience. It only takes a few seconds to remove the tendon, and it makes the final bite more refined.
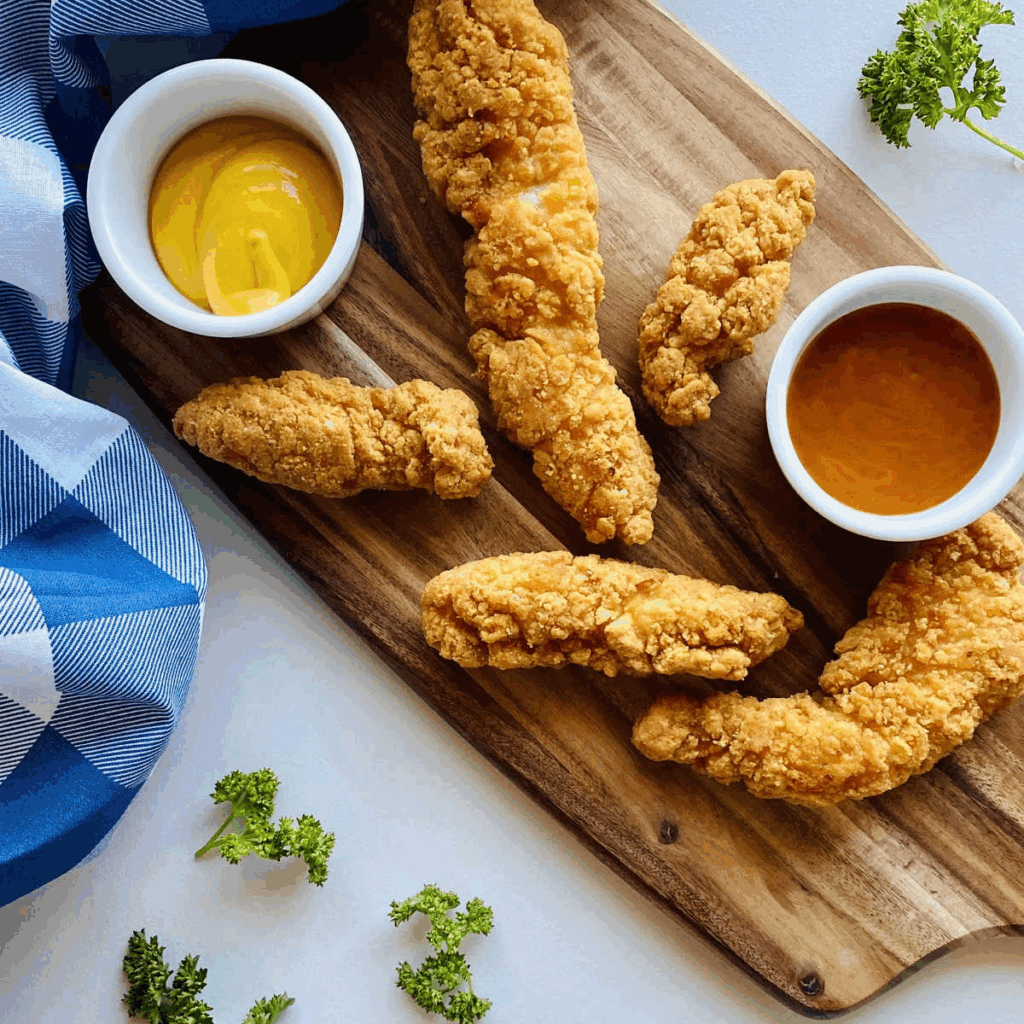
Best Sauces for Chicken Tenders
Chicken tenders are practically made for dipping. My go-to is honey mustard—a 50/50 mix of Dijon and honey with a splash of cider vinegar. It’s balanced, sweet, and tangy.
For something richer, I whip up a garlic parmesan sauce: butter, garlic, grated parm, a touch of cream, and cracked black pepper. It’s perfect for pan-fried tenders or pasta bowls.
When I want heat, I turn to buffalo sauce—melted butter, hot sauce, garlic powder. I toss tenders directly in it or serve it as a side.
For something global, I like sweet chili sauce, Korean gochujang glaze, or tahini-yogurt lemon dressing. These pair especially well with air-fried or grilled tenders. If I’m serving to a group, I plate multiple sauces so everyone can choose.
Seasoning and Marinade Ideas
I treat tenders like a blank canvas, and seasoning is everything. My default dry rub is salt, black pepper, smoked paprika, garlic powder, and a touch of cayenne for kick. I coat evenly and let them sit for at least 10 minutes before cooking.
For marinades, I use buttermilk or yogurt-based blends with lemon juice, mustard, or soy sauce. Even a 30-minute soak transforms texture and taste, keeping the meat tender through high-heat cooking.
When I go Mediterranean, I mix olive oil, lemon, oregano, and garlic. For Latin flavor, I use cumin, lime juice, and ancho chili powder. For Asian-inspired dishes, I turn to sesame oil, soy, rice vinegar, and ginger.
Whatever the style, the key is balancing salt, acid, fat, and heat. I always wipe off excess marinade before cooking to avoid flare-ups or soggy breading.
Creative Recipes with Chicken Tenders
Chicken tenders aren’t just for dipping. One of my favorites is a grilled tender salad with arugula, shaved fennel, lemon vinaigrette, and grated pecorino. It’s light, bright, and satisfying.
I also slice tenders into strips for chicken tacos—cabbage slaw, spicy aioli, and pickled onions on grilled tortillas. For wraps, I use hummus, avocado, and greens inside a lavash or flatbread, rolled tight and sliced on a bias.
They’re great in rice bowls, too—layered with roasted veggies, quinoa, a soft egg, and gochujang dressing. Even kids love them diced and mixed into mac and cheese, folded into quesadillas, or skewered with cheese cubes and cherry tomatoes for lunchboxes.
When planning menus, I often prep extra tenders to serve cold the next day—they hold up incredibly well, and with the right sauce or crisp finish, nobody realizes they’re leftovers.
How to Plate and Serve Chicken Tenders Like a Chef
Presentation elevates even the most casual food, and chicken tenders are no exception. When I plate them for family meals or casual events, I arrange them in a neat stack or fan, never piled haphazardly. I serve dipping sauces in small ramekins or drizzle them on the plate for a cleaner visual.
For more elevated presentation, I slice the tenders on a diagonal bias, especially if they’ve been pan-seared or grilled. I layer the slices over puréed vegetables, grains, or a composed salad, and finish with a herb oil, a dusting of spice, or a citrus zest garnish.
Color and texture contrast are key. If the tenders are golden and crisp, I’ll add brightness through pickled onions, charred lemon wedges, or shredded greens. For darker spice rubs or glazed tenders, I bring freshness with chilled slaws or fruit chutneys.
Whether plated for kids or adults, clean lines, thoughtful color, and good spacing turn tenders from simple protein into a crafted, intentional part of the meal.
FAQ: 15 Questions About Cooking Chicken Tenders — Answered by a Chef
How do I keep chicken tenders from drying out?
From experience, I’ve found that pulling them at just under 165°F and letting them rest is key. Overcooking—even by 2 minutes—makes tenders stringy. A short brine or buttermilk soak also helps retain moisture.
What’s the best oil for pan-frying chicken tenders?
I always use high smoke point oils like grapeseed or canola. Butter burns too fast, and olive oil can get bitter. A neutral oil lets the seasoning and breading shine.
Should I remove the tendon?
Yes, especially for breaded or plated tenders. I use a paper towel to grip the white tendon nub and pull it gently while sliding a paring knife along the muscle. The difference in bite is noticeable.
Can I cook chicken tenders from frozen?
I recommend thawing first for even cooking, but in the air fryer I’ve had good results cooking frozen breaded tenders at 380°F for 12–14 minutes. Just monitor for doneness with a thermometer.
What’s the ideal temperature for chicken tenders?
I recommend pulling tenders at 162°F, then resting for 2 minutes. This lets carryover heat bring them to 165°F, which is USDA safe and keeps them juicy.
How do I get breading to stick better?
I dry the tenders thoroughly, then let them rest after breading for 10 minutes before frying or baking. This allows the coating to hydrate and bind better during cooking.
What are the best sauces for dipping?
I’ve served tenders with garlic aioli, buffalo ranch, honey mustard, Thai sweet chili, and even blue cheese crema. I match sauces to the seasoning—for spicy rubs, I serve creamy dips; for plain, I go tangy or sweet.
Can I bake tenders without a rack?
You can, but the bottom gets soggy. I always recommend baking on a wire rack over a tray. It’s the single best tip for getting oven-baked tenders to crisp on all sides.
How long should I marinate tenders?
Even 20–30 minutes in a buttermilk or yogurt-based marinade makes a difference. For deeper flavor, I marinate overnight with spices and acid. Just don’t use too much salt or citrus—it can start curing the meat.
Are chicken tenders healthy?
They can be. When I air fry or oven-bake tenders with minimal oil and use lean breast meat or organic cuts, they’re a great high-protein, low-fat option—especially paired with vegetables or whole grains.
How do I reheat leftover chicken tenders?
I recommend air frying or baking at 325°F for 6–8 minutes. Microwaving dries them out unless wrapped in a damp towel. Searing in a pan with a little broth also revives moisture.
Why do my tenders come out rubbery?
Usually it’s from overcooking or microwaving. I recommend using a thermometer and not skipping the rest period. Searing at too high a temp without brining can also cause toughness.
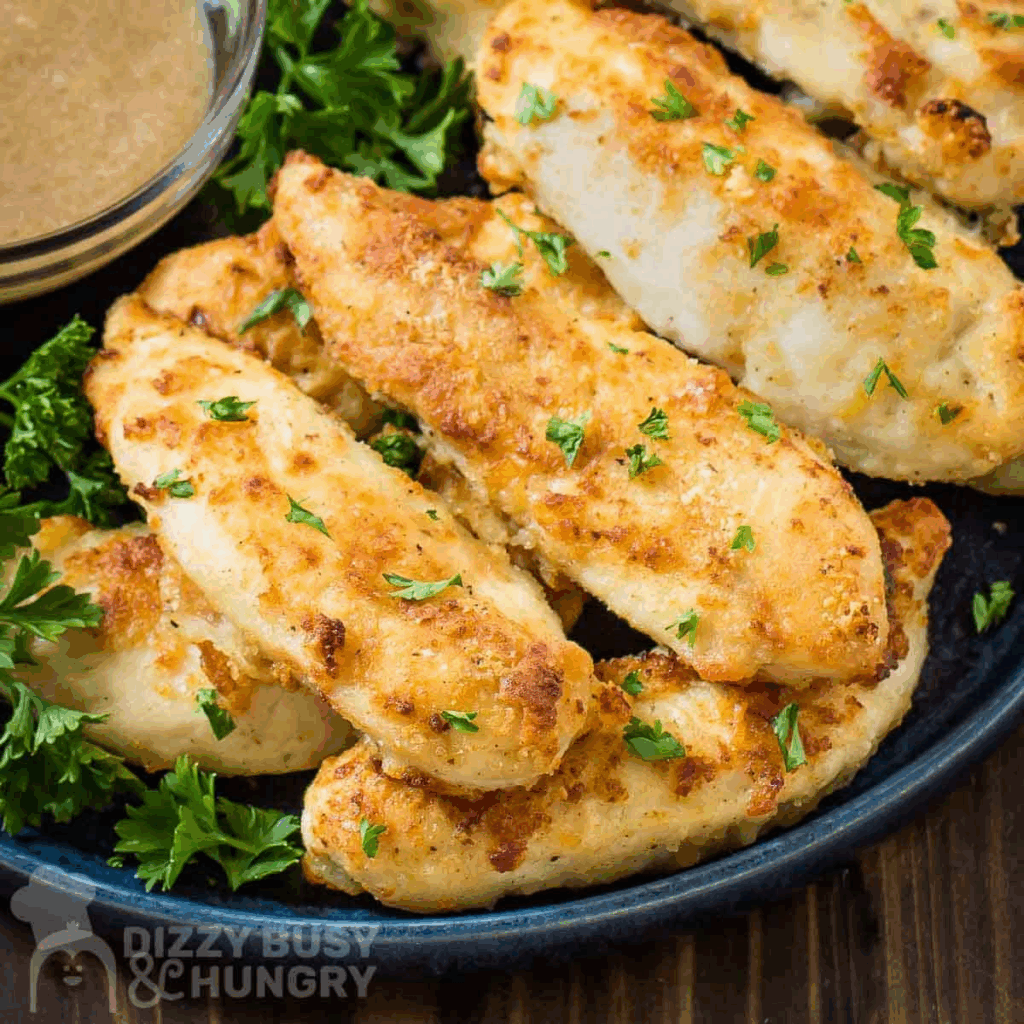
What’s your favorite method for cooking tenders?
Pan-frying in cast iron with a light flour coating and garlic butter finish. It gives color, crunch, and aroma in one go—and pairs with almost anything.
How do I serve tenders for guests?
I slice them and fan them over a purée or grain, drizzle with sauce, and garnish with herbs or pickled onions. I also build appetizer boards with different dipping sauces for groups—it always impresses.
Can I meal prep chicken tenders?
Absolutely. I cook a double batch, keep half in the fridge and freeze the rest. For weekday meals, I slice and reheat in a skillet or toaster oven, then serve in wraps, salads, or bowls. It’s efficient and delicious.
Post Comment