How to Cook Canned Green Beans

How to Cook Canned Green Beans: Guide to Flavorful, Tender Results Every Time

Canned green beans often get overlooked in the kitchen, but with the right approach, they can become a delicious and quick side dish. I’ve worked with every form of green bean, and canned ones are incredibly versatile if handled properly. This guide will walk you through everything from stovetop to oven prep, seasoning, mistakes to avoid, and my personal tricks for making them shine.
- Understanding Canned Green Beans: What You’re Working With
- How to Choose the Best Canned Green Beans
- How to Prepare Canned Green Beans for Cooking
- Essential Ingredients and Kitchen Tools
- Stovetop Method: Classic and Quick
- Oven-Baked Green Beans: Roasted or Casserole Style
- Skillet Style: Southern-Inspired Flavor
- Microwave Method: Fastest Way to Heat and Flavor
- Pressure Cooker or Instant Pot Green Beans
- Time and Temperature Chart for All Methods
- Seasonings and Aromatics That Elevate Canned Beans
- Sauces, Glazes, and Liquids That Add Depth
- Common Mistakes When Cooking Canned Green Beans
- Flavor Variations from Around the World
- Serving and Plating Green Beans Like a Chef
- Storing and Reheating Leftover Cooked Beans
- FAQ: 15 Real Questions About Cooking Canned Green Beans — Answered by a Chef
Understanding Canned Green Beans: What You’re Working With
Canned green beans are pre-cooked and preserved in liquid, which means you’re not starting from raw. Unlike fresh or frozen beans, they’ve already been softened through heat during the canning process. That makes them convenient, but also limits how far you can push texture. You’re working with something fully cooked, so your job becomes all about flavor development and moisture balance.
Difference from fresh or frozen
Fresh green beans offer crunch and flexibility. Frozen ones hold their shape well when steamed or sautéed. Canned beans, however, are softer and can become mushy if overcooked again. They also carry a slight metallic or briny aftertaste, depending on the brand and how long they’ve sat on the shelf. I treat canned beans less like a vegetable and more like a base canvas that needs thoughtful seasoning and structure added back in.
Texture, sodium, and storage
The texture of canned beans is uniformly soft, though some brands preserve a bit of bite. What you must always be aware of is the sodium content—some cans carry more than 500 mg per serving, which can ruin your dish if not accounted for. I always recommend rinsing unless I need the liquid for a broth or casserole. Unopened, they last up to 3 years, but once opened, they need to be used or refrigerated within 3–4 days.
How to Choose the Best Canned Green Beans
All canned green beans are not equal. Over time, I’ve tested dozens of brands, and flavor, cut style, and even metal quality in the can can influence the final taste. My advice is always to read the label, test the texture, and match the cut to your purpose.
Whole vs cut vs French style
Whole green beans retain the most integrity and are best for roasting or plating alongside entrées. Cut green beans are the most common—ideal for sautés, stews, and casseroles. French-style green beans are thin and tender, sliced lengthwise. I use them for delicate preparations or when I want a soft, buttery finish. For any presentation-focused dish, I go with whole beans. For casseroles or soups, cut beans blend more naturally.
Reading labels for flavor and quality
I always look for labels that say “no salt added” or “low sodium”, especially if I’m seasoning aggressively. I avoid cans with long ingredient lists—good green beans don’t need sugar or preservatives. The liquid should be clear, not cloudy or dull. Organic or BPA-free lined cans also offer a cleaner taste, especially when simmering in their own liquid.
How to Prepare Canned Green Beans for Cooking
While you could technically open the can and eat green beans straight, I never serve them that way. To elevate the texture and flavor, proper prep is crucial—even if the cooking time is short.
Draining and rinsing
I begin by draining the beans in a colander. If I’m using them in a dry recipe like roasting or sautéing, I always rinse them under cold water to remove excess sodium and that “canned” flavor. If the beans are going into a dish that simmers or has broth, I may reserve a tablespoon or two of the canning liquid for added moisture and natural bean essence. But never use the liquid as-is—it’s too salty and flat.
When to keep the liquid and why
I only keep the can liquid when making Southern-style beans, slow-cooked green bean stews, or casseroles where I control the rest of the seasoning. The starch in the liquid can help add body. I reduce the amount of added broth or stock to compensate. In other words, the liquid can be a tool—but only when it’s intentional. I never use it as a primary cooking liquid without tasting and balancing first.
Essential Ingredients and Kitchen Tools
Here’s what I always have on hand when cooking canned green beans to make sure they deliver on flavor and finish:
Ingredients:
- Canned green beans (whole, cut, or French style)
- Olive oil, butter, or bacon drippings
- Garlic (fresh or powdered)
- Onion (chopped or sautéed for aroma)
- Crushed red pepper (optional heat)
- Lemon juice or vinegar (for acid)
- Chicken or vegetable broth (for simmering)
- Salt (only after tasting) and black pepper
- Herbs: thyme, dill, parsley, rosemary
- Optional: soy sauce, mustard, balsamic glaze, smoked paprika
Tools:
- Medium skillet or sauté pan (nonstick or stainless)
- Baking dish (for oven methods)
- Fine mesh strainer or colander
- Silicone spatula or wooden spoon
- Digital thermometer (for baking or reheating)
- Microwave-safe bowl with vented lid (for microwave)
- Pressure cooker or Instant Pot (if using)
Продолжаем — вот блоки 5–8, детально, как просил:
Stovetop Method: Classic and Quick
The stovetop is my go-to for most canned green bean preparations. It gives me total control over heat and flavor absorption. The goal here is to warm through gently while infusing flavor—not to “cook” the beans further.
Sauté vs simmer
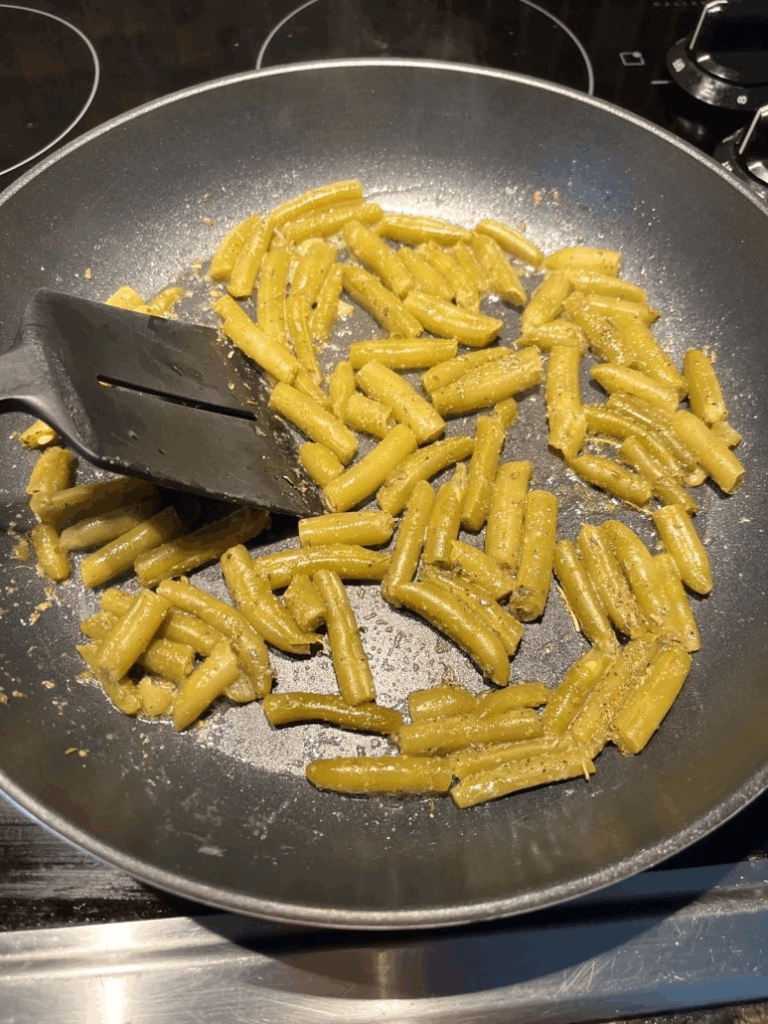
When I sauté canned green beans, I use medium heat, start with a base of butter or olive oil, and add garlic and onion for aromatics. I toss in the drained beans and let them heat through for about 5–7 minutes, stirring gently to avoid breaking them.
If I’m going for a softer, richer finish, I simmer the beans in broth—about ¼ cup per can. I add seasoning, a splash of acid like lemon juice, and simmer uncovered on low for 10–15 minutes. This method is excellent when serving with roast meats or over mashed potatoes.
Timing and temperature
The key is gentle heat. Anything above medium breaks the beans down. I keep the burner between low and medium, depending on the skillet and liquid volume. I recommend removing from heat when beans are hot throughout and glossy but still hold their shape. A quick thermometer check shows 165–175°F (74–80°C) at the center—ideal for serving.
Oven-Baked Green Beans: Roasted or Casserole Style
The oven transforms canned green beans when you use the right approach. You can either roast them for texture or create a creamy casserole-style dish with layered flavor.
Roasting for caramelization
To roast canned beans, I drain and thoroughly pat them dry with paper towels. This is non-negotiable. Moisture kills caramelization. I toss them in olive oil, salt, pepper, and maybe garlic powder or paprika. Then I spread them in a single layer on a baking sheet and roast at 400°F (200°C) for 15–20 minutes, tossing once halfway. The edges blister slightly and the flavor deepens.
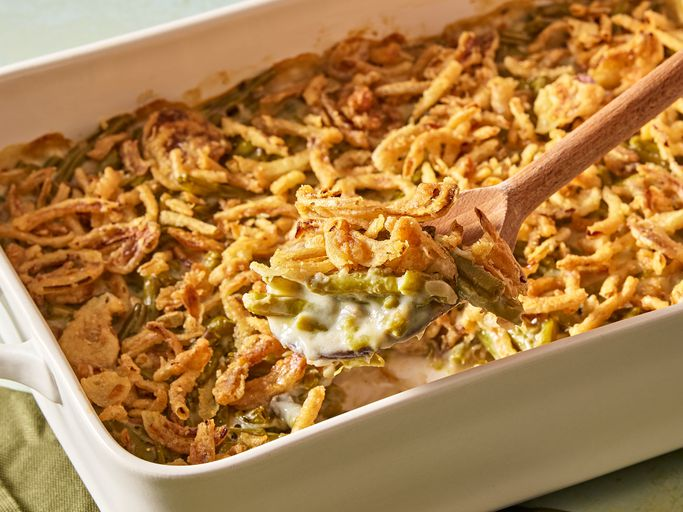
Casserole with broth or cream
For a casserole, I mix beans with a bit of sautéed onion, garlic, ½ cup broth or cream, and a sprinkle of cheese or breadcrumbs. I bake at 375°F (190°C) for 20–25 minutes until bubbling and golden on top. This method works well when you want something hearty and rich without much effort.
Skillet Style: Southern-Inspired Flavor
This is where canned green beans shine. Southern-style skillet beans use fat, aromatics, and time to build a depth of flavor you don’t expect from a can. I’ve served this style in restaurants and at home alike.
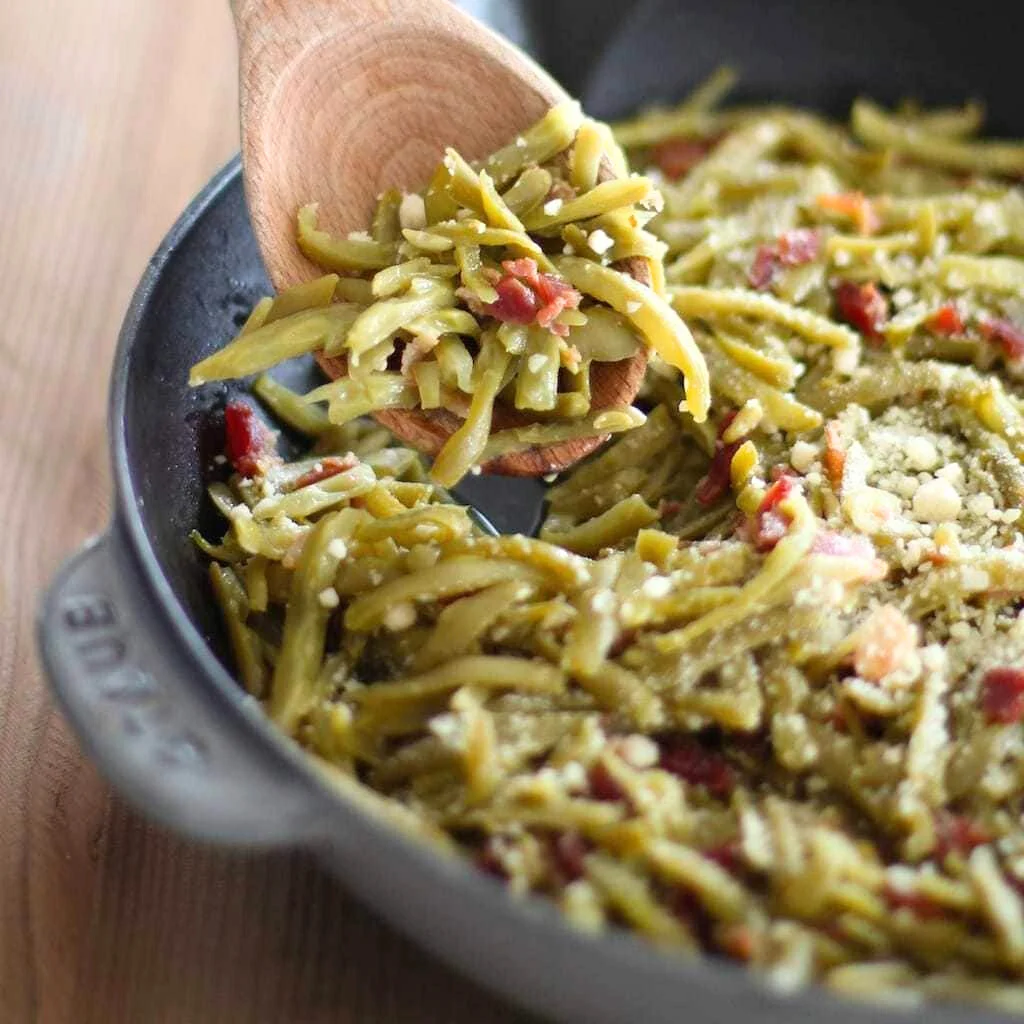
Bacon grease, onion, garlic
I start with 1–2 tablespoons of bacon drippings or butter in a skillet. I sauté chopped onion until golden, then add minced garlic and a pinch of red pepper flakes. I stir in the drained beans and let them absorb the aromatics for 2–3 minutes.
Next, I pour in ¼ cup broth and reduce the heat to low. I simmer uncovered for 15–20 minutes, letting the liquid reduce and the flavor intensify. I finish with black pepper and a splash of vinegar or hot sauce for brightness. It’s savory, smoky, and miles away from “just a can of beans.”
Simmering for depth
The longer you let the beans sit in this aromatic bath, the more they absorb. I stir occasionally but gently—no smashing. Once the liquid has mostly reduced and the beans are hot and tender but not mushy, they’re ready to serve.
Microwave Method: Fastest Way to Heat and Flavor
When time is tight, the microwave does the job—but only if you treat it with care. The key is to heat slowly and trap moisture, rather than blast the beans dry.
Covered cooking technique
I use a microwave-safe bowl, add the drained beans with 1 tablespoon of water or broth, cover loosely with a lid or microwave-safe plate, and heat on 50–70% power. I check and stir every 45 seconds to ensure even heating.
In total, it takes about 2–3 minutes to heat through. I then drain any excess liquid, toss the beans with butter, olive oil, or seasoning, and serve. I avoid microwaving with strong acidic ingredients (like vinegar or tomatoes) already added—it can alter taste under high heat.
Keeping texture with correct power settings
Microwaves work best with lower power and longer time. I use 50% power to retain moisture and avoid hot spots. Overheating causes canned beans to split or fall apart. If using the microwave for reheating leftovers, I splash in some broth or sauce and cover again to maintain softness.
Pressure Cooker or Instant Pot Green Beans
While canned green beans don’t need pressure to become tender, using a pressure cooker or Instant Pot can be useful when infusing flavor quickly, especially when cooking in bulk or enhancing other ingredients in the pot.
Flavor infusion
I combine drained canned green beans, ¼ cup of broth or seasoned liquid, and aromatics like garlic, chopped onion, smoked paprika, or a small ham hock if I’m after a Southern profile. I seal the lid and set the cooker to low pressure or manual for 2–3 minutes max. That’s enough to warm through and infuse flavor without turning them into mush.
Once done, I do a quick release, open the pot, and serve them immediately—or let the beans sit for a few minutes in the warm broth for even more flavor absorption.
Cook time for softness without mush
The sweet spot is 2 minutes under pressure followed by a quick release. I avoid natural release—it keeps beans too hot for too long and breaks down texture. If I include meat or potatoes, I cook those first, then add the beans for the final few minutes under pressure or even on Sauté mode.
Time and Temperature Chart for All Methods
Here’s my reliable chart for canned green beans, based on years of kitchen testing:
| Method | Temperature | Time | Notes |
| Stovetop sauté | Medium heat | 5–7 min | Stir gently, avoid high heat |
| Stovetop simmer | Low heat | 10–15 min | Use broth, keep uncovered |
| Oven roast | 400°F (200°C) | 15–20 min | Dry beans first, single layer |
| Oven casserole | 375°F (190°C) | 20–25 min | Add cream/broth for moisture |
| Skillet (Southern) | Medium–low with broth | 15–20 min | Stir rarely, simmer uncovered |
| Microwave | 50–70% power | 2–3 min | Use cover and stir halfway |
| Pressure cooker | Low/manual pressure | 2–3 min (quick release) | Flavor infusion only |
I always check that beans are hot throughout (165°F/74°C) and still hold shape when nudged with a spoon.
Seasonings and Aromatics That Elevate Canned Beans
When working with canned green beans, seasoning is everything. The beans themselves have a neutral, soft character, and it’s up to you as a cook to bring complexity and balance. I treat seasoning as a layered process—starting with aromatics, then salt and acid, then herbs or finishes.
Salt, acid, fat
First, I always taste the beans after draining or rinsing. Some are extremely salty, especially if not labeled low-sodium. I never salt canned green beans until the very end. Instead, I start with a fat base like olive oil, butter, or bacon grease to carry flavor. Then I add aromatics like chopped garlic, minced shallots, or sweet onions sautéed until golden.
What often gets overlooked is acid—lemon juice, apple cider vinegar, white wine vinegar, or even tomato paste make a huge difference in lifting and brightening the flavor. I usually add acid in the final 1–2 minutes of cooking or drizzle it just before serving.
Fresh herbs and savory blends
Dried herbs often taste stale or disappear during short cooks. That’s why I rely on fresh parsley, dill, chives, or basil at the end to bring life back into the beans. If I want earthy notes, I use thyme or rosemary, either whole sprigs while simmering or finely chopped at the finish.
For a deeper profile, I mix in smoked paprika, cumin, or crushed red pepper, depending on the dish. I also occasionally toss the beans with a teaspoon of herb oil or mustard vinaigrette just before plating for a gourmet finish.
Sauces, Glazes, and Liquids That Add Depth
Canned green beans absorb flavor well, but only if you manage the moisture properly. I use sauces not just for seasoning but for texture contrast and aroma.
Broth, butter sauce, balsamic, mustard glaze
Broth (vegetable, chicken, or beef) adds subtle depth. I simmer beans in it when I want moisture without fat. I often reduce it slightly to concentrate flavor. Butter sauces, on the other hand, coat the beans in richness. I melt butter with garlic and herbs, then toss beans at the very end—never let them boil in butter or it separates.
Balsamic glaze is one of my favorites. I reduce balsamic vinegar with a little sugar or honey until it thickens, then lightly drizzle over roasted or skillet beans for sweetness and acidity. For a mustard glaze, I whisk Dijon mustard with olive oil and a dash of lemon or vinegar. It clings perfectly to hot beans without overpowering them.
When to reduce or toss
Sauces that are too thin waterlog canned beans. I always reduce the sauce first in a separate pan, then toss beans in it for just 2–3 minutes before serving. For hot sauces (like soy or vinegar-based ones), I add them off heat to avoid bitterness or breakdown. The goal is coating, not soaking.
Common Mistakes When Cooking Canned Green Beans
Even experienced cooks fall into traps with canned vegetables. I’ve made all these mistakes before I learned to treat canned beans not like convenience food—but like an ingredient with limits and potential.
Overcooking and salt overload
The most common error is cooking them as if they’re raw. You don’t need to boil or braise them. Every minute over medium heat risks turning them into mush. I always heat them only until warmed through and glistening—never more than 10–15 minutes total depending on the method.
Salt is another danger. Canned green beans often contain 400–600 mg of sodium per serving. If you add broth or bacon without tasting first, you risk a dish that feels unbalanced and heavy. I fix this by rinsing thoroughly and adding salt only at the end.
Skipping acid or fresh ingredients
Without a splash of vinegar or citrus, canned beans taste dull. The acid balances the salt and fat, and fresh herbs reintroduce complexity lost in canning. Every dish I serve gets a bright touch before it hits the table—even just black pepper and a squeeze of lemon juice changes everything.
Flavor Variations from Around the World
Canned green beans are like tofu in that they absorb whatever culture you cook them in. I’ve used them in dishes from Asia, Europe, the Middle East, and the American South. You only need a good base and an idea of the flavor profile you’re chasing.
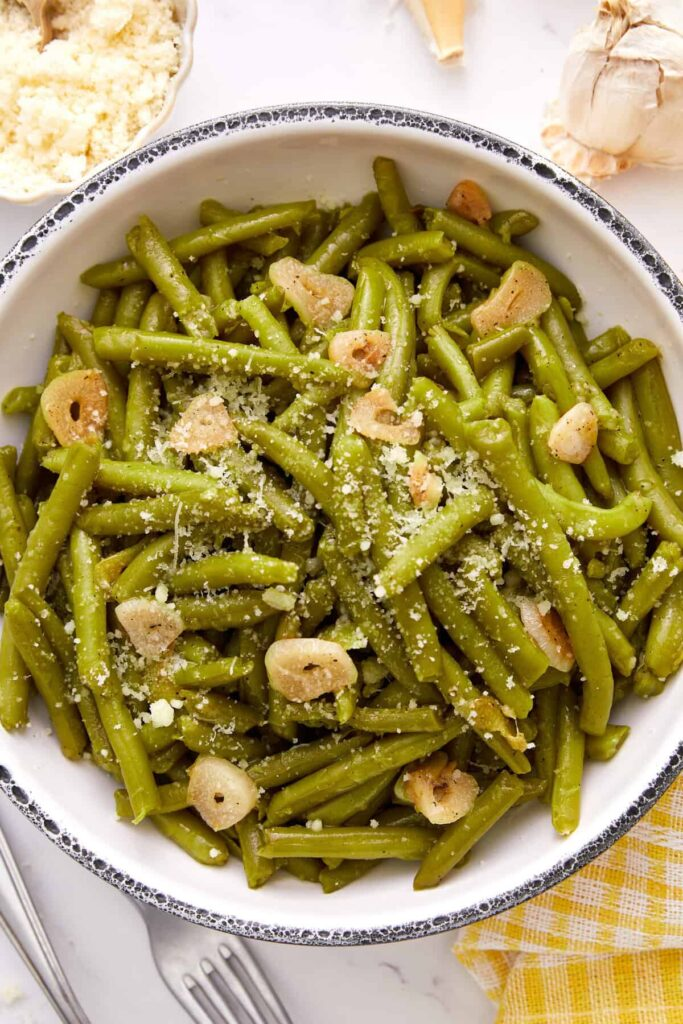
Italian garlic-parmesan
Sauté beans in olive oil with garlic, finish with lemon juice, grated Parmesan, and a sprinkle of chili flakes. Sometimes I add a few cherry tomatoes or a spoonful of tomato paste to mimic rustic Italian stews.
Cajun-style, Asian soy-ginger, Middle Eastern lemon
For Cajun beans, I simmer them with bacon fat, onion, thyme, cayenne, and smoked paprika. It’s hearty and rich—great with cornbread or grilled meats.
For Asian-style, I stir drained beans with soy sauce, sesame oil, fresh ginger, garlic, and a pinch of sugar. Topped with scallions and sesame seeds, they’re a perfect match for grilled chicken or tofu.
Middle Eastern style uses garlic, lemon juice, cumin, and olive oil, often with chopped parsley or coriander. I serve this cold or warm, paired with rice, grilled meats, or hummus.
Serving and Plating Green Beans Like a Chef
How you present green beans can make the difference between “side dish” and “main attraction.” I always focus on contrast and composition when plating.
Pairing with main dishes
I match the bean style to the protein. Garlic and lemon beans go with fish or chicken. Bacon and onion simmered beans pair with pork, beef, or smoked meat. When I make soy-glazed beans, I serve them alongside rice bowls, stir-fried noodles, or crispy tofu.
For large meals or buffets, I place beans in a wide dish, top with herbs and lemon slices. At the table, I offer them with a light spoonful of broth or drizzle of oil for sheen.
Plating for texture and contrast
I never serve beans cold or overly soft. I bundle them into small groups with tongs, layer them in rows, or fan them across the plate for texture. Then I add color—red pepper flakes, bright green herbs, or curls of cheese. Every dish needs a visual pop to signal flavor.
Storing and Reheating Leftover Cooked Beans
Cooked canned green beans store very well—if they’re handled gently. The key is moisture retention and flavor refresh.
Fridge and freezer tips
After cooking, I let beans cool completely, then store them in airtight containers with a tablespoon of broth or cooking fat to keep them moist. In the fridge, they last 3–4 days. I rarely freeze them for direct eating—they become too soft. But I do freeze them in small portions to later add to soups, stews, or casseroles, where texture matters less.
Best ways to reheat without sogginess
I reheat beans in a covered skillet with a splash of liquid, always over low heat. Stir gently, heat only until warmed through. Microwaving is fine if done in short bursts with added moisture and a cover—this helps avoid dry or rubbery texture.
Before serving, I often refresh with a drizzle of butter, oil, or lemon juice—and finish with cracked pepper or herbs. That one touch brings life back to leftovers.
FAQ: 15 Real Questions About Cooking Canned Green Beans — Answered by a Chef
Do I need to rinse canned green beans before cooking?
Yes, I usually rinse them under cold water to reduce excess sodium and remove the metallic flavor from the canning liquid. I only keep the liquid when I’m building a broth-based dish where I can control the seasoning later.
Can I roast canned green beans in the oven?
Absolutely—but only if you pat them dry first. I’ve done this many times: dry beans tossed in olive oil, roasted at high heat, give you a crisp, flavorful result with caramelized edges.
How do I make canned green beans taste fresh?
I recommend adding aromatics like garlic and onion, finishing with lemon juice or vinegar, and tossing in chopped herbs like dill or parsley. I’ve transformed bland beans into crowd-pleasers this way dozens of times.
Are canned green beans already cooked?
Yes, they’re fully cooked during the canning process. That’s why I never boil them—just heat gently while layering in flavor.
What’s the best method for quick preparation?
I use the stovetop sauté method with butter and garlic. It takes under 10 minutes and gives me control over seasoning and finish without breaking the beans apart.
How do I avoid making them mushy?
Avoid high heat, long cooking times, and unnecessary stirring. I cook them just until heated through, always on low to medium heat, and finish with bold flavor—not over-manipulation.
Can I use canned green beans in casseroles?
Yes, and they work especially well when combined with creamy sauces or cheese. I usually drain but don’t rinse for casseroles, so they retain a bit of moisture for texture balance.
How much salt should I add?
Start with none. I always taste the beans after rinsing and heating before adding any salt. Many canned versions have enough sodium to season the dish without any extra help.
What are some good flavor combos for canned beans?
One of my favorites is garlic, olive oil, lemon juice, and red pepper flakes. For something deeper, try bacon, onion, broth, and a splash of vinegar.
Can I cook canned beans in the microwave?
Yes. I use 50–70% power with a little broth or water, covered loosely. Then I toss with seasoning after heating—it keeps the texture intact.
Do they work in pressure cookers?
They don’t need pressure cooking, but I sometimes use it to infuse flavor fast. I keep cook time to 2–3 minutes and always do a quick release to prevent over-softening.
What’s the ideal serving temperature?
I serve them hot, around 165–175°F (74–80°C). That’s warm enough to feel fresh without overcooking. I always rest them off heat for a minute or two before plating.
Should I use the can liquid or discard it?
Most of the time I discard it, especially for sautés and roasts. But in Southern-style simmered beans or casseroles, a bit of the liquid can add flavor and body when balanced correctly.
What’s the best way to reheat leftovers?
I reheat in a skillet with a splash of broth or butter, low heat, covered. That preserves moisture and flavor. I add fresh herbs right before serving to brighten the dish again.
Can I freeze leftover canned green beans?
Technically yes, but I don’t recommend it for texture. If I freeze them, I plan to use them later in soups or stews where softness isn’t a problem.

Post Comment