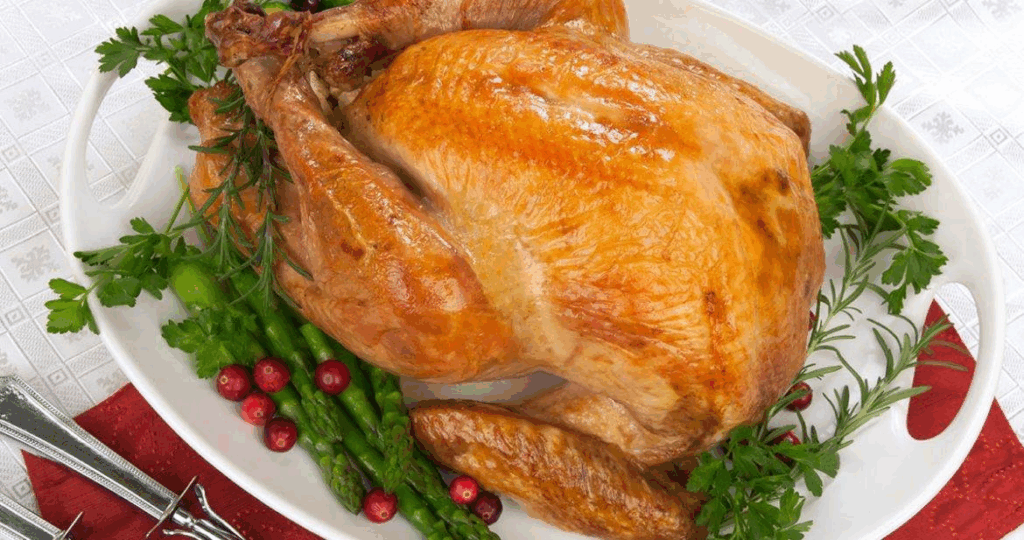
How to Cook a Turkey in an Electric Roaster
How to Cook a Turkey in an Electric Roaster: Full Guide from a Professional Chef

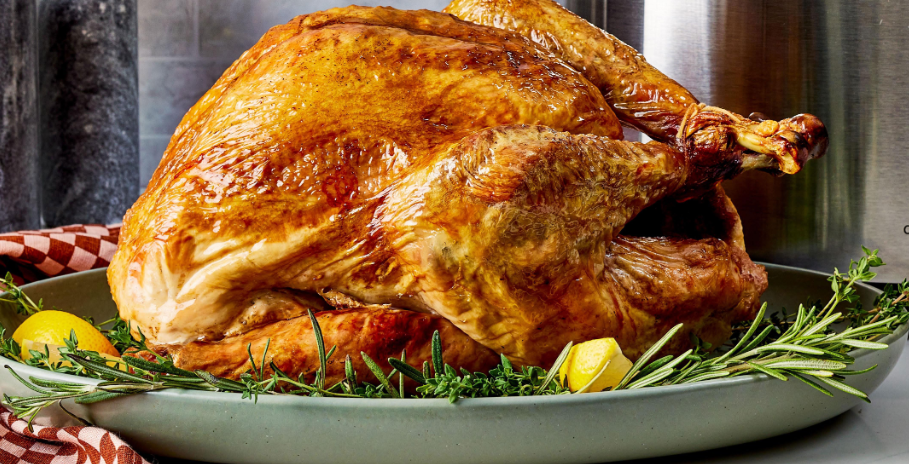
Cooking turkey in an electric roaster is one of my favorite ways to get reliable, juicy results—without tying up the main oven. It may look like an unusual tool, but once you master it, you’ll wonder why you didn’t start sooner. Let me walk you through the entire process with the detail and confidence of a chef who’s done it dozens of times.
- Why the Electric Roaster Is Perfect for Turkey
- Choosing the Right Turkey for Roaster Cooking
- How to Safely Thaw and Prep Your Turkey
- Essential Ingredients and Tools for Electric Roaster Turkey
- How to Season and Flavor Your Turkey for Maximum Impact
- Trussing and Positioning the Turkey in the Roaster
- Temperature and Timing: Cooking Turkey in an Electric Roaster
- Time and Temperature Table by Turkey Weight
- When and How to Baste or Leave It Alone
- Finishing and Browning the Skin Without Overcooking
- Cooking Turkey Parts in a Roaster Instead of the Whole Bird
- Using Other Appliances: Skillet, Microwave, Pressure Cooker, Oven
- Common Mistakes with Electric Roaster Turkey
- My Favorite Turkey Gravy and Pan Sauce Techniques
- Serving and Pairing Ideas for Roasted Turkey
- Storage and Reheating for Best Texture and Flavor
- FAQ
Why the Electric Roaster Is Perfect for Turkey
When people first try cooking a turkey in an electric roaster, they’re often surprised at how effective it is. I’ve used roasters both in professional catering and at home for holidays, and the results can rival a full-size oven—with less hassle. The key advantage? Controlled, enclosed heat that locks in moisture while freeing up your main oven for side dishes or desserts.
How it differs from conventional ovens
Electric roaster ovens work like a countertop version of a traditional oven but circulate heat more efficiently within a compact chamber. That closed environment traps steam and helps the turkey self-baste. Unlike a regular oven, where heat rises and varies by rack level, the roaster maintains a uniform temperature and cooks faster.
Moisture retention and energy efficiency
In my experience, turkeys cooked in a roaster come out especially juicy. Because of the enclosed heat, the skin crisps up less unless you make specific adjustments—but the meat, especially the breast, stays moist. You’ll also use far less energy compared to a full-size oven running for 3–5 hours, making it a practical and economical holiday tool.
Choosing the Right Turkey for Roaster Cooking
Not every turkey fits every roaster, and choosing the right one saves time, stress, and cooking issues. I always check the capacity of the electric roaster before buying the bird.
Ideal weight range
Most standard electric roasters (16 to 22 quarts) comfortably handle turkeys between 10 and 20 pounds. A 22-lb bird may technically fit, but airflow and even heating may suffer. I recommend a 12- to 16-pound turkey for best results—it cooks evenly, doesn’t crowd the roaster, and leaves room for aromatics and basting if needed.
Fresh vs frozen considerations
I prefer fresh turkeys when I can get them, especially for holiday cooking. They require less planning and often have better texture. But frozen turkeys are reliable and more widely available. If using frozen, I always allow at least 24 hours of fridge thawing per 4 pounds of meat—a 16-lb turkey takes at least 4 days. I never roast a partially frozen bird—it results in dry exterior and undercooked interior.
How to Safely Thaw and Prep Your Turkey
Proper thawing is critical for safe and successful cooking. One of the most common mistakes I see is starting with a bird that’s still icy inside. That can derail the entire process.
Fridge and cold water thawing methods
I prefer the refrigerator method: place the turkey, still in its packaging, breast-side up in a large tray or roasting pan to catch any leaks. Thaw in the fridge for 24 hours per 4 lbs. If you’re short on time, the cold water method works—submerge the sealed bird in cold water, changing the water every 30 minutes. This method takes about 30 minutes per pound, so a 16-lb turkey will need roughly 8 hours.
Cleaning, drying, and seasoning prep
After thawing, I remove the turkey from the wrapper, discard any giblets or neck from the cavities, and pat it dry with paper towels. Moisture on the skin prevents browning. At this point, I either apply a dry brine, begin wet brining, or start prepping my seasoning rubs or butter mixture. A dry bird gives the seasoning something to stick to and sets the stage for crisp skin and flavorful meat.
Essential Ingredients and Tools for Electric Roaster Turkey
- Whole turkey (12–16 lbs recommended)
- Kosher salt
- Freshly ground black pepper
- Unsalted butter or olive oil
- Fresh herbs (thyme, rosemary, sage)
- Garlic cloves
- Onion and citrus (optional, for stuffing cavity)
- Dry rub or compound butter (optional)
- Meat thermometer (probe-style or digital instant-read)
- Electric roaster oven (16–22 quart)
- Roasting rack (helps air circulate under bird)
- Heavy-duty aluminum foil
- Basting brush or spoon
- Paper towels
- Large carving board and sharp knife
How to Season and Flavor Your Turkey for Maximum Impact
Seasoning turkey is about more than just salt—it’s about building flavor inside and out. In an electric roaster, where the environment is more humid, seasoning becomes even more important to keep the flavor vibrant and the skin well-balanced.
Dry brine vs wet brine
I often use a dry brine because it requires less space and gives better skin texture. I coat the bird with kosher salt (about 1 tablespoon per 4 lbs), a touch of sugar, and dried herbs like thyme or rosemary. I leave it uncovered in the fridge on a tray for 24 to 48 hours. This draws moisture from the skin, seasons the meat deeply, and helps crisp the skin even in a moist roaster.
If I’m going for extra juiciness, I use a wet brine—a solution of water, salt, sugar, citrus, and herbs. I submerge the turkey completely and refrigerate for 12–24 hours. After brining, I always rinse and thoroughly pat the bird dry before roasting.
Compound butters, aromatics, and rubs
Before roasting, I make a simple compound butter with softened unsalted butter, garlic, chopped herbs, lemon zest, and salt. I gently loosen the skin over the breast and thighs and spread the butter underneath—it bastes from within as it melts.
Inside the cavity, I place quartered onions, halved lemons, garlic, and fresh herbs to perfume the meat. For extra color and flavor, I rub the entire surface with olive oil or more butter, then sprinkle with a dry rub of paprika, black pepper, and salt. This gives a beautiful golden finish even in the closed-roaster environment.
Trussing and Positioning the Turkey in the Roaster
Proper positioning helps the turkey cook evenly, and trussing isn’t just about looks—it affects moisture retention and even heat distribution.
Why trussing affects texture
I tie the legs together loosely with kitchen twine and tuck the wing tips under the body to prevent burning. Trussing helps the bird retain its shape and keeps the breast meat from overcooking while the thighs catch up. I avoid tying the legs too tightly, as that can prevent even heat circulation into the cavity.
Breast up vs breast down debate
For most cooks, roasting with the breast side up is the simplest and safest route in an electric roaster. It gives you better access for basting and monitoring. However, if you want ultra-juicy breast meat, you can start the roast breast-side down for the first hour and flip it over to finish. Personally, I keep it breast-up the whole time and protect the top with foil if it browns too quickly.
Temperature and Timing: Cooking Turkey in an Electric Roaster
Electric roasters work best when preheated and left closed. Every time you lift the lid, you lose valuable heat and add to your cook time. I always preheat the roaster to 325°F (163°C) for even results.
Setting the roaster temperature
I start by plugging in the roaster and setting the dial to 325°F, letting it heat for 20 minutes before adding the turkey. Once the turkey is in, I cover it tightly with the lid and avoid opening it for at least the first 2 hours. This preserves the moisture and keeps the cooking environment stable.
Estimated cook times per pound
In general, I allow 15 minutes per pound for unstuffed turkey and 16–17 minutes per pound for stuffed. A 14-pound bird typically takes 3.5 to 4 hours in a preheated roaster. But I don’t go by time alone—I always check internal temperature.
Time and Temperature Table by Turkey Weight
This is the temperature and timing guide I use based on years of roasting turkeys in electric ovens:
| Turkey Weight | Estimated Time | Roaster Temp | Internal Temp Goal |
| 10–12 lbs | 2.5–3 hrs | 325°F (163°C) | 165°F breast / 175°F thigh |
| 12–14 lbs | 3–3.5 hrs | 325°F (163°C) | same as above |
| 14–16 lbs | 3.5–4 hrs | 325°F (163°C) | same as above |
| 16–18 lbs | 4–4.5 hrs | 325°F (163°C) | same as above |
| 18–20 lbs | 4.5–5 hrs | 325°F (163°C) | same as above |
I insert a meat thermometer into the thickest part of the thigh, without touching the bone. When it hits 175°F (79°C) and the breast is at 165°F (74°C), it’s done. I remove the turkey, tent it with foil, and let it rest for 30–45 minutes before carving.
When and How to Baste or Leave It Alone
Basting is a classic technique, but in an electric roaster, it’s not always necessary—and sometimes even counterproductive. The enclosed design already creates a humid environment that helps prevent the turkey from drying out.
Why I often skip basting
In my experience, frequent basting can extend the cooking time and soften the skin. Every time you lift the lid, you lose heat and steam, which lowers the cooking chamber’s temperature. Unless I’m after extra crispy skin, I often skip basting altogether and rely on a compound butter under the skin and olive oil on the surface to self-baste as the bird roasts.
Basting methods that work without opening the lid
If you still want to baste, I recommend doing it only once or twice in the second half of cooking. I use a turkey baster or large spoon to ladle pan juices over the bird quickly, then immediately replace the lid. Alternatively, I’ll brush the surface with melted butter during the final 30 minutes for enhanced color.
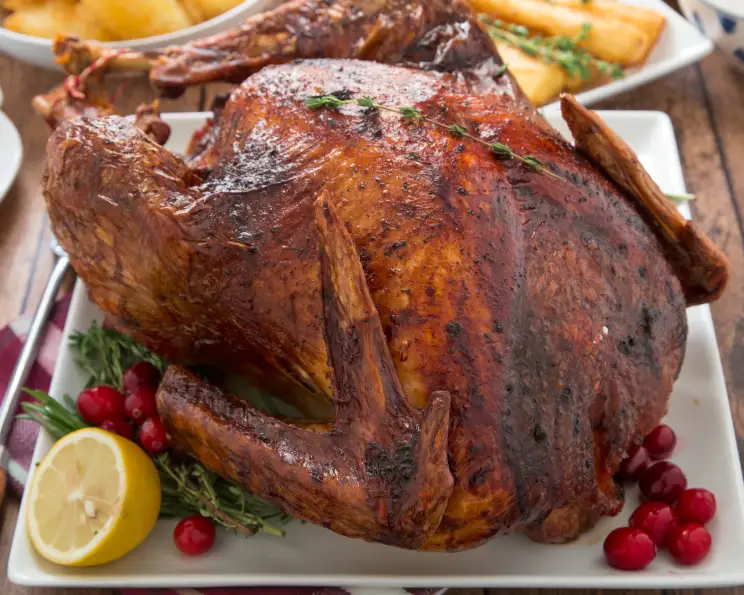
Finishing and Browning the Skin Without Overcooking
Since electric roasters trap steam, skin doesn’t always brown as it would in a conventional oven. But there are ways to get that golden finish without sacrificing the internal juiciness.
Crank up heat or torch?
I don’t recommend raising the roaster temperature above 375°F—it tends to cause uneven cooking. Instead, I transfer the turkey to a broiler-safe roasting pan and place it under the oven broiler for 4–6 minutes, rotating as needed for even browning. Another trick I sometimes use is a culinary torch to touch up pale areas without overheating the whole bird.
Butter and broil options
Brushing the turkey with melted butter or pan juices before broiling enhances the golden color and creates a gentle glaze. If I used a rub with sugar or paprika, the color comes naturally—but I’m careful not to burn it. Always watch closely when using direct heat at the end.
Cooking Turkey Parts in a Roaster Instead of the Whole Bird
Not everyone wants to roast a whole turkey, especially for smaller gatherings or when different parts need different doneness. The electric roaster works beautifully with legs, thighs, or breasts cooked separately.
Legs, breast, wings separately
I often roast just the breast on the bone, especially if serving a smaller group. It cooks faster—about 20 minutes per pound at 325°F—and stays juicy when placed skin-side up on a rack. Legs and thighs take slightly longer but develop deep flavor, especially when marinated or spiced before roasting.
Wings are best used for broth or snacks, as they can dry out. If cooking parts together, I stagger them in the roaster or start thighs and legs before adding the breast.
Timing and placement tips
I position cuts evenly spaced on the rack so air can circulate freely. If cooking multiple parts, I place darker meat toward the edges where the heat is slightly higher. I check each piece with a thermometer and pull them as they reach safe temperature—165°F for breast, 175°F for thighs and legs.
Using Other Appliances: Skillet, Microwave, Pressure Cooker, Oven
I often combine the electric roaster with other tools when managing multiple dishes or handling leftovers. Each appliance plays a different role, depending on the stage of cooking or serving.
When to use each for sides or leftovers
For quick browning or searing, I use a cast iron skillet to crisp up turkey slices or skin-on cuts. It’s perfect for bringing back texture. If I’m short on oven space, I’ll make sides like stuffing, roasted vegetables, or gratins in a countertop oven.
When reheating, I avoid the microwave for whole cuts. But for small pieces, I place them in a microwave-safe dish with broth, cover with a lid, and reheat at 50% power in 30-second bursts until just warmed through. It’s not ideal for skin but works well for sandwiches and salads.
Reheating safely
In a pressure cooker, I sometimes use turkey leftovers for soups or stews. The meat gets extra tender without drying. If reheating full portions, I wrap them in foil and warm in the oven at 275°F (135°C) until they reach an internal temp of 160°F. I always add moisture—pan drippings, broth, or a dab of butter—to preserve texture.
Common Mistakes with Electric Roaster Turkey
I’ve coached a lot of home cooks through their first electric roaster turkey, and I see the same mistakes repeated. The good news? They’re all avoidable once you understand how this appliance behaves.
Steaming, overstuffing, skipping rest
The biggest error is treating the roaster like a conventional oven without adjusting expectations. If the turkey is touching the lid or walls of the roaster, it tends to steam instead of roast. I always make sure there’s 1–2 inches of clearance around the bird. Overstuffing the cavity is another issue—it slows cooking and increases the risk of underdone stuffing. I recommend cooking stuffing separately and using aromatics like onion, lemon, and herbs inside the bird instead.
And whatever you do, don’t carve immediately after cooking. I rest the turkey 30 to 45 minutes, tented with foil. This lets the juices redistribute and makes the meat much easier to slice cleanly.
Misjudging internal temperature
Many people still go by time, but no turkey should be pulled without checking internal temp. Relying on the pop-up timer (if your bird has one) is risky—they’re often set too high. I always use a digital thermometer and check the thickest part of the thigh and breast. If you take it out too soon or too late, texture and safety suffer.
My Favorite Turkey Gravy and Pan Sauce Techniques
An electric roaster makes great drippings—but collecting and enhancing them takes a bit of planning. I never let those rich juices go to waste. They’re the base of every memorable gravy.
Making gravy from drippings
Once the turkey is removed, I pour the drippings from the roaster into a fat separator or chilled bowl. After the fat rises to the top, I use the flavorful broth below to start my gravy. In a saucepan, I combine equal parts butter and flour to make a roux, cook for 2–3 minutes, then slowly whisk in the turkey drippings. I simmer until thickened, usually 5–7 minutes, and season with salt, pepper, and a splash of lemon juice.
Enhancing with wine or herbs
To level up the flavor, I sometimes add a splash of dry white wine or Madeira, a few sprigs of thyme, or a small spoon of Dijon mustard. If I used citrus and garlic in the cavity, I’ll reduce those aromatics directly into the sauce for a bright, herbaceous finish. A tablespoon of heavy cream gives it a glossy, restaurant-quality texture.
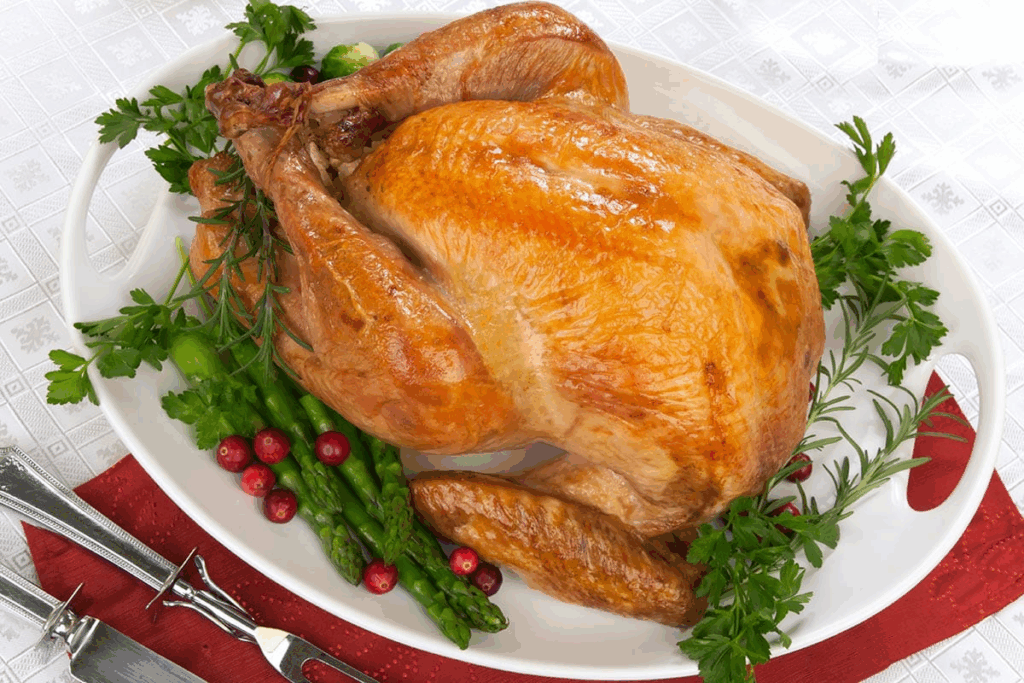
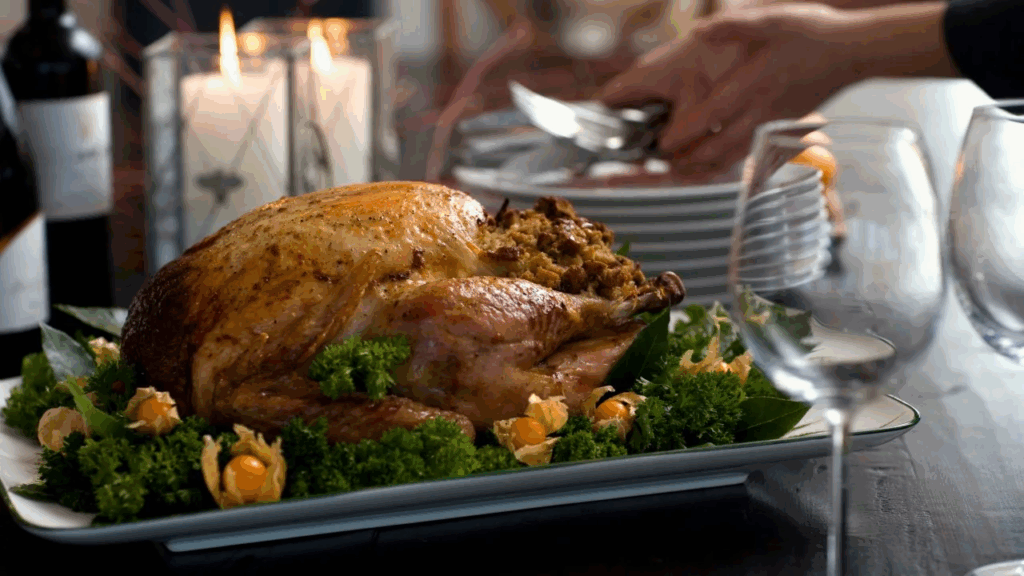
Serving and Pairing Ideas for Roasted Turkey
Turkey is more than a centerpiece—it’s the anchor of the plate, so everything else must balance richness, texture, and freshness. Whether you’re plating for the holidays or a weeknight meal, thoughtful pairing matters.
Carving advice and classic sides
I always carve the turkey on a large wooden board with a groove, using a sharp slicing knife. I remove the legs first, then the thighs, wings, and finally the breast. I slice the breast crosswise into ¼-inch thick pieces and arrange the meat on a warm platter, drizzling with a little pan jus.
For sides, I pair turkey with savory stuffing, mashed potatoes, cranberry sauce, roasted carrots, green beans, and gravy. If I want something fresher, I add an arugula salad or citrus vinaigrette slaw to brighten the plate.
Presentation and holiday plating tips
I garnish the platter with herb sprigs, lemon wedges, and roasted garlic bulbs for color and aroma. I use white serving dishes to let the golden turkey shine, and I place sauceboats of gravy on the side so guests can add as much or little as they like. Even at home, a thoughtful presentation turns a turkey dinner into something special.
Storage and Reheating for Best Texture and Flavor
Leftover turkey is one of my favorite ingredients—it makes everything from sandwiches to soups taste better. But to keep it juicy, it must be stored and reheated properly.
Fridge, freezer, and reheat methods
I slice or pull the meat before storing, dividing it into light and dark meat. I place the portions in airtight containers with a few spoonfuls of pan juices or broth. In the fridge, turkey lasts 3–4 days. For longer storage, I wrap portions in parchment, then foil, and freeze in zip-top bags for up to 2 months.
To reheat, I use a covered skillet with broth over low heat, or the oven at 275°F (135°C) for 15–20 minutes, tented with foil. For larger portions, I reheat in a covered baking dish with added liquid to maintain softness. Microwaving works only for small, moist pieces—I always avoid reheating skin in the microwave.
FAQ
Do I need to preheat the electric roaster before putting the turkey in?
Yes, absolutely. I always preheat the roaster to 325°F for at least 20 minutes. Starting cold extends cooking time and can affect browning. A hot chamber ensures even heat distribution right from the start.
Can I cook a stuffed turkey in an electric roaster?
Technically yes, but I don’t recommend it. I’ve tried it, and it’s very difficult to get the center of the stuffing up to 165°F without overcooking the breast. I always cook stuffing separately—it’s safer and easier to control.
How do I keep the turkey from steaming instead of roasting?
I make sure the turkey doesn’t touch the lid and that the roaster isn’t overcrowded. I dry the skin thoroughly, use a rack to elevate the bird, and don’t open the lid often. Crisp skin requires dry heat—even in a roaster.
What size turkey fits in a standard electric roaster?
Most 16–22 quart roasters comfortably fit up to a 20-pound bird. I usually go with 12 to 16 pounds for ideal air circulation and cook time. Larger birds may fit but are harder to brown and turn.
Should I baste the turkey while it’s cooking?
Not unless you absolutely need to. I rarely baste—opening the lid drops the heat dramatically. If I do baste, it’s just once near the end. I prefer seasoning under the skin and butter on the outside for self-basting.
Does the turkey skin get crispy in a roaster?
Not always. Roasters trap moisture, so unless you dry the bird well, use fat, and sometimes finish under a broiler, skin can stay soft. I brush with butter and finish in the oven if needed.
How do I know when the turkey is done?
I never trust timers or pop-ups. I use a meat thermometer in the thickest part of the thigh—175°F is perfect. The breast should be 165°F. Always rest the turkey after cooking for at least 30 minutes.
Can I use an electric roaster for just the turkey breast?
Yes, and I often do for smaller gatherings. A bone-in breast cooks in about 2–2.5 hours at 325°F. I still season under the skin and use a rack to elevate it for even cooking.
What do I do if the turkey is browning too fast?
I tent the top loosely with foil. This protects the skin without trapping too much steam. If it’s already too brown, I lower the temp by 25°F and check internal temps more frequently.
Can I put vegetables in the roaster with the turkey?
Yes, but only if there’s room and they don’t block airflow. I sometimes place carrots, onions, and celery around the bottom for flavor—but I keep them below the rack, not covering the meat.
How do I collect drippings in an electric roaster?
I use the roasting rack so juices pool at the bottom. After cooking, I pour everything through a fine mesh strainer into a fat separator, then make gravy on the stovetop. Roaster drippings are incredibly flavorful.
Can I carve the turkey right out of the roaster?
No, and I wouldn’t recommend it. The bird is too hot and awkward. I lift it out onto a carving board, tent it, and let it rest. Resting improves texture and makes slicing neater and juicier.
What’s the best way to store leftover turkey from the roaster?
I slice the meat while it’s still warm and store it in containers with a few spoonfuls of drippings. It stays moist in the fridge for 3–4 days. For freezing, I wrap in parchment and foil and use airtight bags.
Can I cook a frozen turkey in an electric roaster?
No—never cook frozen poultry. The outside will overcook before the inside is safe. Always thaw your turkey fully in the fridge or with cold water, then pat it dry and bring to room temp before roasting.
Is there any flavor difference between roaster and oven turkey?
Slightly. Roaster turkey is usually more moist, but the skin won’t crisp as much. If you finish it with broiling or torching, the flavor is nearly identical. I use both methods depending on what else I need my main oven for.


Post Comment