Indian Street Food: How to Make Pani Puri


I still remember the first time I tasted Pani Puri on a buzzing street corner in Delhi. The burst of spicy tangy water, the crunch of the puri, the coolness of potato — it was electrifying. Since then, I’ve made this dish hundreds of times in restaurant kitchens and homes alike. In this guide, I’ll take you through everything I’ve learned — from choosing the right semolina to preparing flavor-rich pani and assembling puris that never go soggy.
- Understanding the Essence of Pani Puri
- Key Ingredients for Authentic Flavor
- How to Make the Puri Shells at Home
- Cooking Time and Preparation Table
- The Perfect Pani: How to Balance Spice, Tang, and Coolness
- Stuffing Options Beyond the Classic Potato
- Assembly: Building the Pani Puri in the Right Order
- Regional Variations of Pani Puri Across India
- Make-Ahead Tips for Hosting Pani Puri Parties
- Comparing Homemade vs. Street-Style Pani Puri
- Nutritional Value and Digestive Considerations
- Time Table for Cooking and Serving Pani Puri
- Serving Suggestions and Presentation Ideas
- Oven, Microwave, and Slow Cooker Approaches
- Common Mistakes and How to Avoid Them
- Why Pani Puri Stands Out Among Indian Street Foods
- FAQ
Understanding the Essence of Pani Puri
Pani Puri is not just food — it’s a sensory experience. Known by different names across India (Golgappa in the North, Phuchka in Bengal), it’s built on a few universal principles: crisp puris, spicy water (pani), and flavorful stuffing. The puri is a puffed, hollow shell made from semolina or wheat flour, designed to crack open and hold the liquid until the very last second before it reaches your mouth.
At my restaurant, I always remind my staff: this is not a dish for the fridge. It must be eaten fresh, immediately after being assembled. The contrast between the cold, spicy pani and the warm potato mash is key — and the joy is in that explosion of flavor that lasts only seconds but leaves a memory.
Key Ingredients for Authentic Flavor
Over time, I’ve learned that every element of Pani Puri deserves attention. You can buy puris pre-made, but if you have the time and patience, homemade ones take the experience to another level.
For the puris, I mix semolina (sooji) with all-purpose flour and a pinch of salt. The dough must rest and be rolled thin before deep-frying until they puff. The pani — the spicy, tangy water — is where creativity shines. My base includes mint, coriander, green chilies, tamarind pulp, black salt, and roasted cumin. I blend it into a bright green elixir that wakes the palate.
As for the stuffing, classic versions use boiled potatoes, black chickpeas, or white peas. I like mixing mashed potatoes with chaat masala, onions, and a bit of lemon. In fact, I’ve even used sprouted moong beans during health-focused pop-ups and guests were amazed at the depth of flavor.
How to Make the Puri Shells at Home
Making the puri shells from scratch is a rewarding process, though it does take a bit of precision. I start by kneading semolina dough that’s just stiff enough to hold shape. After resting for at least 30 minutes, I roll it out thin — about the thickness of a coin — and cut small discs using a cutter or lid.
These are deep-fried in hot oil until they puff and turn golden brown. If they don’t puff, it usually means the oil wasn’t hot enough or the dough needed more resting. Once fried, I let them cool completely before storing in an airtight container. Properly made, they can last up to a week and remain crisp.
You can experiment by using wheat flour or adding a touch of ajwain for extra aroma, but for that classic street-style taste, semolina does the trick best. I’ve taught this version in my workshops and it always gets enthusiastic reactions — especially when participants see the puris puff up like balloons in oil.
Cooking Time and Preparation Table
Here is the full timeline I follow in both home and professional settings:
| Task | Time Required | Method |
| Making and resting puri dough | 40 mins | Manual (resting included) |
| Rolling and frying puris | 25 mins | Deep fry, high heat |
| Preparing pani (spiced water) | 20 mins | Blend + chill for 1 hour |
| Boiling and mashing potatoes | 30 mins | Stove or pressure cooker |
| Assembling and serving | 10 mins | On-the-spot, immediately before eating |
| Optional chutneys (tamarind, garlic) | 20–30 mins | Simmer + cool |
This structured approach helps when prepping for guests or large gatherings. I often make the pani and fillings ahead, then focus on frying puris fresh — it always draws a crowd.
The Perfect Pani: How to Balance Spice, Tang, and Coolness
Getting the pani just right is a balancing act. In my own experience, I’ve found that the best flavor starts with a base of fresh mint and coriander leaves. I blend them with green chilies, roasted cumin, black salt, regular salt, lemon juice, and tamarind pulp. For extra depth, I add a few soaked dates — they round off the heat with a subtle sweetness.
Once blended, the mixture needs to be strained to remove fibrous bits. I then chill the pani for at least an hour. This isn’t just about temperature — the flavors deepen when allowed to rest. Sometimes, I’ll add a few ice cubes and boondi (crunchy fried gram flour pearls) just before serving. If you’ve ever tasted the pani from a street vendor and wondered what makes it pop, it’s the ratio of tamarind to green chili — and that extra pinch of black salt.
In my kitchen, I always serve the pani cold, never lukewarm. That chill against the warm potato mix creates the ultimate contrast.
Stuffing Options Beyond the Classic Potato
The traditional filling for Pani Puri is mashed potato with chaat masala, but I’ve experimented with everything from spicy mashed peas to beetroot-laced chickpeas. One of my most memorable versions was a green moong sprout and paneer crumble stuffing — guests still ask about it years later.
Some regional styles — like Kolkata’s phuchka — use tamarind-spiced mashed potatoes with chopped green chilies and coriander. Down South, I’ve even seen coconut-cooked chickpeas paired with jaggery-laced pani.
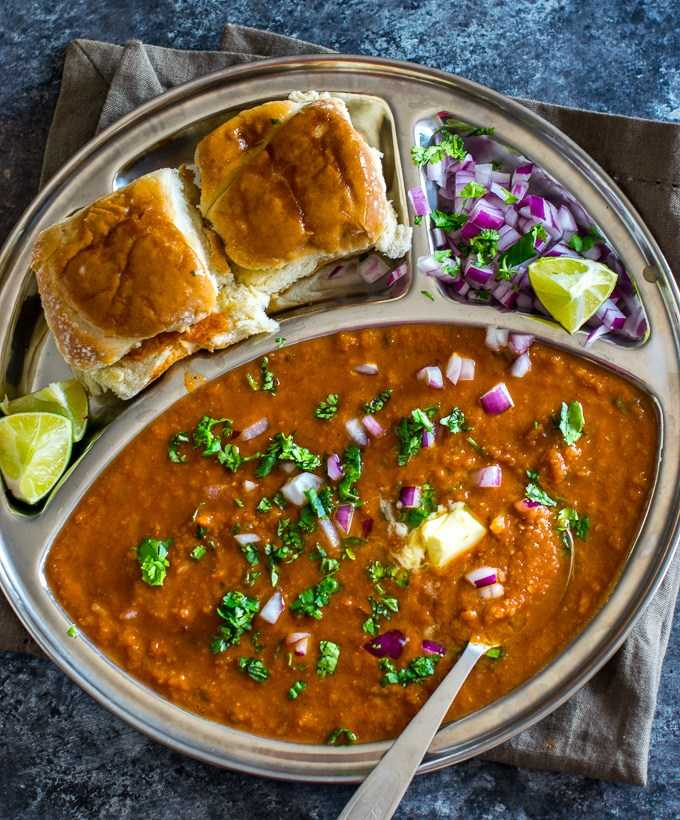
For large gatherings, I set up a “stuffing station” where guests can pick between potato, sprouts, peas, and even bhaji, a smooth mixed-vegetable mash. That mash, by the way, is also the heart of another dish I love serving alongside Pani Puri — What is Indian Pav Bhaji and how to serve it.
It creates a delightful mix of crisp and creamy, spicy and buttery, that celebrates the soul of Indian street food.
Assembly: Building the Pani Puri in the Right Order
Assembling Pani Puri is quick, but timing is everything. Once you crack the puri top, there’s no going back. I usually fill each puri with a spoonful of stuffing, followed by a dash of sweet tamarind chutney, then dunk or spoon in the cold pani. I serve immediately — even a 10-second delay can lead to soggy shells.
At festivals or events, I often assemble each puri in front of the guest. It’s part performance, part craftsmanship. There’s a reason why some vendors are known by name for their puri technique. The angle of pouring the pani matters — I pour it gently against the inside to keep the crunch alive a few seconds longer.
To elevate the experience, I sometimes serve with a trio of flavored panis — classic mint, a fiery chili one, and a sweet-spicy version made with tamarind and jaggery. This adds surprise and variety with each bite.
Regional Variations of Pani Puri Across India
India’s diversity is on full display when you look at how Pani Puri changes from state to state. In Maharashtra, it’s served with ragda — a white pea curry — instead of dry potato. In Gujarat, sweet tamarind pani is more common. In the North, the pani is aggressively spicy and sharp, while in Bengal, phuchka comes with a potato mix that’s heavily mustard-flavored.
I once traveled across India just to study street snacks, and Pani Puri was the one constant — always present, always local. It taught me that authenticity doesn’t mean one recipe; it means honoring the spirit of the dish while using what’s seasonal and available.
Even internationally, chefs now create fusion puris — filled with guacamole, wasabi cream, even tuna tartare. While I admire the creativity, my heart still belongs to the version with boiled potato, mint pani, and maybe a little tamarind chutney on top.
Make-Ahead Tips for Hosting Pani Puri Parties
Hosting a pani puri party at home has become one of my favorite catering requests. To pull it off successfully, I always prep in stages. I boil and mash the potatoes the night before, mixing them with spices just before serving to preserve texture. The pani also improves if made 12–24 hours ahead — the tamarind, mint, and spice flavors settle beautifully.
Puris should be bought fresh if not made at home. I store them in airtight containers to keep them crisp. On the day of the party, I set up separate bowls for stuffing, chutneys, and pani. That way, guests can mix and match, and the puris don’t go soggy waiting on a tray.
I’ve even made themed parties where Pani Puri was served alongside traditional Indian breakfasts. One hit combination? A brunch pairing with flattened rice dishes like [вставить по смыслу: How to prepare Indian Poha breakfast], served with lemon wedges and sev.
These setups create interaction, laughter, and shared flavor discoveries.
Comparing Homemade vs. Street-Style Pani Puri
There’s something undeniably charming about eating Pani Puri on the street — the breeze, the clinking bowls, the anticipation of that first burst of flavor. But making it at home has its own magic. You get full control over hygiene, spice levels, and creative fillings.
Street vendors often have puris that are fried to perfection — thin, airy, explosive. At home, I’ve found success using store-bought puris reheated gently in the oven for 2–3 minutes. It revives the crunch without deep frying.
Another difference is the pani. On the street, vendors tend to use very strong mint and green chili mixes, sometimes with crushed ice. At home, you can mellow it out, add jaggery or extra lemon juice, and fine-tune the blend to suit your taste or guests.
In my experience, homemade puri can actually taste better when paired with fresh coriander-mint pani and fillings tailored to your mood or dietary needs.

Nutritional Value and Digestive Considerations
As indulgent as Pani Puri feels, it can be reasonably light when made thoughtfully. Most puris are made from semolina or wheat flour, then deep-fried — so moderation is key. The fillings are often healthy: boiled potatoes, chickpeas, sprouts, and fresh herbs.
The pani, made with tamarind, mint, cumin, and lemon, can actually aid digestion. I sometimes recommend my guests have a few puris with just the pani if they’re feeling heavy. The black salt and cumin work wonders.
When I’m preparing Pani Puri for older guests or those with dietary needs, I go easy on the chilies, skip fried puris, and offer baked alternatives. Served this way, it becomes not just a snack but a revitalizing palate cleanser between courses.
Time Table for Cooking and Serving Pani Puri
| Task | Estimated Time | Notes |
| Soaking tamarind | 20–30 minutes | Can be done in advance or overnight |
| Preparing pani (blending + chilling) | 40 minutes + 1 hour chill | Chill intensifies flavor |
| Boiling and mashing potatoes | 30 minutes | Boil until fork-tender, season later |
| Making chutneys (optional) | 20–30 minutes each | Tamarind, mint-coriander, and garlic chutney |
| Assembly time | 10–15 minutes | Final stuffing and filling served immediately |
| Serving window | Immediate | Once filled with pani, serve each puri right away |
This prep timeline allows you to serve up to 30–40 puris comfortably for a small gathering with minimal stress.
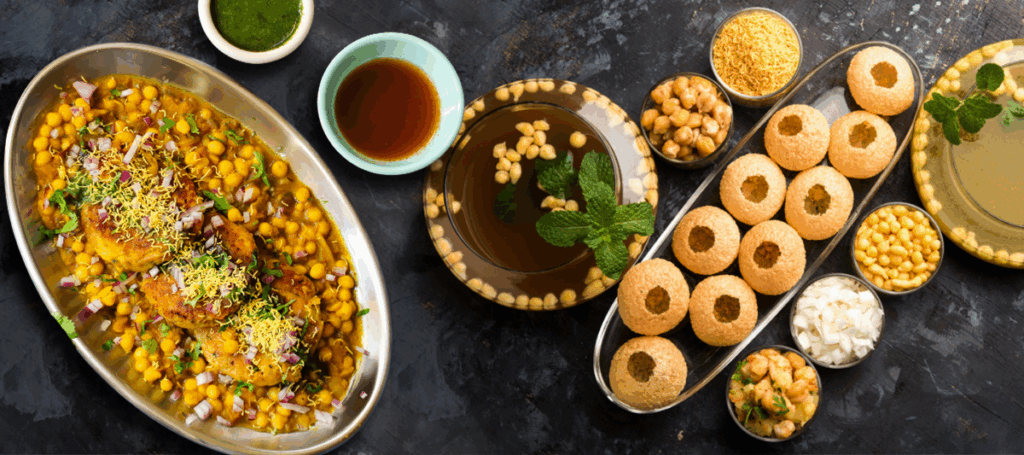
Serving Suggestions and Presentation Ideas
When I serve Pani Puri at events or pop-ups, I aim to blend tradition with charm. The best way to serve it? Arrange the puris in a circular wooden tray, fillings in small bowls around, and pani in a large earthen pot with a ladle. Guests can help themselves — it’s informal, interactive, and perfect for gatherings.
If you’re hosting a modern Indian dinner, I like to plate three puris on a long ceramic dish, each already filled — one spicy, one sweet, and one tangy. Add a drizzle of tamarind or coriander chutney on the plate for color and garnish with microgreens or sev.
Pairing Pani Puri with cooling drinks like a sweet yogurt-based beverage creates balance. My favorite? A chilled glass of Easy Indian Mango Lassi recipe — it soothes the palate and ends the meal on a creamy note.
Oven, Microwave, and Slow Cooker Approaches
Pani Puri isn’t a dish that traditionally relies on heavy cooking, but a few components benefit from modern appliances:
Microwave: Perfect for reheating store-bought puris. Just 15–20 seconds on medium power keeps them crisp without burning. I also use it to soften tamarind paste quickly by adding water and microwaving for 30 seconds.
Oven: Ideal for baking homemade puris instead of deep frying. I preheat to 400°F (200°C), brush the flattened dough lightly with oil, and bake for 6–8 minutes until puffed and golden. They’re lighter and still delightfully crunchy.
Slow Cooker: Surprisingly helpful for prepping fillings. I slow-cook whole potatoes or chickpeas in the pot on low overnight. By morning, the base of your stuffing is ready, warm, and perfectly tender.
These tools don’t change the soul of the dish — just make prep easier when you’re short on time.
Common Mistakes and How to Avoid Them
One of the most common issues I’ve seen in home kitchens is soggy puris. The trick? Fill each puri only at the moment it’s going to be eaten. Even a few seconds too long, and the puri will collapse.
Another error is overly thick pani. It should be liquid and pourable, with suspended spices and herbs, not a paste. Use a strainer if needed — clarity and texture matter.
Don’t over-spice the stuffing either. Keep it flavorful but neutral. Let the pani deliver the kick — that’s its role.
Lastly, avoid reusing pani that’s sat too long with hands or spoons in it. Always serve fresh or from a dispenser to keep flavors clean and hygienic.
Why Pani Puri Stands Out Among Indian Street Foods
As someone who’s cooked and tasted countless Indian snacks, I can confidently say that Pani Puri holds a unique place. It’s fast, flavorful, and personal. Each person creates their ideal bite, combining crunch, spice, sourness, and sweetness in one go.
Unlike other street foods that require utensils or longer cooking, this one is all about the moment. It’s social. It’s fun. And it’s wildly customizable — from beetroot fillings to flavored pani with pomegranate juice or roasted cumin foam.
It’s not just a snack. It’s a burst of storytelling in one mouthful.
FAQ
What’s the best type of water to use for pani?
From my experience, chilled filtered water works best. It keeps the pani crisp and clean in flavor. I’ve also used carbonated water for a fun fizzy twist — guests loved it.
Can I make puris in advance?
Absolutely. I’ve made batches two days ahead. Just store them in an airtight container with a silica gel packet to prevent moisture. I’ve even frozen them successfully for up to a month.
Is there a gluten-free version of Pani Puri?
Yes. I’ve tried making puris with rice flour and arrowroot — they don’t puff quite the same, but they do crisp well when baked or fried. The flavor is subtler but enjoyable.
What’s the difference between Pani Puri and Golgappa?
On my travels across India, I noticed that while the base concept is the same, the fillings and pani vary. In the North (where they call it Golgappa), the water is often tangier; in the West (Pani Puri), it’s spicier and greener.
Can I serve it as a starter at dinner parties?
I’ve done this many times. I set up a DIY station and let guests assemble their own. It becomes a conversation piece and sets the tone for a flavorful evening.
What fillings work best apart from potatoes and chickpeas?
I’ve experimented with sprouted moong, spicy mashed sweet potatoes, and even minced paneer. All worked well. The key is texture — it should mash easily but still hold shape.
Can I use bottled tamarind concentrate?
Yes, and I’ve done this when short on time. Just dilute well and strain before adding to your pani. Some concentrates are sweetened, so taste and adjust the balance.
How spicy should the pani be?
That depends on your audience. I always make two types: one mild and tangy, the other fiery. On my own table, the spicy one goes twice as fast — but I always give guests the choice.
Can kids eat Pani Puri?
I’ve made “kid-friendly” versions with boiled mashed potatoes, grated carrots, and sweetened tamarind water. They enjoy the crunchy shells and love participating.
Do I need special tools?
Not at all. I’ve used a spoon, a ladle, and my hands to serve. For events, I sometimes use test tubes for pani — guests love the novelty.
How do I store leftover pani?
On my own, I refrigerate it in a sealed jug for up to two days. Give it a stir before reusing, and always taste before serving again. It may need a refresh of mint or lemon.
Can I make puris healthier?
Yes. I’ve baked them with a light brushing of avocado oil. They puff less but are still delicious. I also use whole wheat flour sometimes — earthier flavor, slightly denser texture.
What’s the origin of Pani Puri?
From what I’ve read and heard from elders, Pani Puri likely originated in Magadha (now Bihar), evolving differently across India. I’ve seen it transform region by region, each version with its charm.
Is Pani Puri served in restaurants too?
Yes, especially in modern Indian bistros and fusion places. I’ve served it in shot glasses, wine goblets, and even atop spoons for cocktail receptions.
How do I make it vegan?
Most traditional recipes already are. I just make sure not to use ghee or dairy-based chutneys. Tamarind, mint, potatoes — all plant-based and perfect.

Post Comment