Homemade Indian Naan Bread Without a Tandoor: A Chef’s Complete Guide

As a professional chef who grew up surrounded by the aromas of sizzling spices and fresh breads, naan has always held a special place in my kitchen. While traditional naan is made in a blazing hot tandoor, I’ve perfected the technique for creating restaurant-quality naan at home—no tandoor required. Whether you’re using a skillet, oven, slow cooker, or even a microwave, I’ll walk you through every detail to ensure your naan turns out irresistibly soft, blistered, and full of flavor.
- The Role of Naan in Indian Cuisine
- Essential Ingredients for Homemade Naan
- Mixing and Kneading the Dough Like a Pro
- Cooking Time & Method Comparison Table
- How to Cook Naan on a Stovetop Skillet
- Using the Oven to Make Naan Bread
- Microwave and Slow Cooker Naan: What Works and What Doesn’t
- Perfect Naan Variations to Try at Home
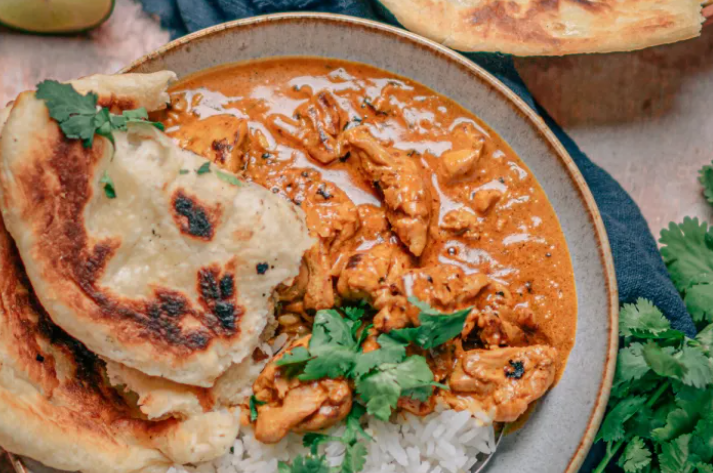
- What to Serve with Homemade Naan Bread
- Resting, Reheating, and Storing Naan
- Tips for Getting the Perfect Texture
- Vegan and Gluten-Free Naan Variations
- Naan Dough Troubleshooting Tips
- Secrets for Restaurant-Style Naan at Home
- Making Naan for Meal Prepping and Events
- Why I Keep Making Naan, Even Without a Tandoor
- FAQ: Indian Naan Bread Without a Tandoor

The Role of Naan in Indian Cuisine
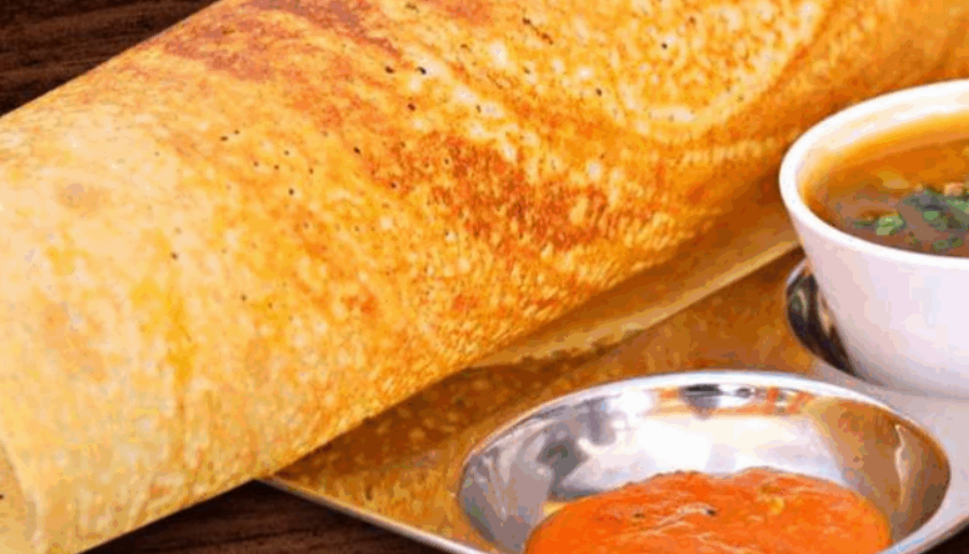
Naan isn’t just a side dish—it’s a cultural icon. In Indian cuisine, naan bread serves as the soft, slightly chewy companion to gravies, dals, and kebabs. Traditionally, it’s slapped against the inside of a scorching clay tandoor, where it cooks in seconds, puffing up and blistering into that perfect golden finish.
At home, the goal is to recreate that tandoor effect using methods that mimic high heat and rapid cooking. Over the years, I’ve tested countless versions—on cast-iron skillets, inside Dutch ovens, under broilers—and I’ve learned that while you may not have a tandoor, you can still achieve authentic texture and flavor with the right method.
Beyond taste, naan is functional. It scoops, folds, and soaks up sauces in ways that elevate your entire meal experience. When you pair it with dishes like chicken tikka masala, dal tadka, or saag paneer, it transforms into something far more than just bread—it becomes part of the main event.
Essential Ingredients for Homemade Naan
To get that authentic, slightly tangy, tender naan at home, quality ingredients make a big difference. I keep my base ingredients simple but precise:
- All-purpose flour – The backbone of naan. Use unbleached if possible.
- Plain yogurt – Adds moisture, softness, and a subtle tang.
- Warm milk or water – Helps activate the yeast and create tenderness.
- Yeast – For that pillowy rise. Instant or active dry both work, but I prefer instant for speed.
- Sugar – Just a touch to feed the yeast.
- Salt – To bring balance.
- Oil or ghee – Adds richness and helps in cooking.
Optional add-ins I sometimes use:
- Crushed garlic
- Fresh cilantro or mint
- Nigella seeds (kalonji) or sesame for topping
When I want vegan naan, I simply swap out the dairy for plant-based yogurt and use almond or oat milk. It still comes out soft and aromatic, especially with a brush of coconut oil at the end.
Mixing and Kneading the Dough Like a Pro
Making naan dough isn’t difficult, but it needs attention and patience. First, I combine warm milk (around 100°F or 38°C), sugar, and yeast. After letting it bloom for 5–10 minutes until frothy, I stir in yogurt and oil. Then I slowly incorporate the flour and salt, mixing until a shaggy dough forms.
Kneading is where the magic begins. I knead the dough for about 8–10 minutes by hand or 5–6 minutes using a stand mixer with a dough hook. You’re looking for a smooth, slightly tacky dough that springs back when pressed.
Once kneaded, I coat it lightly in oil, cover it, and let it rise in a warm place for about 1 to 1.5 hours—until doubled in size. This fermentation is crucial. It develops flavor and gives that soft, slightly chewy texture naan is known for.
After rising, I punch it down gently and divide the dough into equal portions (usually 6–8). I roll each ball out to about ¼-inch thickness, shaping into ovals or teardrops. Then, it’s ready to cook using one of the methods we’ll dive into next.
Cooking Time & Method Comparison Table
Here’s a breakdown I personally use depending on the equipment or method at hand. This table will help you decide which technique suits your kitchen setup and schedule:
| Method | Heat Source | Cook Time | Notes from My Kitchen |
| Skillet (stovetop) | Medium-high flame | 1–2 min/side | Best mimic of tandoor blistering using cast-iron |
| Oven (broiler) | Broiler, top rack | 2–3 mins | Great puff, needs fast flipping |
| Oven (bake) | 500°F / 260°C | 4–5 mins | Less char, but soft texture |
| Microwave (for reheat only) | Microwave-safe plate | 20–30 sec | Use only to reheat; not ideal for fresh cooking |
| Slow cooker | High heat (inverted lid) | 2–3 hrs | Doughy result, unique but not traditional texture |
| Grill (BBQ) | Direct heat | 1–2 min/side | Adds smokiness and crisp edges |
How to Cook Naan on a Stovetop Skillet
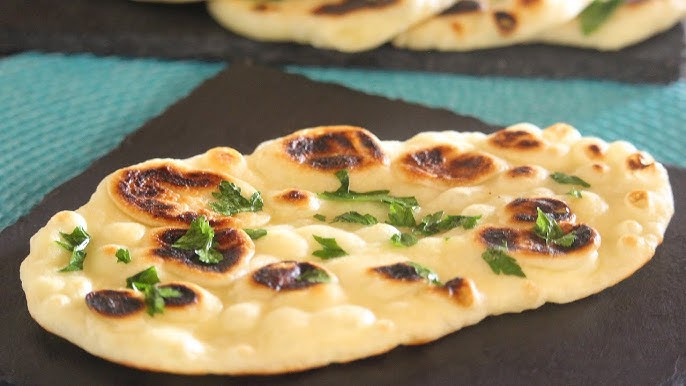
This is my go-to method at home, especially when I want fast and reliable naan with that golden blistered surface. I always use a cast-iron skillet because it retains heat beautifully and gives me that semi-charred, chewy result that’s closest to a tandoor.
I preheat the skillet for a few minutes over medium-high heat until it’s almost smoking. No oil or butter goes in at this stage. Once hot, I place a rolled-out naan directly onto the dry skillet. In about 30 seconds, bubbles begin to form. I let it cook for 1–2 minutes until I see good puffing and golden spots underneath.
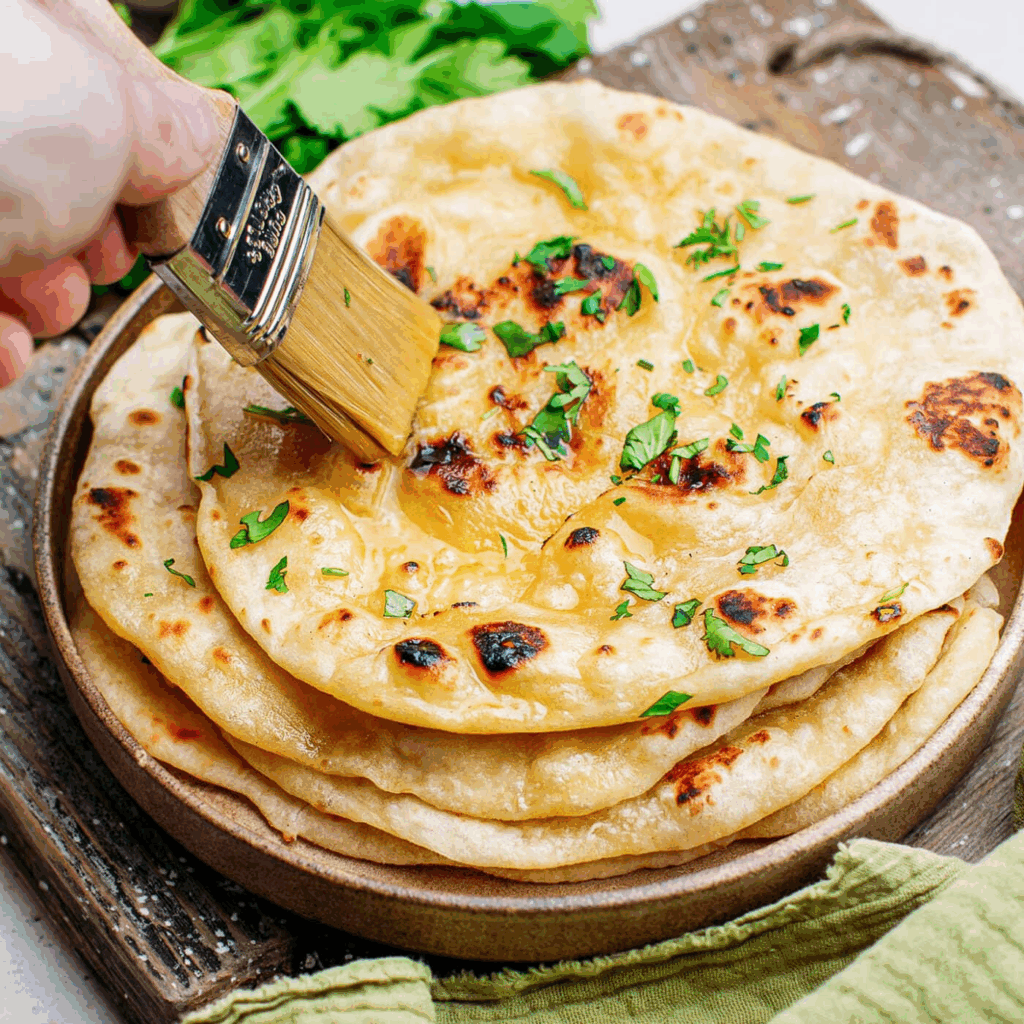
Then, I flip it once and cover it with a lid to trap some steam. This extra touch helps soften the bread while letting the underside brown. After another 1–2 minutes, I remove it from the heat and immediately brush it with melted ghee or butter. If I’m going for garlic naan, I sprinkle minced garlic and chopped cilantro at this point.
This method is fast, effective, and doesn’t require anything fancy—just a pan, a burner, and a good sense of timing.
Using the Oven to Make Naan Bread
When I’m cooking for a larger group and need to prepare multiple naans at once, I often turn to the oven. The broiler is my favorite setting for this, as it offers high heat from the top, similar to the tandoor’s dome heat.
I preheat the broiler to high and set an oven rack as close to the heat source as safely possible. Then, I place the rolled-out dough pieces onto a preheated baking stone or an upside-down heavy sheet pan. This trick mimics the hot surface of a tandoor wall.
I broil each naan for 2–3 minutes, keeping a close eye on them. They puff up quickly and get golden spots. Sometimes I flip them to get a bit more browning underneath, depending on how hot my oven is running. Once done, I pull them out and brush with ghee or infused butter (try garlic or cumin for extra aroma).
If you don’t have a broiler, baking at 500°F (260°C) also works, though you’ll get a softer, less blistered naan. In that case, I bake them for about 4–5 minutes directly on a baking stone or steel.
Microwave and Slow Cooker Naan: What Works and What Doesn’t
Let’s talk about some unconventional methods. I’ve tested both the microwave and slow cooker—not because they’re ideal, but because many home cooks ask if they’re viable.
Starting with the microwave, it’s not recommended for initial cooking. The dough becomes rubbery and dry. However, the microwave shines when reheating already-cooked naan. I wrap the bread in a damp paper towel and heat for about 20–30 seconds. It restores the softness without drying out the edges.
The slow cooker, surprisingly, can cook naan—if you’re patient. I preheat the cooker on high with the lid inverted or propped open slightly to simulate dry heat. Then I lay the naan directly on parchment inside. It takes 2–3 hours, and the result is soft, more like steamed flatbread. It lacks the golden blistering of traditional naan but still tastes good with curries.
So while neither method replaces the skillet or oven, they have their place if you’re experimenting or working with limited tools.
Perfect Naan Variations to Try at Home
Over the years, I’ve tried all sorts of naan twists in my test kitchen. Some have even become client favorites during private dinners. If you want to go beyond plain naan, here are a few flavorful options I frequently make:
- Garlic Naan – I finely mince fresh garlic and press it into the dough before cooking, then brush with garlic butter after.
- Cheese Naan – This one’s a crowd-pleaser. I fill the center of the dough with shredded mozzarella or paneer, seal the edges, roll out gently, and cook as usual. The cheese melts inside and adds creamy richness.
- Herb Naan – I mix chopped cilantro, mint, or even rosemary into the dough or press on top before cooking.
- Whole Wheat Naan – I substitute half the flour with whole wheat. It’s a little denser but adds nuttiness and fiber.
- Stuffed Naan – Think spiced mashed potatoes, grated beetroot, or minced onions mixed with spices. This turns naan into a full dish on its own.
What I love about these variations is how easy it is to adapt the base dough. Whether for dietary preferences or flavor fun, naan is a blank canvas—once you master the base, the possibilities are endless.
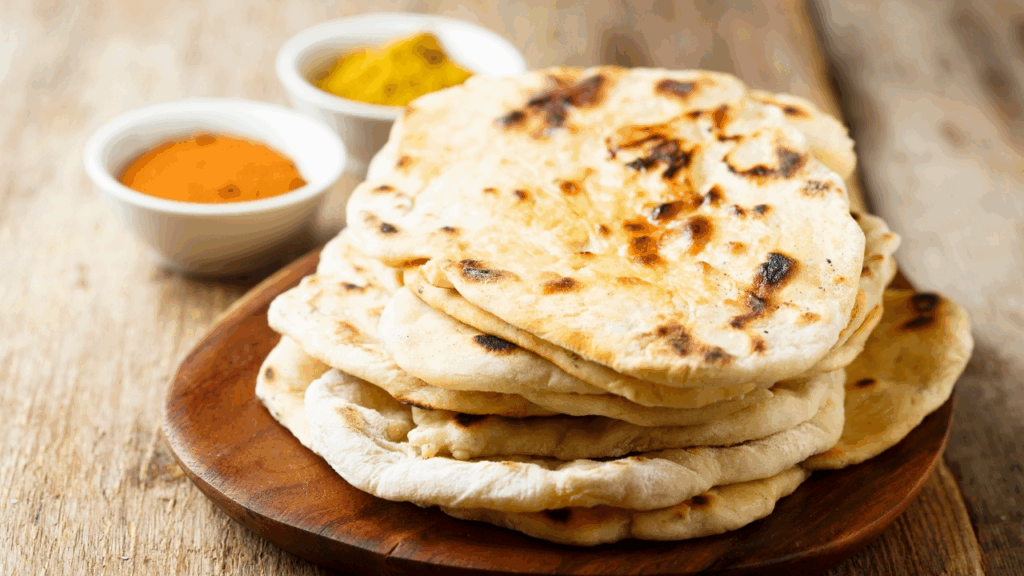
What to Serve with Homemade Naan Bread
On its own, naan is delicious. But when paired with the right dishes, it turns a simple meal into an experience. In my kitchen, I often design menus around naan as the foundation. I think of it not just as bread, but as a vessel for flavor. Below is a table of my go-to pairings, organized by dish type.
| Dish Type | Examples I Serve With Naan |
| Curries (Creamy) | Chicken Tikka Masala, Paneer Butter Masala, Lamb Korma |
| Dry Sabzis | Aloo Gobi, Baingan Bharta, Bhindi Masala |
| Dals | Dal Tadka, Dal Makhani, Chana Dal |
| Meaty Gravies | Rogan Josh, Keema Curry, Goat Curry |
| Tandoori Grilled | Tandoori Chicken, Seekh Kebabs, Malai Tikka |
| Fusion Fillings | Wraps with grilled chicken, spicy lamb, mint yogurt, or falafel with hummus |
| Chutneys & Dips | Mint chutney, tamarind sauce, garlic yogurt, mango pickle |
| Sweet Pairings | Naan with jaggery butter or Nutella for a dessert twist |
From my catering events, I’ve noticed guests love to rip off pieces of naan and mop up every last bit of sauce. That’s the kind of joy only fresh naan can bring.
Resting, Reheating, and Storing Naan
Once cooked, naan should be eaten fresh—but that’s not always practical. From my experience managing prep for dinner parties and catering gigs, I’ve developed reliable ways to hold, reheat, and store naan.
Resting: After cooking, I wrap naan in a clean towel to keep it warm and soft. Stacking them in a cloth-lined bowl or basket works great for serving, especially if you’re feeding a crowd.
Reheating: If you made naan earlier in the day, reheat on a skillet for 30 seconds per side, covered with a lid to trap steam. The microwave works for single pieces—wrapped in a damp paper towel and heated for 20–30 seconds. Never use the oven unless you’re reheating a large batch; it tends to dry out the bread.
Storing: Cooked naan keeps well in the fridge for up to 3 days in an airtight container. For longer storage, freeze between parchment sheets in a zip bag. When reheated from frozen directly on a hot skillet, they taste nearly as fresh as day one.
On my own time, I often make a double batch and freeze half—it saves a ton of effort later in the week.
Tips for Getting the Perfect Texture
After years of cooking naan across different kitchens—gas stoves, induction burners, and outdoor grills—I’ve developed a few non-negotiable tips that ensure the right balance of chew, puff, and softness:
- High Heat Is Essential: Whether using a skillet or oven, don’t be afraid of heat. Moderate temperature just dries out the bread.
- Use Yogurt, Not Just Water: The acidity helps tenderize gluten, giving you that soft chewiness without being rubbery.
- Don’t Over-Roll the Dough: Keep it thick enough (¼ inch) to allow puffing. Too thin, and it crisps like a cracker.
- Rest the Rolled Dough Briefly: I let it sit for 3–5 minutes before cooking. This short rest relaxes the gluten and helps it puff better.
- Cover While Cooking: Trapping a bit of steam (with a lid or inverted bowl) simulates the tandoor environment.
- Brush Immediately After Cooking: Ghee, butter, or oil brushed right after cooking adds moisture and shine—and helps flavors stick.
Even small tweaks to hydration or cooking time can make a noticeable difference. That’s why I always recommend testing one naan first before cooking the entire batch.
Vegan and Gluten-Free Naan Variations
I often get requests from clients for plant-based or gluten-free alternatives—and over time, I’ve refined versions that don’t feel like compromises.
For Vegan Naan:
I substitute dairy yogurt with coconut yogurt or plain soy yogurt, and use plant-based milk (like oat or almond) in the dough. Instead of ghee or butter, I brush finished naan with coconut oil or vegan margarine. The texture is slightly different—softer and a bit cakier—but still warm and satisfying.
For Gluten-Free Naan:
This requires a more careful approach. I use a 1:1 gluten-free flour blend that includes xanthan gum or guar gum for elasticity. I also add a touch more yogurt for moisture and cook these on lower heat so they don’t crack. Rice flour or chickpea flour versions work well but won’t puff like regular naan—they resemble flatbread more than traditional naan.
For anyone with dietary restrictions, I always advise setting expectations accordingly—but on my table, they’re still delicious and thoughtfully prepared.
Naan Dough Troubleshooting Tips
Even experienced bakers occasionally run into problems with naan dough. Over the years, I’ve identified the most common issues my students and clients face—and how I resolve them:
- Dough isn’t rising: This usually means your yeast is old or the liquid used was too hot or too cold. Always proof your yeast in warm milk (not hot) and make sure it bubbles before adding flour.
- Dough is too sticky: If the dough clings excessively to your hands after kneading, dust with a little more flour. But be careful—not too much, or the naan will turn out dense.
- Tough or rubbery naan: This happens when dough is overworked or too dry. Make sure your dough is moist and soft, and let it rest properly.
- No puffing during cooking: Often caused by over-rolling or cooking on low heat. Let the rolled dough rest for a few minutes before cooking and ensure your skillet or oven is very hot.
- Naan burning before cooking through: Lower the heat slightly or reduce the sugar in the dough, which can accelerate browning.
Whenever I run cooking classes, I emphasize feeling the dough—smooth, elastic, soft—not dry or too firm. That intuition matters as much as any measurement.
Secrets for Restaurant-Style Naan at Home
If you’ve ever wondered why restaurant naan tastes so much better, here are some behind-the-scenes tips I’ve used in commercial kitchens that you can apply at home:
- Yogurt and milk combo: This duo creates a richer dough and a subtle tang that resembles restaurant naan.
- Use a baking steel or pizza stone in your oven: It holds high heat and mimics a tandoor floor. Preheat it well before placing the naan.
- High-hydration dough: Restaurant naan dough tends to be wetter. It’s a little harder to handle but produces soft, chewy results.
- Egg wash or ghee finish: Some chefs use a light egg wash for sheen; I prefer ghee brushed right after cooking for aroma and flavor.
- Quick broil after skillet cooking: I sometimes throw the naan under the broiler for 30 seconds after stovetop cooking to get a slightly charred surface.
These little touches make a big difference. If you’re hosting guests, it’s worth going the extra mile for that wow factor.
Making Naan for Meal Prepping and Events
When catering or prepping meals in advance, I often scale up naan production. Doing this without compromising quality takes planning. Here’s how I do it:
- Bulk dough prep: I double or triple the recipe and let it rise in a large, oiled bowl covered tightly.
- Par-cooking: I half-cook the naan on a skillet until it starts to puff but doesn’t fully brown. Then I cool and refrigerate or freeze.
- Final cook on demand: Before serving, I finish each naan on a hot skillet or under the broiler. This refreshes it perfectly.
- Transport tips: For events, I stack naan in foil-lined insulated bags with a warm towel. This keeps them soft for hours.
I’ve used this system for weddings, office lunches, and even large family gatherings. It’s scalable and stress-free once you get into the rhythm.
Why I Keep Making Naan, Even Without a Tandoor
There’s a unique satisfaction in making naan by hand. Despite the tandoor’s absence in my home kitchen, the techniques I’ve developed over the years have helped me reproduce that iconic taste and feel.
It’s not just about tradition—it’s about the smell of the warm dough, the crackling sound of bubbles forming, and that final swipe of ghee melting across the surface. It’s about the joy in my guests’ eyes when they pull apart a warm piece and scoop up curry with their hands.
Even after working in fine dining restaurants, I keep coming back to naan. It’s humble, it’s nostalgic, and it’s endlessly versatile.
Whether you’re new to Indian cooking or already deep into its flavors, learning to make naan without a tandoor opens up a world of possibilities—right from your own stovetop.
FAQ: Indian Naan Bread Without a Tandoor
Can I make naan without yeast?
Yes, I’ve done it using baking powder and yogurt instead. The result is softer and flatter, but still very tasty. It won’t puff like yeasted naan, but it works in a pinch.
What if I don’t have yogurt?
On my own experience, plain kefir or even sour cream thinned with a little milk makes a decent substitute. You can also use plant-based yogurt for a vegan version.
How do I get bubbles in the naan?
High heat and proper resting after rolling are key. I’ve found that letting the dough sit for 5 minutes before cooking improves bubble formation dramatically.
Can I make naan gluten-free?
I’ve tried it with a gluten-free flour blend that includes xanthan gum. It’s not identical in texture but still enjoyable. Just keep the dough slightly wetter than usual.
Why does my naan turn out dry?
From my experience, overcooking or too much flour causes dryness. Cook quickly over high heat and brush with ghee immediately after cooking.
Is it okay to use self-raising flour?
I’ve tested it—it works in a no-yeast naan version, especially when you want something quick and simple. Add a little yogurt for softness.
Can I prepare naan dough ahead of time?
Absolutely. I often refrigerate the dough overnight. Just let it warm up for about 30–60 minutes before rolling.
What’s the best oil to use instead of ghee?
I’ve used avocado oil, coconut oil, and even olive oil with great results. Each gives a unique flavor.
Do I need a cast-iron pan?
Not necessarily, but on my stove, cast iron gives the best blistering. Non-stick pans work too—just keep the heat high.
How do I keep naan warm for guests?
I wrap them in foil and keep them in a low oven (around 180°F or 80°C). For large parties, I use a towel-lined basket or food-safe warming tray.
What makes naan different from roti or chapati?
Naan is leavened and richer, often with yogurt or milk. Roti and chapati are simpler, whole wheat, and unleavened. I serve them depending on the meal.
Can I freeze naan?
Yes, I’ve frozen both raw dough and fully cooked naan. For best texture, reheat frozen naan directly on a hot pan.
Is it okay to use a tortilla press to shape naan?
I’ve tried it, and it works for small pieces. But rolling gives more control over shape and thickness.
How long does naan last after cooking?
On my table, fresh naan disappears fast. But if needed, it stays soft for up to 3 days refrigerated in an airtight bag.
Can I make mini naans or naan pizzas?
Yes—and I often do for kids or appetizers. Just shape them smaller and adjust cooking time slightly. They’re great with creative toppings.

Post Comment