How to Cook Beef Chuck
How to Cook Beef Chuck: Complete Guide to Tender, Flavorful Results

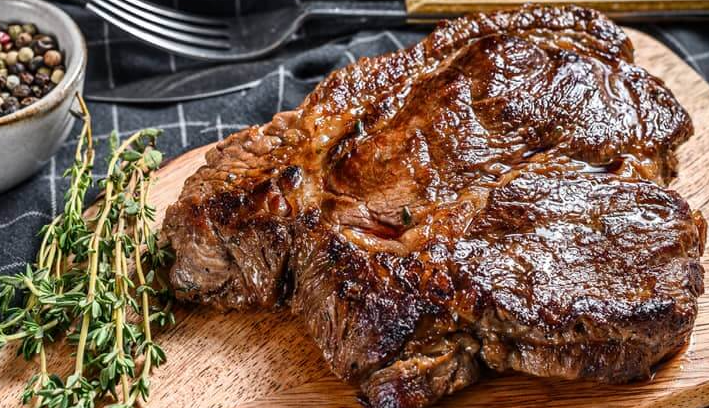
Beef chuck is one of the most underrated cuts in the kitchen—tough at first glance, but unbelievably rich when treated right. I’ve cooked it every way possible, and I’m here to show you how to turn this hardworking muscle into something unforgettable. Whether you’re roasting, braising, or pan-searing, beef chuck offers depth and satisfaction that rivals any premium steak.
- Understanding Beef Chuck: Flavor, Texture, and Structure
- Choosing the Right Cut of Chuck for Your Recipe
- How to Prepare Beef Chuck Before Cooking
- Essential Ingredients and Tools for Cooking Chuck
- Oven-Braising Chuck for Fall-Apart Tenderness
- Slow Cooker Method for Easy Chuck Roast Meals
- Cooking Chuck in a Pressure Cooker or Instant Pot
- Skillet and Pan-Seared Chuck Steak
- Temperature and Doneness Guide for Chuck Beef
- Time and Temperature Chart by Method
- Microwave Cooking: When It Works and When to Avoid It
- Common Mistakes When Cooking Chuck and How to Fix Them
- My Favorite Sauces and Braising Liquids for Chuck
- Best Seasonings and Aromatics for Chuck Cuts
- Serving and Pairing Chuck Like a Chef
- Storing and Reheating Chuck for Later Meals
- FAQ: 15 Real Questions About Cooking Chuck Beef — Answered by a Chef
Understanding Beef Chuck: Flavor, Texture, and Structure
Beef chuck comes from the shoulder region of the cow, a heavily used muscle group that develops deep flavor and dense connective tissue. While it starts off tough, this same toughness is exactly what makes it ideal for slow cooking—it breaks down into rich, melt-in-your-mouth tenderness when treated properly.
What part of the cow it comes from
Chuck is cut from the upper front portion near the neck and shoulder. It includes various muscles, with interwoven fat and collagen that need time and low heat to soften. This makes it unsuitable for quick grilling but outstanding for braises, stews, and pressure cooking.
Why it’s ideal for slow cooking
The secret to chuck is time. As the collagen melts into gelatin, the meat takes on a luscious texture you won’t get from leaner cuts. When cooked slowly in a moist environment, chuck becomes fork-tender and absorbs whatever aromatics and liquids it’s paired with, making it one of the most flavorful options in the butcher’s case.
Choosing the Right Cut of Chuck for Your Recipe
Not all chuck is the same. Depending on how you want to serve the beef—shredded, sliced, or seared—you need to choose the cut accordingly. I always talk to the butcher about what I’m planning to cook before selecting a chuck cut.
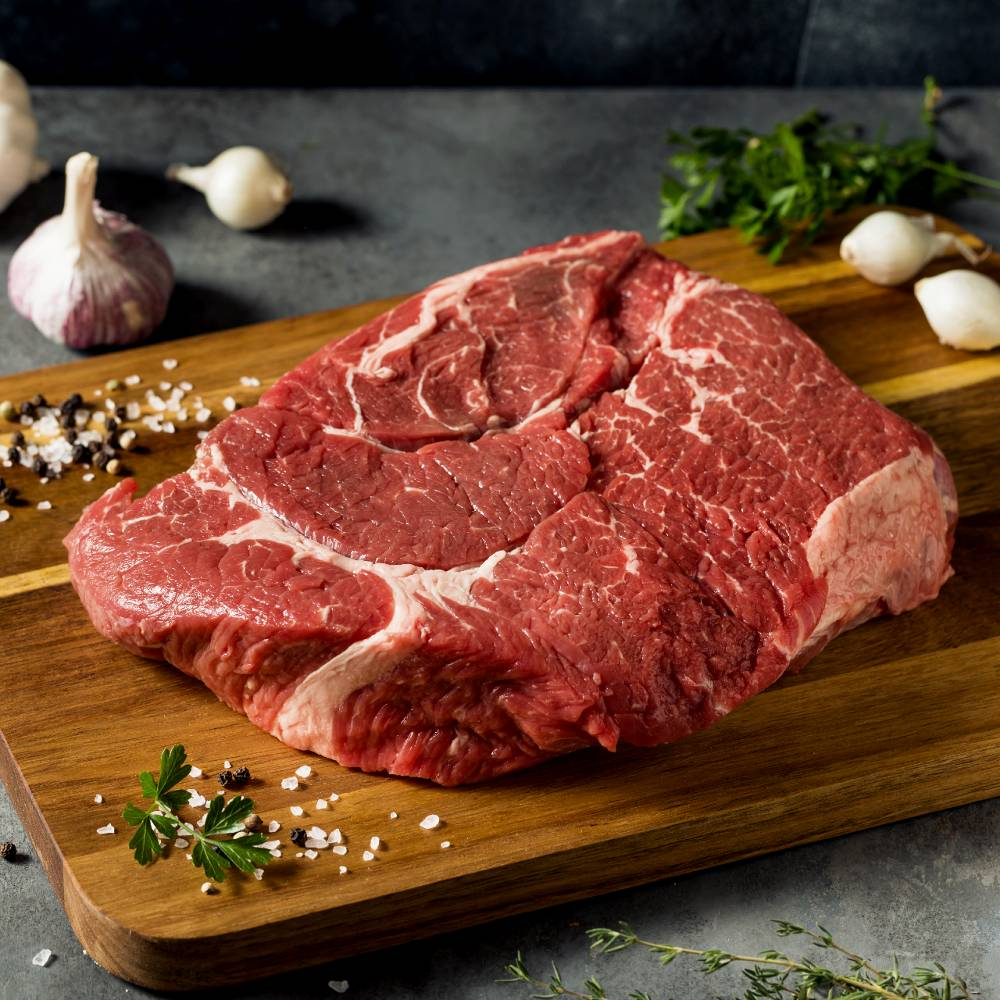
Chuck roast vs chuck steak vs shoulder
For braising or slow cooking, I go with a chuck roast—also known as blade roast or chuck pot roast. It’s thick, well-marbled, and ideal for shredding or slicing. Chuck steak is a thinner cross-section of the same primal area and works well for pan-searing or quick skillet dishes. The shoulder clod is a leaner alternative—good for slicing when cooked just to medium and rested properly.
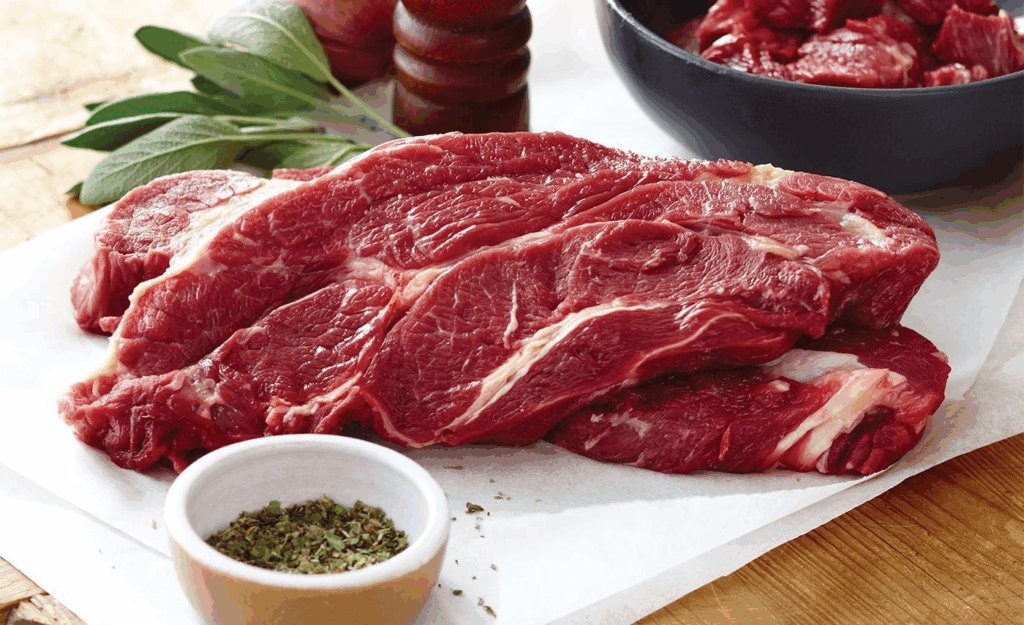
What to look for in marbling and thickness
I look for visible marbling throughout—not just fat on the edges. The fat within the meat melts and keeps it moist. I also avoid thin cuts unless I’m searing them fast. For oven or slow cooker use, I prefer a piece that’s at least 2 inches thick and weighs around 2.5 to 4 pounds for even cooking and juicy results.
How to Prepare Beef Chuck Before Cooking
Preparation makes a difference in both flavor and texture. I always give the meat time to breathe, dry the surface, and consider seasoning hours—or even a day—in advance.
Trimming, seasoning, and room temperature rest
I trim only the excess surface fat or silver skin. I leave any marbled fat inside the meat—it renders down beautifully during cooking. Before seasoning, I pat the meat dry with paper towels. Then I apply kosher salt, pepper, and optionally a spice rub or crushed herbs. I let the seasoned chuck rest at room temperature for 30 to 60 minutes before cooking—this ensures even internal temperature and better crust formation when searing.
Optional marinating for flavor depth
If I’m going for bold flavor—like in Korean or Latin-inspired dishes—I marinate the chuck for up to 12 hours in a mix of acidic ingredients (like vinegar or citrus), garlic, soy, and spices. For traditional roast beef or stews, I skip the marinade and let the natural flavor of the beef shine through with just aromatics and slow heat.
Essential Ingredients and Tools for Cooking Chuck
- Beef chuck roast or steak (2.5–4 lbs)
- Kosher salt
- Freshly ground black pepper
- Neutral oil (canola, avocado, or vegetable)
- Garlic cloves
- Onions or shallots
- Fresh thyme or rosemary
- Bay leaves (optional)
- Beef stock, wine, or broth
- Dutch oven or heavy pot with lid
- Cast iron skillet or sauté pan
- Meat thermometer (digital preferred)
- Aluminum foil
- Tongs
- Paper towels

Oven-Braising Chuck for Fall-Apart Tenderness
The oven remains one of my favorite ways to cook beef chuck. It gives you full control over temperature and moisture, and if done correctly, you’ll end up with meat that practically melts under a fork.
Low-and-slow technique explained
I preheat the oven to 300°F (150°C). In a Dutch oven, I first sear the chuck on all sides over medium-high heat until browned. Then I remove the meat, sauté aromatics like onions, garlic, and herbs in the drippings, deglaze with wine or broth, and return the meat to the pot. The liquid should come halfway up the sides of the meat—not fully submerged. I cover the pot with a tight-fitting lid and braise in the oven for 3 to 3.5 hours for a 3-pound roast. I check tenderness at the 2.5-hour mark with a fork.
When to cover and when to uncover
For most of the cooking time, the lid stays on to trap moisture and help the meat break down. During the last 30 minutes, I may uncover the pot to let the liquid reduce slightly and intensify in flavor. If the surface dries too much, I spoon the braising liquid over the roast or lower the heat to 275°F.
Slow Cooker Method for Easy Chuck Roast Meals
For hands-off cooking, the slow cooker does a beautiful job with chuck. It transforms the toughest cuts into comfort food with minimal effort.
Ideal liquid ratios and settings
I place the chuck roast in the slow cooker with roughly 1 to 1.5 cups of liquid—beef broth, wine, or tomato puree all work well. I always add aromatics: onions, garlic, herbs, and a splash of acid like vinegar or Worcestershire sauce. Too much liquid makes the result soupy, so I aim for about ⅓ to ½ coverage. I set the cooker on LOW for 8–9 hours or HIGH for 5–6 hours, depending on the size of the roast.
When to add vegetables and herbs
I add hearty vegetables like carrots and potatoes in the last 2–3 hours of cooking. If added too early, they’ll turn mushy. Fresh herbs like parsley or thyme go in at the beginning for infusion, but delicate herbs like basil or dill go in right before serving.
Cooking Chuck in a Pressure Cooker or Instant Pot
The pressure cooker is perfect when I want chuck roast quality in a fraction of the time. It breaks down collagen fast while locking in juices and aromatics.
Timing, liquid, and natural release
I brown the meat in the pressure cooker using the sauté function, then deglaze with broth or wine. I add enough liquid to cover about one-third of the meat—usually 1 to 1.5 cups. I cook on high pressure for 45–55 minutes, depending on the roast size, then let it naturally release for at least 15 minutes. Quick release may dry the meat and cause it to seize.
Flavor-enhancing tips
To boost flavor, I add soy sauce, tomato paste, a bay leaf, or even a splash of balsamic vinegar before sealing. Once done, I remove the meat and reduce the remaining liquid using sauté mode to make a glaze or sauce to spoon over the sliced or shredded beef.
Skillet and Pan-Seared Chuck Steak
Not every chuck cut needs to be slow-cooked. For thinner steaks or cross-cut chuck, a hot skillet delivers a crusty, beefy finish when cooked quickly and rested properly.
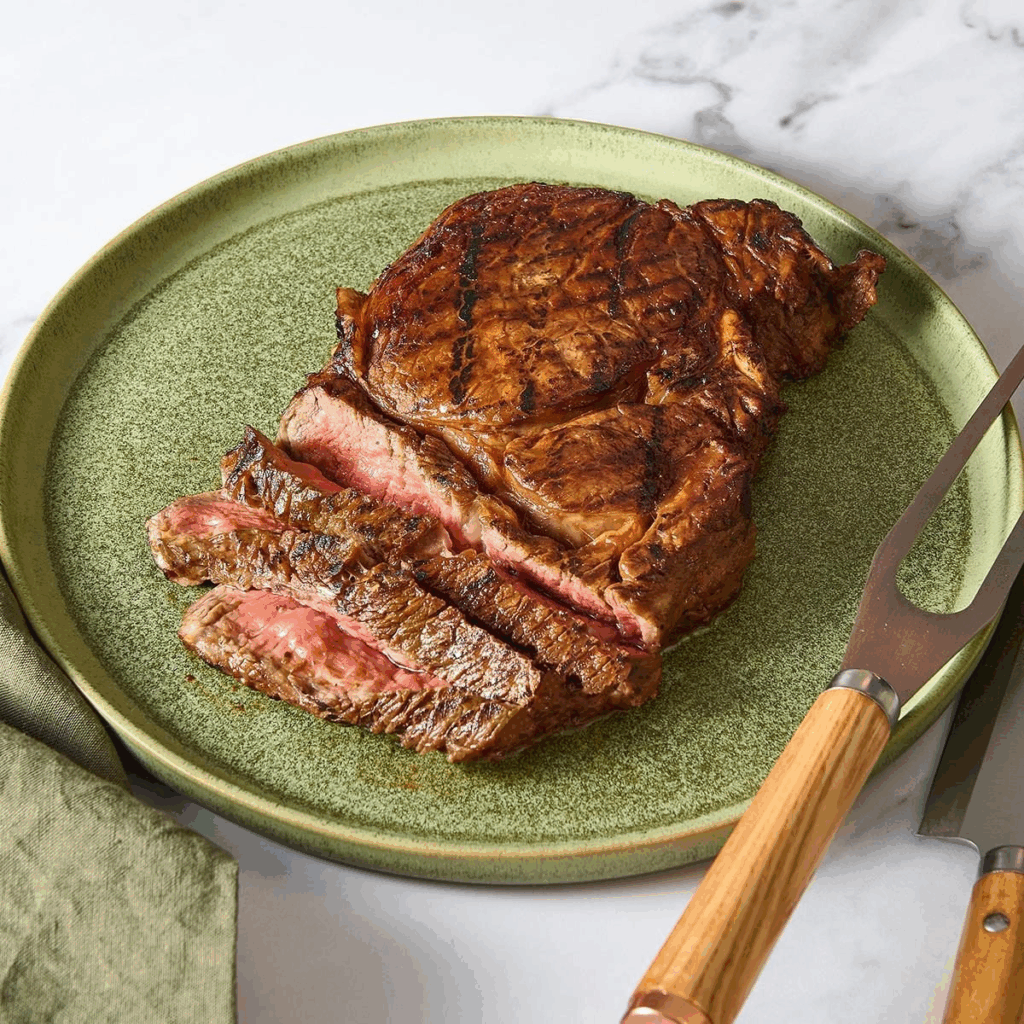
High-heat sear and resting
I heat a cast iron skillet until very hot, add a thin layer of neutral oil, and place the chuck steak in carefully. I let it sear undisturbed for 3–4 minutes per side, flipping once for even browning. I aim for an internal temperature of 130–135°F for medium-rare, then let the steak rest for 5–10 minutes under foil before slicing.
Finishing with butter and aromatics
In the last minute of cooking, I drop in butter, crushed garlic, and a sprig of thyme, then tilt the pan and baste the steak with the melted butter. This adds richness and helps finish the interior gently. If the steak is thicker than 1 inch, I sometimes finish it in a 300°F oven for 5–8 minutes after searing.
Temperature and Doneness Guide for Chuck Beef
With beef chuck, internal temperature is less about “rare” or “medium” and more about what you want the final texture to be—sliceable or fall-apart tender. I use a thermometer every time, regardless of method.
USDA safety vs tenderness thresholds
According to USDA guidelines, beef is safe to eat at 145°F (63°C) with a rest time. But for chuck, that’s just the beginning. At that point, it’s still too tough. For slicing, I go to 180°F (82°C). For shredding, I let it climb to 195–205°F (90–96°C), when the collagen has fully melted and the meat pulls apart easily.
When to pull for slicing vs shredding
If I want chuck I can slice and serve with pan sauce, I pull it at 180°F, rest it 20 minutes, and carve against the grain. For pulled chuck—like for tacos or sandwiches—I keep cooking until it’s at least 200°F, then let it rest and use tongs or forks to shred it into soft fibers.
Time and Temperature Chart by Method
Here’s the temperature and time breakdown I follow for common cooking methods:
| Cooking Method | Temp Setting | Internal Temp Goal | Total Cook Time |
| Oven-braising | 300°F (150°C) | 195–205°F | 3–4 hours |
| Slow cooker | Low / High | 195–205°F | 8–9 hrs (Low) / 5–6 hrs (High) |
| Pressure cooker | High Pressure | 200°F | 45–55 mins + 15 min NR |
| Skillet steak | High heat sear | 130–135°F (medium) | 6–8 minutes + rest |
| Microwave | 50% power for reheating | 160°F | 1–3 mins in intervals |
I always verify temperature with a digital thermometer. Chuck is forgiving, but precise heat makes all the difference in texture.
Microwave Cooking: When It Works and When to Avoid It
I don’t cook raw chuck in the microwave—it doesn’t allow for browning or gradual collagen breakdown. But it’s a good tool for reheating pre-cooked chuck when done right.
Pre-cooked chuck uses
Leftover shredded chuck, thinly sliced steak, or braised beef heats up well in the microwave. I place the meat in a microwave-safe dish with a spoonful of broth or drippings, cover with a microwave lid or plastic wrap, and heat at 50% power for 30–60 seconds at a time. Stirring between intervals helps avoid cold spots.
Best microwave reheating practices
I avoid high power settings—they dry the meat. For the best results, I let refrigerated beef sit at room temperature for 10–15 minutes, then reheat gently with added moisture and a quick toss in olive oil or jus right before serving. If possible, I reheat in the oven or skillet instead.
Common Mistakes When Cooking Chuck and How to Fix Them
Even experienced home cooks sometimes misjudge beef chuck. I’ve made every possible mistake with this cut in my early years—and each one taught me something valuable. Chuck demands the right combination of time, moisture, and patience. Without these, you’re guaranteed disappointing results.
Overheating, undercooking, skipping rest
One of the most frequent mistakes I see is trying to rush the process. High heat causes the outer fibers of the chuck to tighten before the interior collagen has time to break down, resulting in dry, stringy edges and a tough center. The key is cooking at a steady low temperature, preferably between 275–300°F (135–150°C) in the oven or on low in the slow cooker.
Undercooking is another pitfall. Chuck isn’t edible at medium-rare—it needs to hit at least 195°F (90°C) internally to become tender. I often go even higher—up to 205°F (96°C)—when I want it pull-apart soft. The third big error is skipping the rest. Chuck needs at least 20–30 minutes under foil after cooking to redistribute juices and firm up for slicing. Skipping this makes your meat leak liquid and lose flavor fast.
Not enough moisture or fat
Chuck is forgiving, but only if you give it the moisture it needs. I always use at least 1 to 1.5 cups of braising liquid—beef stock, wine, beer, or tomato puree. I also resist the temptation to trim away all the fat. Internal fat renders slowly and bastes the meat from within. If your chuck is dry or tough after cooking, shred it and toss with warm broth or sauce to help rehydrate and salvage texture.
My Favorite Sauces and Braising Liquids for Chuck
Chuck loves bold, rich, deeply seasoned sauces. It’s a blank canvas that soaks up flavor like few other cuts. Depending on what cuisine I’m cooking, I change the entire braising setup—but the principles remain the same: balance, depth, and enough acidity or sweetness to complement the beef.
Red wine, soy-ginger, barbecue, tomato broth
For a classic French-style dish, I use a base of dry red wine, beef stock, tomato paste, garlic, shallots, and thyme, reducing the liquid slowly to a glossy consistency. If I’m doing something Asian-inspired, I create a mix of soy sauce, ginger, sesame oil, garlic, scallions, and a touch of brown sugar or mirin. It’s amazing over rice.
For American BBQ-style chuck, I slow-cook the meat in a blend of apple cider vinegar, smoked paprika, mustard powder, ketchup, molasses, and onion. Once cooked, I shred the beef and toss it in the reduced sauce. For Italian-style braises, I favor crushed tomatoes, basil, rosemary, and chili flakes, adding olives or capers for a briny edge.
When to reduce and when to thicken
If the cooking liquid tastes great but is too thin, I reduce it on the stove uncovered over medium heat until it coats the back of a spoon. If I want a quicker fix, I stir in a cornstarch slurry or finish with a few cold cubes of butter, whisked in off the heat for a silky finish. I taste often and adjust salt, acidity, or sweetness accordingly. A little balsamic vinegar or lemon juice can lift even the richest sauces if they feel flat.
Best Seasonings and Aromatics for Chuck Cuts
Chuck doesn’t need to be buried under spices—it needs seasoning that lifts its natural richness. Whether I’m doing a dry rub or building flavor in a braise, I layer elements that support the beef’s texture and complexity.
Herbs, spice rubs, and umami boosters
My dry rubs for chuck usually include kosher salt, cracked pepper, garlic powder, onion powder, and sometimes smoked paprika, dried rosemary, or mustard seed. For Latin or BBQ dishes, I add ground cumin, coriander, chili powder, or cocoa powder. When braising, I build flavor with bay leaves, thyme, oregano, rosemary, and fresh garlic. I tie delicate herbs into a bundle or drop them into the braising liquid.
For umami, I use tomato paste, Worcestershire sauce, anchovy paste, or miso. These add depth without drawing attention. I also sauté onions and carrots before adding chuck—this classic soffritto builds a rich, caramelized base.
Layering flavor without masking the meat
I start by seasoning the chuck at least 30–60 minutes before cooking, sometimes overnight if dry-brining. I always brown the meat first to develop a crust and deepen the final flavor. After that, I layer aromatics and build my braising liquid in stages. I avoid overly sweet sauces unless offset with acid or spice. Chuck is bold on its own—it just needs the right support.
Serving and Pairing Chuck Like a Chef
Chuck can be rustic or refined, depending on how you present it. The meat itself is hearty and filling, so I always aim to pair it with something lighter, fresher, or acidic to balance the plate.
Side dish balance and plating
For classic braised chuck, I serve it over buttered mashed potatoes, soft polenta, or risotto, spooning over the reduced sauce and finishing with chopped parsley. If the preparation is Mediterranean, I plate it with grilled eggplant, lemony couscous, or olives. Asian-flavored chuck pairs well with jasmine rice, steamed bok choy, or pickled vegetables.
Presentation matters. For sliced chuck, I carve across the grain in ¼-inch slices and fan them on a platter. For shredded chuck, I build hearty bowls or sandwiches. I often add a crunchy or bright element—like shaved fennel, red onion pickles, or arugula—to contrast the softness and fat of the meat.
Slicing, shredding, and portioning tips
After resting, I slice chuck using a very sharp knife across the grain for tenderness. I portion 6–8 oz per person for plated meals and 4–6 oz for sandwiches or tacos. If shredding, I pull while the meat is still warm, not piping hot or cold—it comes apart more easily and stays juicy. I always spoon some of the braising liquid over before serving to keep the meat glossy and flavorful.
Storing and Reheating Chuck for Later Meals
Chuck improves after a day in the fridge. The flavors intensify, the texture sets, and the sauce thickens. But how you store and reheat it determines whether it stays amazing or turns dry.
Fridge and freezer storage tips
I store leftover chuck in shallow containers with a generous amount of cooking liquid or jus. This keeps the meat moist. If I’m planning to freeze it, I separate the meat from the sauce and place both in airtight bags or containers. I press out the air, seal tightly, and freeze for up to 3 months.
I label everything with the cook date and portion sizes. When ready to reheat, I thaw it slowly in the fridge overnight. Rapid defrosting (like in the microwave or under hot water) can mess with the texture and cause uneven reheating.
Moisture-preserving reheating methods
In the oven, I place chuck in a baking dish, spoon over some sauce, cover tightly with foil, and heat at 275°F (135°C) for about 25–30 minutes, depending on thickness. On the stove, I reheat it in a covered nonstick skillet or Dutch oven with a splash of broth over low heat. For shredded beef, I toss it gently in a pan with sauce until warmed through.
I only use the microwave for shredded chuck, never full pieces. I heat it at 50% power in short bursts, always covered, always with moisture. To finish, I often drizzle with a little fresh olive oil, warm broth, or lemon juice to revive the flavor.
FAQ: 15 Real Questions About Cooking Chuck Beef — Answered by a Chef
What’s the best way to make chuck tender?
I recommend slow cooking at low heat with moisture. Whether in the oven, slow cooker, or pressure cooker, chuck needs time and liquid to break down the collagen and become melt-in-your-mouth tender. I always aim for internal temps around 195–205°F for shredding.
Can I grill beef chuck like a steak?
You can, but only if it’s a chuck eye steak or a thinner, well-marbled cut. Regular chuck roast is too tough for direct grilling. I’ve grilled chuck steaks before, but they need marinating and careful timing. Otherwise, it’s better suited for braising.
What’s the difference between chuck roast and chuck steak?
A chuck roast is thicker and ideal for braising or slow cooking, while a chuck steak is thinner and cooks faster—best for pan-searing or quick skillet dishes. I choose based on how much time I have and how I plan to serve the meat.
How do I avoid chewy chuck?
Chewy chuck usually means it was undercooked or cooked too fast. It needs to hit that collagen breakdown range above 190°F to become tender. If it’s chewy, I put it back in the oven or slow cooker with more liquid and cook longer.
Can I use chuck in stir-fry?
If you slice it very thinly across the grain and tenderize it first (with baking soda or marinade), chuck can work in stir-fries. I usually prefer flank or sirloin for that, but chuck does well if treated right and cooked quickly.
Is it okay to cook chuck from frozen?
Yes, but only in a pressure cooker or slow cooker with extra time. I’ve done it in emergencies, but flavor and browning suffer. I prefer thawing overnight in the fridge, then seasoning and searing properly before cooking.
How much liquid should I use when braising chuck?
I cover about 1/3 to 1/2 of the meat with liquid. Too much liquid can dilute the flavor. I always include aromatics and something acidic like wine, tomatoes, or vinegar to help tenderize and add complexity.
What kind of wine goes best with beef chuck?
For braising, I use dry red wine like Cabernet, Merlot, or Zinfandel. For serving, the same wines pair beautifully. Their tannins complement the richness of the meat and help cleanse the palate.
Should I marinate chuck before cooking?
It’s optional. For sliced or grilled chuck, I marinate to tenderize and add flavor. For braising, I skip marinating and focus on seasoning and searing. The cooking liquid does the heavy lifting in slow methods.
How do I slice chuck roast properly?
I rest the meat at least 15–20 minutes, then slice against the grain into thin slices. This shortens the muscle fibers and makes every bite more tender. If the meat’s too hot, it shreds; too cold, it crumbles.
Can I freeze leftover cooked chuck?
Absolutely. I portion it into small containers or bags with some sauce or liquid, label them, and freeze for up to 3 months. I always defrost in the fridge overnight and reheat gently to keep it juicy.
What vegetables go well with braised chuck?
I love pairing it with carrots, onions, celery, parsnips, mushrooms, or potatoes. They hold up during long cooking and absorb the rich juices. I add softer greens like kale or peas near the end for color and contrast.
Is chuck considered a healthy cut?
It’s moderately fatty, especially compared to sirloin or tenderloin. But it’s nutrient-dense and high in protein, iron, and zinc. I trim visible fat and pair it with vegetables or grains to create a balanced meal.
Can I make tacos or sandwiches from chuck?
Yes, and I often do. After braising or pressure cooking, I shred the meat and toss it with its cooking sauce or a separate glaze—barbecue, chipotle, or soy-ginger all work great. It makes incredible tacos, sliders, or rice bowls.
What’s the secret to really flavorful chuck beef?
Patience, heat control, and building flavor in layers. I season early, sear for color, add aromatics to the pan, and cook slowly in broth or wine. Then I finish with a fresh sauce, a touch of acidity, and let the meat rest before slicing or shredding.

Post Comment